Why Do You Shake A Jar Of Moonshine? We Help Find The Answer
Article-At-A-Glance
- The bubble test is a traditional method moonshiners use to estimate the alcohol content of their spirits without specialized equipment
- Large bubbles that dissipate quickly generally indicate higher alcohol content, while small, persistent bubbles suggest lower proof
- Surface tension principles explain why alcohol and water create different bubble patterns when shaken
- Experienced moonshiners can achieve accuracy comparable to modern alcoholometers using just the shake test
- While traditional, the shake test has limitations and should be paired with other assessment methods for safety
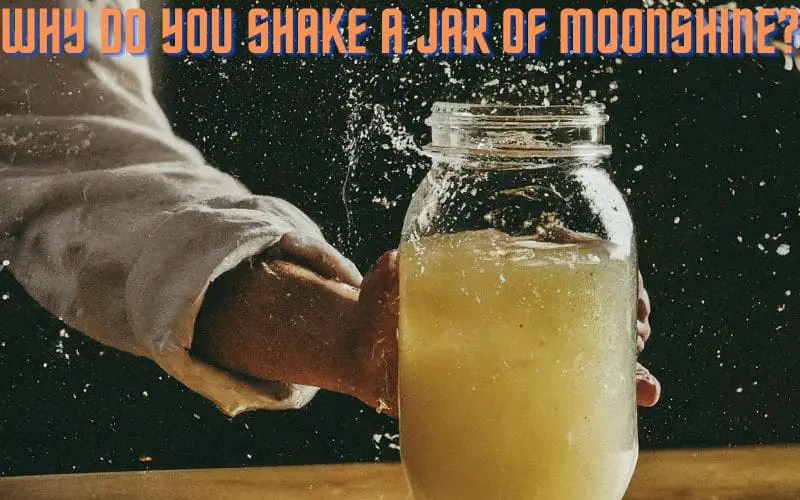
Ever watched a seasoned moonshiner confidently shake a jar of clear liquid, observe it for a few seconds, and declare its proof with surprising certainty? This isn’t just theatrical showmanship—it’s a time-honored tradition rooted in practical necessity and scientific principles. Mountain Moonshine experts have been using this technique for generations to assess the quality of their craft spirits.
The “shake test” represents the intersection of folk wisdom and rudimentary chemistry, developed in the backwoods of Appalachia when fancy equipment wasn’t an option, and knowing your product’s strength could mean the difference between a satisfied customer and a dangerous batch.
The Science Behind Shaking Moonshine: What Happens in the Jar

“Science png Images – Free Download on …” from www.freepik.com and used with no modifications.
When you shake a jar of moonshine, you’re creating a temporary disturbance in the liquid that reveals important characteristics about its composition. The agitation causes gas bubbles to form and rise to the surface, creating a temporary “head” similar to what you might see in beer, but with distinct properties unique to distilled spirits.
The physical reaction happening in that jar is primarily about surface tension—the property that allows some insects to walk on water and causes water to form droplets rather than spreading evenly. Alcohol has significantly lower surface tension than water, which means that liquids with higher alcohol content form different types of bubbles than those with lower proof.
This difference becomes immediately visible when the jar is shaken. The behavior of these bubbles—their size, distribution, and most importantly, how quickly they dissipate—provides critical information about the alcohol content and purity of the moonshine.
The Bubble Test: How Moonshiners Check Proof Without Special Equipment

“Test The Proof of Moonshine …” from www.youtube.com and used with no modifications.
Before modern tools like hydrometers became widely available, distillers needed reliable ways to test their product. The shake test emerged as an elegant solution requiring nothing more than a clear glass jar with a tight-fitting lid. It’s remarkably effective despite its simplicity.
The technique involves filling a jar approximately halfway with moonshine, securing the lid, giving it a vigorous shake, then carefully observing what happens to the resulting bubbles. A skilled practitioner can estimate alcohol content within a surprisingly narrow range just by watching how these bubbles behave in the first few seconds after shaking.
What makes this test particularly valuable is that it requires no special equipment, can be performed anywhere, and provides immediate results. For moonshiners operating in remote locations or under the constraints of prohibition-era secrecy, these advantages were invaluable.
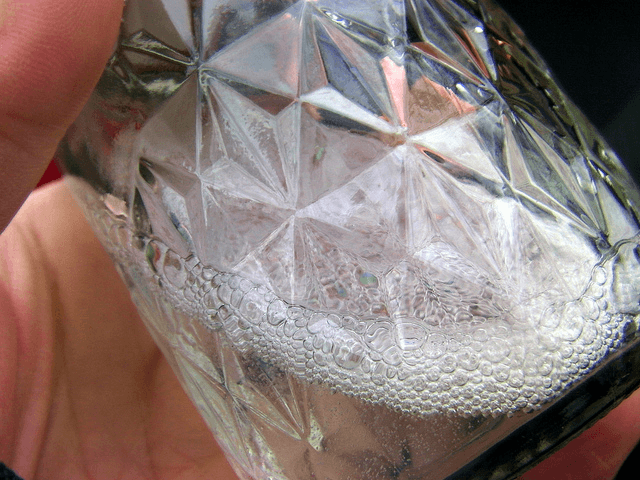
What the Bubble Size Tells You
Bubble size serves as one of the primary indicators in the shake test. High-proof moonshine typically forms large, distinct bubbles that are more separated from each other. This happens because higher alcohol content reduces the liquid’s surface tension, allowing bubbles to expand more before breaking. To understand more about traditional methods, explore the moonshining traditions that influence these characteristics.
Low-proof spirits or those with significant water content will form smaller, more numerous bubbles that cluster tightly together. The contrast can be dramatic—80-100 proof moonshine might create bubbles the size of small pearls, while 40-50 proof spirit produces bubbles more like pinheads.
Experienced distillers can also spot potential impurities by examining bubble uniformity. Inconsistent bubble sizes or unusual patterns might indicate contamination or problems with the distillation process, prompting further investigation before the batch is deemed safe to consume.
How Long Bubbles Last: The Time Test
Perhaps even more telling than the size of the bubbles is how long they persist after shaking. This temporal element of the shake test provides the clearest indication of alcohol content.

How Long Bubbles Last: The Time Test
Perhaps even more telling than the size of the bubbles is how long they persist after shaking. This temporal element of the shake test provides the clearest indication of alcohol content. High-proof moonshine (70% ABV and above) will create bubbles that quickly pop and disappear, sometimes vanishing almost instantly after the shake. The entire “head” might collapse within 2-3 seconds. To learn more about the nuances of moonshining, you can explore traditional moonshining traditions.
Medium-proof spirits (50-70% ABV) typically show bubbles that linger for 5-10 seconds before completely disappearing. Lower-proof products (30-50% ABV) will maintain their bubbles for significantly longer, sometimes lasting 20-30 seconds or more before the surface returns to normal. This distinct timing difference provides moonshiners with a surprisingly accurate gauge of their product’s strength.
Experienced distillers can even detect subtle proof variations of just a few percentage points based on these dissipation rates, demonstrating how refined this seemingly primitive technique can become in skilled hands. For more insights into the techniques used by distillers, you can explore the shake test method.
The Surface Tension Principle Explained
The science behind the shake test revolves around surface tension, which is the tendency of liquid surfaces to shrink into the minimum surface area possible. Water has higher surface tension than alcohol—about three times greater—which explains why the bubbles behave differently based on concentration.
When water dominates the mixture (lower proof), the high surface tension creates stronger, more persistent bubbles. As alcohol content increases, surface tension decreases, causing bubbles to form more easily but burst more quickly. This inverse relationship between alcohol content and bubble stability forms the foundation of the shake test’s reliability.
The relationship isn’t perfectly linear, however. Factors like temperature can influence surface tension, which is why experienced moonshiners perform the test under consistent conditions whenever possible.
The History of the Shake Test in Appalachian Moonshine Culture
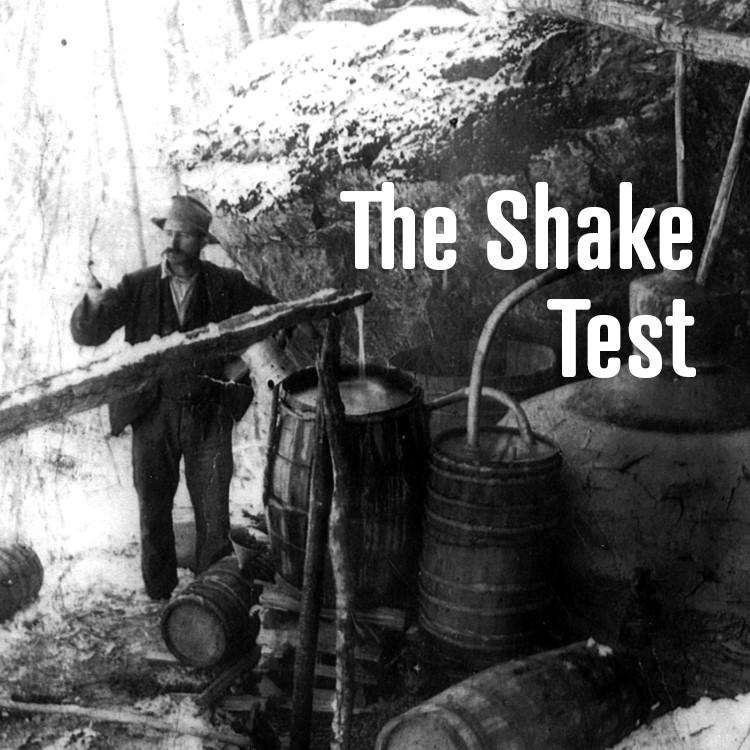
“The Shake Test – Specific Engineering …” from specificengineering.com and used with no modifications.
The shake test emerged from necessity during America’s moonshining heyday, particularly in the Appalachian region where distilling traditions run deepest. When prohibition criminalized alcohol production in 1920, distillers were forced underground, often working in remote locations without access to scientific equipment.
These resourceful craftsmen developed and refined practical field tests that required minimal equipment. The shake test became one of the most widespread techniques, passed down through generations of distillers as part of the oral tradition of moonshining. Alongside other folklore methods like the “thumb and flame” test, these techniques formed a practical science of spirit production outside formal education.
Even after prohibition ended in 1933, many rural distillers continued their illicit operations to avoid taxation and regulation, further cementing these traditional testing methods in moonshine culture. Today, even legal craft distillers sometimes use the shake test alongside modern equipment, honoring this historical connection to their distilling ancestors.
Born from Necessity: Distilling in the Woods
The remote conditions of Appalachian moonshining operations demanded ingenious solutions for quality control. Operating deep in mountain hollows, often miles from the nearest road, moonshiners couldn’t simply order laboratory equipment or chemical testing supplies. They relied instead on observational techniques that could be performed using only materials readily available in their environment.
Moonshine stills were typically constructed in secluded locations near natural water sources, requiring everything needed for production and testing to be carried in by hand or horseback. Glass mason jars—used both for storing the final product and conducting the shake test—were among the few “specialized” items a moonshiner might transport to their hidden operation.
This environmental constraint drove the refinement of techniques like the shake test, which maximized information while minimizing required equipment. The practical elegance of these solutions reflects the remarkable adaptability of Appalachian moonshiners in the face of both natural and legal challenges.

Traditional Methods Before Modern Tools
Before hydrometers became common, the shake test was just one of several complementary methods moonshiners used to evaluate their product. These techniques formed a comprehensive quality control system based entirely on observation and experience rather than precise measurement.
Alongside the shake test, distillers might perform the “burn test” by igniting a small amount of spirit to observe flame color and behavior. The “bead test” involved watching how droplets or “beads” formed when the jar was tilted, while the “gun powder test” determined if spirits were strong enough to ignite gunpowder after being poured over it and lit.
Together, these methods allowed moonshiners to make remarkably accurate assessments of their spirits’ quality, strength, and safety—all without a single piece of scientific equipment. The sophistication of these seemingly simple techniques demonstrates the deep practical knowledge embedded in traditional moonshining culture.
How to Properly Perform the Moonshine Shake Test
“Shake Test, Gun Powder Test, Hydrometer …” from learntomoonshine.com and used with no modifications.
While the shake test might seem straightforward, proper execution requires attention to detail to obtain reliable results. When performed correctly, this technique can provide valuable information about your spirit’s composition and quality. The process begins with selecting the right vessel and continues through careful observation of the resulting bubble patterns.
Step 1: Fill the Jar Correctly
Start with a clean, clear glass mason jar with a tight-fitting lid—traditionally a pint or quart size. Fill the jar approximately halfway (no more than 60% full) to allow adequate space for bubble formation and movement. Overfilling the jar restricts bubble development and limits the test’s effectiveness.
Ensure the jar is at room temperature, as cold moonshine creates different bubble patterns than warm spirits. For consistency, many moonshiners perform this test with spirits around 70°F (21°C). The jar itself should be completely dry on the inside before adding the moonshine to prevent any dilution or contamination that might affect results.
Step 2: The Perfect Shake Technique
Secure the lid tightly to prevent any spillage during the test. Hold the jar firmly at the base and shake vigorously with a consistent motion for approximately three seconds—not too gently, but not violently either. The goal is to create enough agitation to form a good “head” of bubbles without introducing excessive air into the liquid.
Immediately after shaking, hold the jar steady at eye level in good lighting. Avoid direct sunlight, which can create glare, but ensure you have enough illumination to clearly observe the bubbles’ behavior. Many experienced moonshiners prefer natural daylight for the most accurate assessment.
The moment you stop shaking is when the actual test begins. Start timing mentally or with a watch if you’re attempting more precise measurements. The first few seconds are particularly critical for high-proof spirits.
Step 3: Reading the Results Accurately
Focus on both bubble characteristics and timing. For high-proof moonshine (70%+ ABV), expect large bubbles that pop quickly, often disappearing entirely within 2-5 seconds. Medium-proof spirits (50-70% ABV) typically show medium-sized bubbles that persist for 5-15 seconds. Lower-proof products (below 50% ABV) create smaller bubbles that may last 15-30 seconds or longer.
Also observe bubble distribution across the surface. High-proof spirits tend to create a more even layer of bubbles, while lower proof or contaminated moonshine might show irregular patterns or clustering. Some distillers also check for a “ring” of bubbles around the jar’s edge, which can indicate particular proof ranges.
With practice, you’ll develop an intuitive sense of the relationship between bubble behavior and alcohol content specific to your distillation setup. Many moonshiners keep mental benchmarks based on batches they’ve previously tested with more precise methods. For more insights into this process, you can read about the shake test used by moonshiners.
Common Mistakes to Avoid
Several errors can compromise the accuracy of your shake test results. Using a jar with residual moisture inside will dilute the spirit and create misleading bubble patterns. Inconsistent shaking technique—either too gentle or too aggressive—can similarly skew results by creating abnormal bubble formation.
Temperature variations represent another common source of error. Cold moonshine creates more persistent bubbles regardless of proof, potentially leading you to underestimate alcohol content. Conversely, warm spirits might cause you to overestimate proof as bubbles dissipate more rapidly.
Finally, don’t rush your judgment. Take time to observe the complete lifecycle of the bubbles from formation to dissipation. Some subtle indicators, like the way bubbles merge or separate as they disappear, provide additional information that hasty assessment might miss.
What the Bubbles Really Tell You About Your Moonshine

“What is this compound in my moonshine …” from www.reddit.com and used with no modifications.
The shake test reveals more than just alcohol content. For experienced distillers, bubble behavior serves as a window into various quality aspects of their spirits. Understanding these nuances transforms the shake test from a simple proof estimate into a comprehensive quality assessment tool.
High Proof vs. Low Proof Indicators
At its most basic level, the shake test distinguishes between high-proof and low-proof spirits. Pure ethanol (200 proof) creates almost no bubbles when shaken because its extremely low surface tension prevents bubble formation. As water content increases, bubbles become more numerous and persistent, which is why moonshine often needs to sit to achieve the desired proof level.
This relationship creates distinctive patterns. Moonshine around 100-120 proof (50-60% ABV) typically forms a moderate layer of bubbles that dissipates within 5-10 seconds. As proof increases toward 150-180 proof (75-90% ABV), bubbles become larger but less stable, disappearing almost immediately after shaking. Lower proof spirits (80 proof/40% ABV and below) create a dense crown of small bubbles that might persist for 30 seconds or longer. For more insights into why moonshiners shake the jar, you can read this Distractify article.
Experienced moonshiners can estimate proof within about 10-15 percentage points just using the shake test, which was often sufficient precision for traditional production methods.
Detecting Impurities and Potential Dangers
Beyond alcohol content, the shake test can reveal potential contaminants or production problems. Oily residues, excessive fusel alcohols, or incomplete fermentation can all affect bubble formation and behavior. Particularly concerning is the presence of methanol, which can create distinctive bubble patterns different from those of ethanol.
Abnormal bubble behavior might manifest as uneven distribution, unusual opacity, or bubbles that behave inconsistently across the surface. Some impurities create bubbles that pop at irregular intervals rather than following the normal dissipation pattern. Others might leave a residual film on the glass after bubbles collapse.
While the shake test alone cannot definitively identify specific contaminants, it can serve as an early warning system prompting further testing. Traditional moonshiners would often combine the shake test with taste and smell assessments to identify potentially dangerous batches.
Limitations of the Shake Test
Despite its utility, the shake test has important limitations. Environmental factors like temperature, humidity, and atmospheric pressure can all influence bubble behavior independently of alcohol content. The test also requires consistent technique and conditions for reliable comparison between batches.
Perhaps most significantly, the shake test cannot distinguish between types of alcohols present. Methanol (wood alcohol) and ethanol (drinking alcohol) have different surface tension properties, but these differences may not be obvious enough to detect dangerous methanol levels reliably through the shake test alone.
For these reasons, modern distillers typically complement the traditional shake test with more precise instruments and chemical analyses, particularly when producing spirits for commercial distribution. Nevertheless, the shake test remains valuable as a quick field assessment that requires no special equipment.
Modern Alternatives to the Shake Test

“The 8 best shaker bottles to increase …” from health.yahoo.com and used with no modifications.
While the shake test persists as a beloved tradition, contemporary distilling incorporates several more precise measurement tools. These modern alternatives provide exact values rather than estimates and can detect specific compounds beyond just alcohol content.
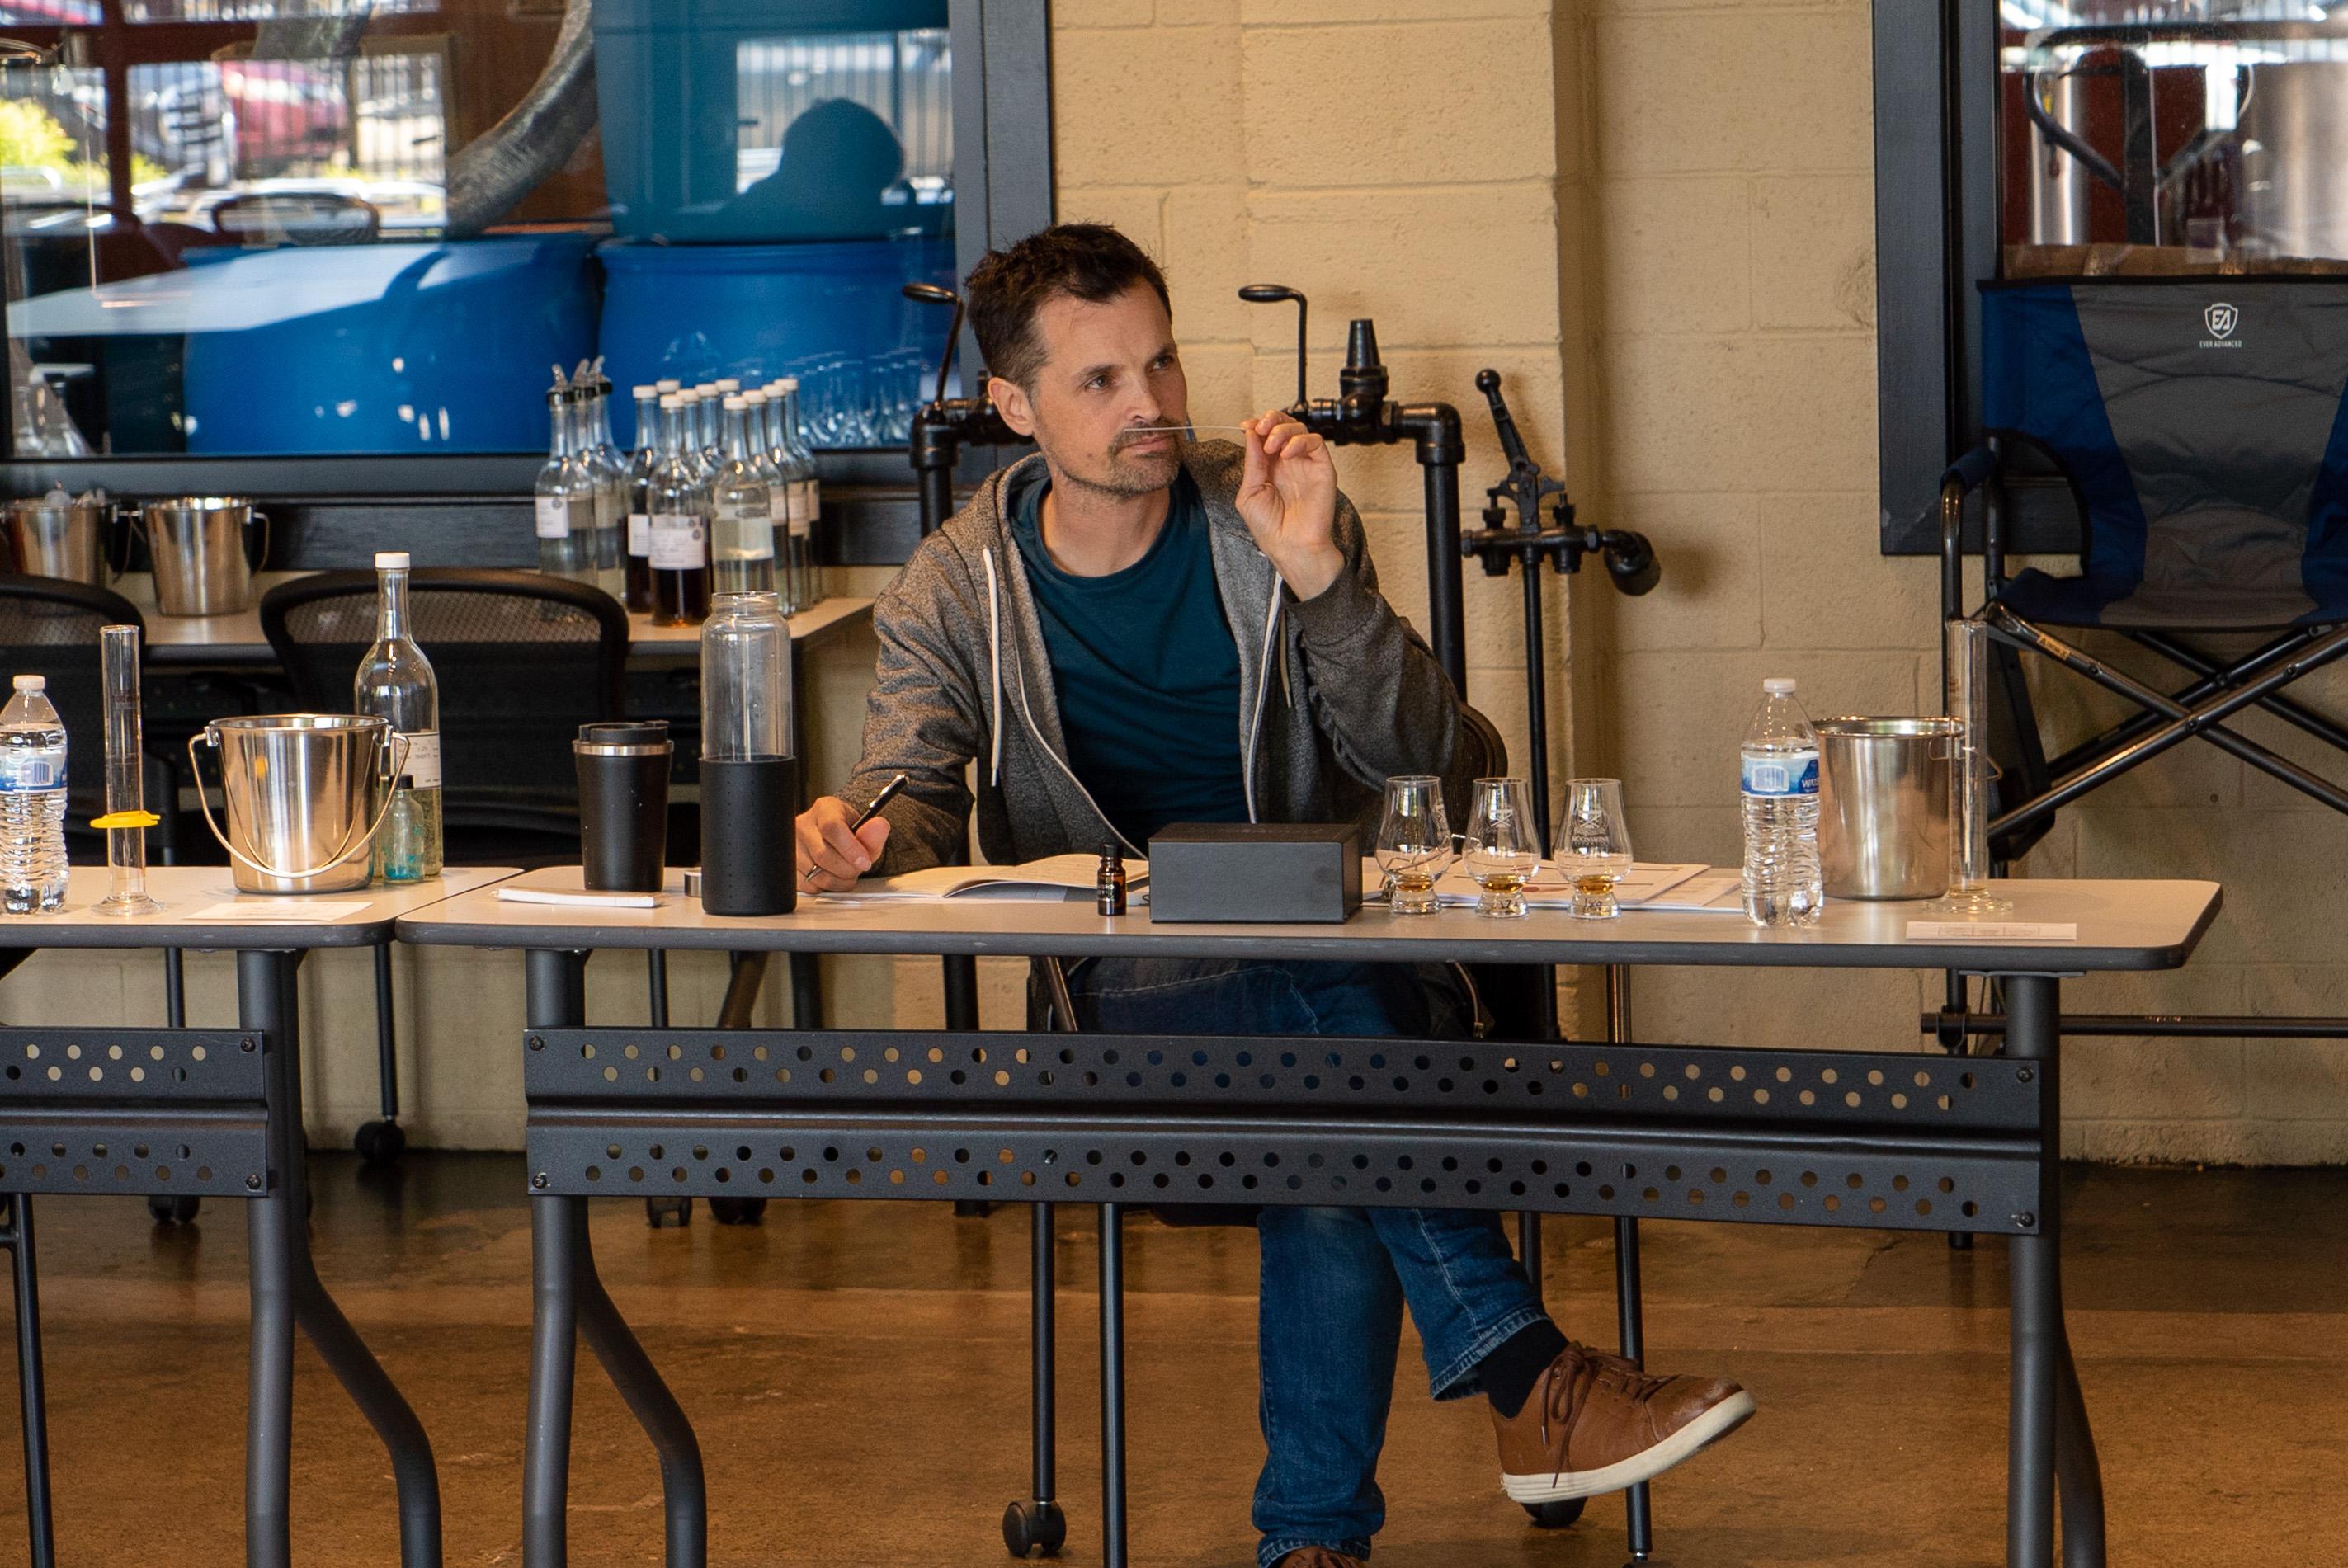
Using Alcoholometers for Precise Measurements
Alcoholometers (also called hydrometers) have largely replaced the shake test for precise proof measurement. These simple instruments measure the specific gravity of a liquid, which correlates directly with alcohol content. The alcoholometer floats at different heights depending on the liquid’s density, allowing distillers to read the exact proof from a calibrated scale.
Most commercial distillers use alcoholometers calibrated specifically for spirits, typically measuring in both proof and percentage alcohol by volume (ABV). These instruments provide accuracy within about 0.5% ABV when used correctly—far more precise than even the most skilled practitioner can achieve with the shake test alone.
For best results, alcoholometers require temperature correction, as alcohol density changes with temperature. Modern versions often include built-in thermometers and conversion charts to account for these variations.
Digital Testing Equipment for Home Distillers
The digital revolution has reached distilling with electronic devices that measure alcohol content through various means. Refractometers use light refraction principles to determine alcohol concentration, while more sophisticated digital alcoholometers combine temperature sensing with density measurement for automated readings.
For safety testing, gas chromatography equipment can identify and quantify specific compounds including methanol and fusel alcohols. While once confined to professional laboratories, simplified versions of this technology have become available to serious home distillers concerned about product safety.
Despite these technological advances, many distillers—both commercial and hobbyist—continue to perform the traditional shake test alongside modern measurements. This connection to historical practice honors the craft’s roots while providing a useful reality check on instrumental readings.
Beyond the Shake: Other Traditional Quality Tests

“Moonshine Taste Testing with Mark and …” from www.youtube.com and used with no modifications.
The shake test represents just one component in a constellation of traditional moonshine assessment methods. Experienced distillers typically employed several complementary techniques to evaluate their spirits, creating a comprehensive quality control system using only their senses and simple tools available in remote settings.
The Flame Test Explained
The flame test offers another traditional method for estimating alcohol content. In this technique, a small amount of moonshine is poured into a spoon or metal lid and ignited with a match. The resulting flame’s color, intensity, and duration provide information about the spirit’s proof and purity.
High-proof moonshine (above 100 proof/50% ABV) typically burns with a clear blue flame, while lower proof spirits produce more yellow or orange flames. Contaminants often create distinctive flame colors—certain metals burn green or red, while some organic compounds produce unusual flame behavior. For more insights on how to enhance your moonshine experience, check out our guide on making moonshine taste smooth.
The duration of the burn also indicates alcohol content, with higher proof spirits sustaining combustion longer. When the flame extinguishes, moonshiners would check for residue in the testing vessel, as pure moonshine should burn completely without leaving residual material. Learn more about the traditional methods used by moonshiners in this article on moonshiners’ techniques.
The Spoon Test Method
The spoon test, another heritage technique, involves placing a small amount of moonshine in a metal spoon and heating it over a flame until it just begins to simmer. As the moonshine heats, distillers observe how vapors form and how the liquid behaves during heating.
Clean, properly distilled moonshine should heat evenly without significant residue. The vapors should ignite if a flame is brought near, but shouldn’t sustain a flame down to the liquid itself if the proof is appropriate. Problematic moonshine might foam excessively, leave oily residues, or produce unusual odors when heated. For those interested in exploring different flavors, consider trying some infused moonshine recipes.
This test was particularly valued for detecting oils and other contaminants that might not be visible in cold moonshine but separate during heating. Many moonshiners considered the spoon test essential for confirming the results of the shake test, especially when working with unfamiliar equipment or ingredients.
Trust Your Senses: When to Rely on the Shake Test
“Sensory Evaluation | Moonshine U” from www.moonshineuniversity.com and used with no modifications.
Despite advanced modern alternatives, the shake test remains relevant in specific circumstances. When quick field assessment is needed or when specialized equipment isn’t available, this traditional method provides valuable information with minimal resources. Its greatest strengths lie in its accessibility, speed, and the way it connects modern practitioners to generations of distilling heritage. While no longer sufficient as a standalone quality control method for commercial production, the shake test continues to serve as a practical skill for anyone interested in understanding spirit production from a historical perspective.
Frequently Asked Questions
The tradition of shaking moonshine has generated numerous questions among both curious observers and aspiring distillers. For instance, why do moonshiners shake the jar is a common inquiry about this fascinating practice.
Is the moonshine shake test actually accurate?
In skilled hands, the shake test can provide surprisingly accurate estimates of alcohol content—often within 10-15 percentage points of instrumental measurements. Research has confirmed the scientific principles behind the test, validating that bubble behavior does correlate with alcohol concentration due to surface tension differences. However, accuracy depends heavily on consistent technique, appropriate environmental conditions, and the distiller’s experience interpreting results. Most professional distillers now use the shake test as a preliminary assessment followed by more precise measurements with alcoholometers.
Can I use the shake test on other spirits besides moonshine?
The shake test works on any distilled spirit, though results may vary depending on additional ingredients. Commercial whiskeys, rums, and vodkas will display bubble patterns corresponding to their proof, but additives like sugars, glycerin, or flavor compounds can alter surface tension and create misleading results. Aged spirits containing dissolved oak compounds may also behave differently than fresh distillate. While the fundamental principles remain valid, interpretation becomes more complex with commercially produced spirits that contain ingredients beyond just alcohol and water.
Why do some bubbles form a ring around the jar’s edge?
The “bubble ring” phenomenon occurs due to surface tension interactions between the liquid and the glass container. This ring formation is particularly noticeable in spirits between approximately 80-100 proof (40-50% ABV), where the balance of water and alcohol creates ideal conditions for this effect. Higher proof spirits typically don’t form pronounced rings because their lower surface tension prevents bubbles from adhering to the glass wall. Experienced moonshiners often use this ring characteristic as an additional indicator when estimating proof, noting both its prominence and persistence after shaking. For more insights on traditional practices, explore moonshining traditions.
How can I tell if my moonshine is dangerous to drink?
While the shake test can identify some quality issues, it cannot reliably detect all harmful compounds. Methanol contamination—the most dangerous potential issue in improperly produced spirits—requires chemical testing for definitive identification. If bubble patterns appear unusual, if the spirit smells sharply of chemicals rather than grain or fruit, or if it leaves oily residues when evaporated, these are warning signs warranting further testing. For safety, only consume spirits produced by knowledgeable distillers using proper techniques and equipment, ideally verified with appropriate testing methods beyond just the shake test.
Is it legal to make moonshine at home for personal consumption?
In the United States, federal law prohibits distilling alcohol for beverage purposes without proper permits and tax payment, even for personal consumption. While fermenting beer and wine at home is legal in most locations, distilling remains tightly regulated. Penalties for illegal distilling can include significant fines and potential imprisonment. Some countries have different regulations—New Zealand, for example, allows limited home distilling for personal use. Always research and comply with your local laws before attempting any alcohol production.
The moonshine shake test represents a fascinating bridge between folk wisdom and scientific principles, demonstrating how generations of distillers developed sophisticated quality control methods without modern technology. Whether you’re examining this technique from a historical perspective or considering its practical applications, the shake test offers valuable insights into the craft of distillation.
Remember that safety should always be the primary concern when dealing with distilled spirits. While traditional methods like the shake test provide useful information, they should be complemented with appropriate modern testing when product safety is at stake.
For those interested in learning more about traditional and modern distilling practices, numerous resources are available through craft distilling associations, historical preservation societies, and educational platforms dedicated to the science and art of spirit production.