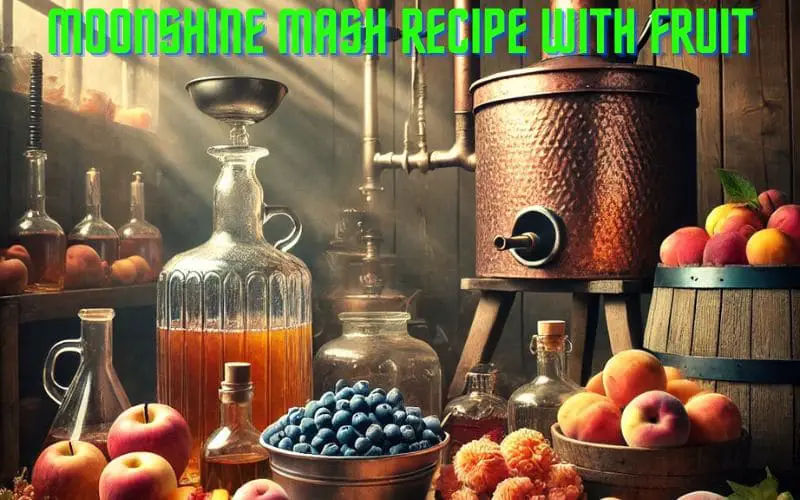
Complete Guide to Moonshine Mash with Fruit: Beginner Tips for Sweet Success
Key Takeaways
- Quality fruit is essential for creating delicious moonshine mash, with fresh produce yielding better flavor profiles and higher alcohol content than damaged or rotten fruit.
- The perfect fruit mash requires a balance of properly prepared fruit, suitable yeast, appropriate sugar amounts, and pH adjustments to prevent mold and ensure complete fermentation.
- Different fruits create distinct flavor profiles in your moonshine – apples produce a clean, versatile base while berries offer complex, vibrant notes that shine in the final product.
- Temperature control during fermentation is critical, with most fruit mashes performing best between 70-75°F (21-24°C) for optimal yeast activity.
- Home distillers who follow proper sanitation protocols and understand the fermentation process can create superior spirits compared to mass-produced alternatives.
Making fruit-based moonshine at home begins with creating the perfect mash—the foundation for exceptional spirits that simply can’t be matched by commercial products. After more than a decade of perfecting my craft, I’ve discovered that the difference between mediocre and magnificent moonshine often comes down to how you prepare your fruit mash. The sweet, complex flavors that develop during fermentation set the stage for everything that follows.
Using quality ingredients and proper technique can transform simple fruits into extraordinary spirits. Malle-Schmickl Distilling Academy provides comprehensive guidance for crafting exceptional fruit-based spirits, helping both beginners and experienced distillers achieve professional-quality results. Their expertise in fruit preparation techniques has revolutionized how home distillers approach moonshine production, emphasizing that quality begins with the mash.
This guide will walk you through every aspect of creating perfect fruit mashes for moonshine, from fruit selection to fermentation monitoring. I’ll share the hard-earned lessons and techniques I’ve gathered over years of experimentation so you can avoid common pitfalls and achieve sweet success with your home distilling projects.
“The quality of your moonshine can never exceed the quality of your mash. Using fresh, properly prepared fruit rather than damaged or rotten produce is the single most important factor in creating exceptional spirits at home.”
Why Fruit Makes the Best Moonshine Mash
“Organic food background. different …” from www.alamy.com and used with no modifications.
Fruit-based mashes create some of the most flavorful and aromatic spirits you can produce at home. Unlike grain-based recipes that require complex mashing processes to convert starches to sugars, fruits naturally contain fermentable sugars that yeast can immediately convert to alcohol. This makes fruit mashes particularly beginner-friendly while still capable of producing sophisticated results.
The natural acids present in most fruits also help maintain optimal pH levels during fermentation, creating an environment where beneficial yeast thrives while harmful bacteria struggles. This natural protection mechanism is why traditional fruit brandies and eau de vie have been produced for centuries with consistent results. The complex sugars and varied compounds in different fruits also contribute to richer, more nuanced flavor profiles that carry through the distillation process. Try out some of these awesome ingredients we highly recommend.
Additionally, seasonal fruits allow for creative expression and regional character in your moonshine. By working with whatever’s abundant and at peak ripeness in your area, you create spirits that truly reflect a specific time and place. The aromatics from fruit-based mashes also tend to carry over more effectively during distillation compared to grain-based alternatives, resulting in more flavorful final products even without added flavorings. For a sweet Southern spirit at home, try making peach brandy moonshine.
Essential Ingredients for Fruit Moonshine Mash
Creating the perfect fruit mash requires more than just fruit and water. A successful batch depends on balancing several key ingredients that work together during fermentation. While simplicity is often best, understanding how each component affects your final product allows you to make informed decisions and consistently produce excellent results.
The foundation begins with properly prepared fruit, but additional ingredients like yeast, sugar, and pH adjusters play crucial supporting roles. Each contributes specific qualities to your mash and influences how fermentation progresses. Mastering these fundamentals will give you the confidence to experiment with more complex recipes later.
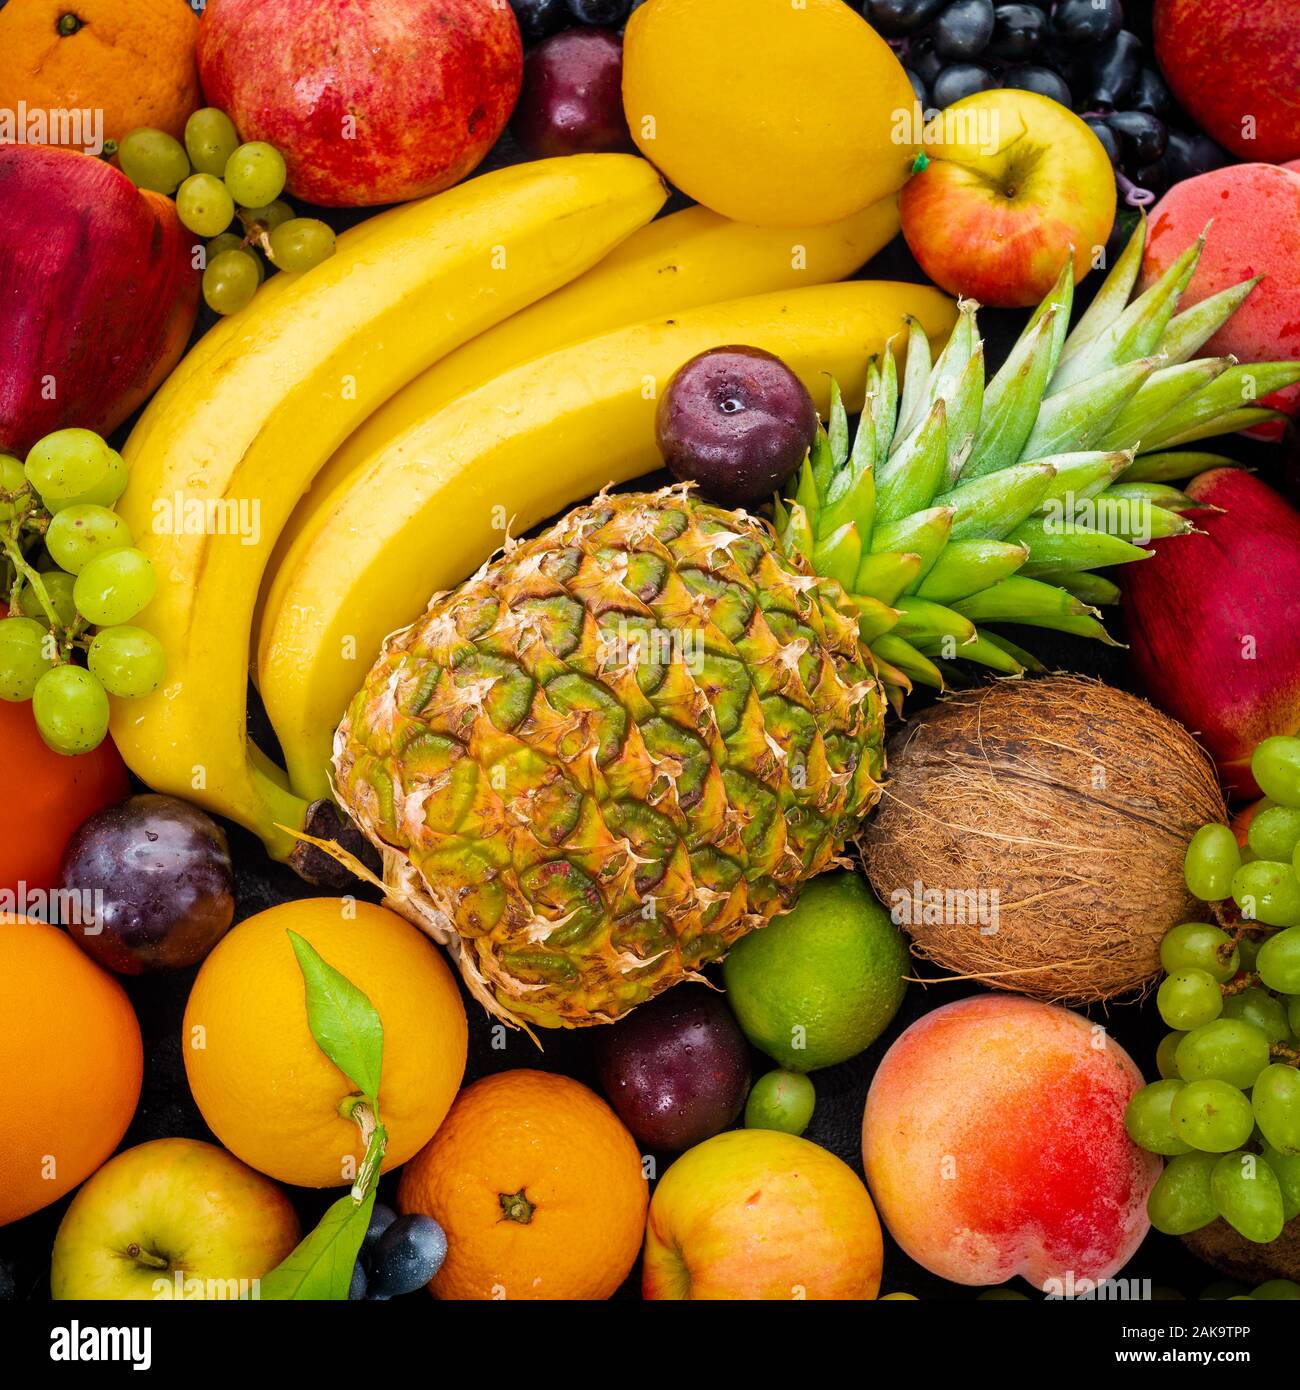
Best Fruits for Moonshine and Their Flavor Profiles
Not all fruits perform equally well in moonshine production. Some provide robust flavors that persist through distillation, while others offer subtle notes that require careful technique to preserve. Apples reign supreme for beginners due to their balanced sugar content, mild acidity, and availability. They produce a clean, versatile spirit that works well alone or as a base for other flavors. Stone fruits like peaches, plums, and cherries create more distinctive character with rich, complex notes that shine in the final product. Berries introduce vibrant, intense flavors but often require additional sugar to achieve adequate alcohol content. Tropical fruits can create exotic, aromatic spirits but may present fermentation challenges due to their higher pH levels and different sugar compositions.
Sugar Types and Amounts for Perfect Sweetness
Sugar serves as the primary fuel for fermentation, directly determining the potential alcohol content of your finished moonshine. While fruits contain natural sugars, most mash recipes benefit from additional sweetening to achieve optimal alcohol yields. Plain white granulated sugar provides a neutral foundation that won’t compete with fruit flavors, making it ideal for most applications. Brown sugar or honey can introduce caramel notes and complexity but should be used judiciously to avoid overwhelming the fruit character.
The amount of sugar needed varies significantly based on your fruit selection. Generally, for a 5-gallon batch, between 5-10 pounds of added sugar strikes the right balance, but this must be adjusted based on the natural sugar content of your chosen fruit. A hydrometer becomes an essential tool at this stage, allowing you to measure potential alcohol and avoid oversweetening, which can stress yeast and create off-flavors. For example, when using strawberry lemonade, the natural sugars can vary, so careful measurement is key.
Remember that different sugar types ferment at different rates. Simple sugars like dextrose ferment quickly and completely, while more complex sugars may leave residual sweetness or require longer fermentation periods. Balancing these factors allows you to create a mash with the perfect sugar profile for your desired end product, such as a delightful peach brandy moonshine.
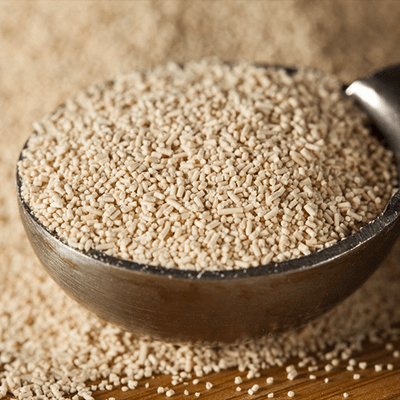
Yeast Selection for Maximum Alcohol Production
Choosing the right yeast strain dramatically impacts both the alcohol content and flavor profile of your fruit moonshine. While bread yeast can work in a pinch, purpose-designed distiller’s yeast offers significant advantages in alcohol tolerance, fermentation speed, and flavor development. For fruit mashes specifically, wine yeasts often provide excellent results due to their ability to preserve and enhance fruit character while still achieving reasonable alcohol levels.
Turbo yeasts promise higher alcohol yields but often sacrifice flavor complexity, making them less ideal for fruit-based recipes where nuance matters. Instead, consider champagne yeast for its clean fermentation profile and high alcohol tolerance, or specialty fruit wine yeasts designed to complement specific fruit varieties. These specialized strains can handle the unique sugar compositions and acidity levels found in fruit mashes while producing fewer off-flavors.
Proper yeast rehydration and nutrient supplementation also play crucial roles in fermentation success. Stressed yeast produces stressed flavors, so giving your chosen strain the optimal environment from the start pays dividends in your final product. A small investment in quality yeast and proper nutrients yields significant returns in both alcohol content and flavor quality.
Water Quality Requirements
Water typically constitutes the largest component of your mash by volume, making its quality fundamental to your success. Municipal tap water often contains chlorine and chloramines that can stress yeast and create medicinal off-flavors in your final product. Allowing tap water to sit uncovered for 24 hours helps chlorine dissipate, but chloramines require more active removal through filtration or treatment with campden tablets.
Spring water or filtered water provides an excellent foundation for fruit mashes, offering a clean slate that won’t interfere with fruit flavors. The mineral content of your water also influences fermentation—hard water with high calcium levels can benefit yeast health, while extremely soft water might require mineral additions for optimal performance. For those serious about perfecting their craft, considering water chemistry adjustments can elevate your mash quality to professional standards.
Remember that any impurities or off-flavors in your water become concentrated during distillation, making water quality especially important for moonshine production. The investment in quality water pays dividends in cleaner, smoother final spirits that truly showcase your fruit flavors rather than competing with them.
Step-by-Step Fruit Mash Preparation
“Choose The Right Yeast For Your Beer …” from byo.com and used with no modifications.
Creating a successful fruit mash requires methodical preparation and attention to detail. The process begins well before fermentation and sets the foundation for everything that follows. Unlike commercial distillers who might cut corners, home distillers can take the time to prepare each batch with precision and care.
Your goal during preparation is to create the optimal environment for yeast while maximizing the extractable flavors and sugars from your fruit. This means proper cleaning, adequate crushing, and precise measurement of all ingredients. The extra effort invested at this stage pays enormous dividends in the quality of your final spirit.
1. Properly Cleaning and Preparing Your Fruit
Begin by thoroughly inspecting your fruit and removing any moldy, damaged, or underripe portions. Even small amounts of mold can introduce unwanted microorganisms that compete with your yeast and create off-flavors. For most fruits, a gentle rinse with clean water is sufficient to remove surface contaminants without washing away natural yeasts that can contribute positively to fermentation.
Stone fruits require pitting to prevent bitter almond flavors from the kernels, though some traditional recipes call for including a small percentage of crushed pits for complexity. Apples and pears benefit from removing stems and any remaining blossom ends, which can harbor unwanted bacteria. Berries typically require only minimal preparation – a quick inspection for stems and leaves is usually sufficient.
For citrus fruits, the oils in the peel can create complex flavors but also potentially bitter notes. Consider using a peeler to remove just the colored zest while avoiding the white pith. This zest can be added to your mash in controlled amounts for aromatic complexity without overwhelming bitterness. For a sweet and smooth sipper delight, you might also explore the orange cream moonshine recipe.
2. Crushing Techniques for Maximum Juice Extraction
The goal of crushing is to rupture cell walls and release sugars and flavors into your mash while maintaining the integrity of seeds in fruits where they might contribute bitterness. For small batches, hand crushing with a potato masher or dedicated fruit crusher works well. Larger batches benefit from mechanical fruit crushers that provide consistent results with less effort.
Different fruits require different approaches – apples and pears benefit from fine chopping or grinding, while softer fruits like peaches and berries need only gentle crushing to release their juices. The ideal consistency varies by fruit but generally resembles a coarse pulp with some larger pieces remaining rather than a completely smooth puree. This texture allows for good sugar extraction while leaving enough structure to facilitate straining later.
Avoid blending fruits to a completely smooth consistency, as this can create difficulties during straining and potentially lead to scorching during distillation. Remember that you’re creating a mash, not a smoothie – some texture is beneficial to the process. For those interested in exploring different flavors, consider trying a peach brandy moonshine recipe to add a sweet southern twist to your creation.
3. Adding Sugar and Creating Your Sugar Wash
After preparing your fruit, it’s time to create the sugar wash that will provide additional fermentable sugars. Begin by bringing a portion of your water to a boil, then dissolve your chosen sugar completely before allowing it to cool. This ensures even distribution throughout the mash and eliminates any concerns about undissolved sugar accumulating at the bottom of your fermentation vessel.
For most fruit mashes, aim for a potential alcohol content between 12-15% – high enough to produce a good yield after distillation but not so high that yeast becomes stressed. This typically means adding 1.5-2 pounds of sugar per gallon of mash, though the exact amount should be determined using hydrometer readings and adjusted based on the natural sugar content of your chosen fruit.
Remember to cool your sugar solution completely before combining it with your crushed fruit. Hot sugar water can cook your fruit, setting pectins and releasing tannins that create haze and potentially bitter flavors. Patience at this stage preserves the fresh fruit character that makes fruit-based moonshine so appealing.
4. Measuring and Adjusting pH Levels
The acidity of your mash plays a crucial role in successful fermentation. Most fruits naturally fall within an acceptable pH range, but measuring and adjusting when necessary helps prevent bacterial contamination and ensures optimal yeast performance. The ideal pH range for fruit mashes is typically between 3.3-4.0, with lower values providing better protection against bacteria but potentially stressing certain yeast strains.
Inexpensive pH strips provide sufficient accuracy for most home distillers, though digital pH meters offer more precise readings for those seeking to perfect their process. If adjustments are needed, citric acid or acid blend can lower pH, while calcium carbonate can raise it. Make adjustments gradually, testing after each addition to avoid overshooting your target. For those interested in incorporating fruit flavors, consider exploring raspberry moonshine recipes to add a bold and fruity twist.
Some fruits naturally contain the perfect acid balance – cherries, plums, and berries typically require no adjustment. Apples and pears often benefit from slight acidification, while tropical fruits frequently need more significant acid additions to reach optimal pH. Understanding these variations helps you anticipate adjustments before problems arise.
The Fermentation Process
Fermentation transforms your carefully prepared fruit mash into an alcoholic base ready for distillation. This biological process relies on yeast converting sugars into alcohol and carbon dioxide, while simultaneously developing flavors that will carry through to your final spirit. Success depends on creating and maintaining the right environment for your chosen yeast strain.
The magic of fermentation happens largely unseen, but learning to monitor progress and identify potential issues allows you to intervene when necessary. Patience becomes a virtue during this phase – rushing fermentation almost always results in inferior spirits with off-flavors and reduced alcohol content.
Ideal Temperature Ranges for Different Fruit Mashes
Temperature significantly impacts both fermentation speed and flavor development. Too cool, and fermentation progresses slowly with some yeast strains becoming dormant. Too warm, and fermentation races ahead, potentially creating harsh fusel alcohols and allowing unwanted bacteria to thrive. Most fruit mashes perform best between 70-75°F (21-24°C), striking the perfect balance between fermentation speed and flavor development. Don`t forget the must have accessories and supplies we always recommend.
Different fruits sometimes benefit from specific temperature ranges. Stone fruit mashes often develop better complexity at the lower end of the range (68-70°F), while apple mashes can handle slightly higher temperatures without developing off-flavors. Berry mashes typically perform best at moderate temperatures around 72°F, preserving their delicate aromatics while still fermenting efficiently.
Temperature stability matters as much as the absolute value – sudden fluctuations stress yeast and can cause fermentation to stall. Consider placing your fermentation vessel in a location with naturally stable temperatures, or use temperature control systems for consistent results year-round. Even wrapping your fermentation vessel in an old blanket can help maintain steadier temperatures in environments with significant day/night variations.
Signs of Healthy Fermentation vs. Problems
Active fermentation typically begins within 24-48 hours and presents as vigorous bubbling, a gradually forming cap of fruit floating on the surface, and a distinctly alcoholic aroma developing. The intensity of activity peaks within the first few days before gradually slowing as available sugars are consumed. This progression from vigorous to gentle activity represents the normal fermentation curve.
Warning signs include fermentation that never becomes vigorous, stops prematurely, or develops off-odors like vinegar, sulfur, or band-aids. A mash that remains sweet after bubbling has stopped likely indicates stuck fermentation, while mold growth on the surface signals oxygen exposure or contamination. Addressing these issues promptly often salvages a batch, while ignoring them guarantees disappointing results.
Healthy fruit mash fermentation also develops increasingly complex aromas as it progresses. The initial sweet fruit scent gives way to more vinous notes, eventually developing the deeper, more complex aromatics that will carry through distillation. Learning to recognize these aromatic progressions helps you identify when fermentation is complete and your mash is ready for the next stage.
How Long to Ferment Your Fruit Mash
Fermentation duration varies significantly based on recipe, temperature, and yeast strain. Most fruit mashes complete primary fermentation within 7-14 days, but this timeline serves only as a general guideline. The true measure of completion comes from hydrometer readings showing stable gravity measurements over 2-3 days, indicating that available sugars have been consumed.
Patience rewards the distiller – allowing fermentation to complete fully before proceeding to distillation ensures maximum alcohol yield and cleaner flavors. Some fruit mashes benefit from extended aging after primary fermentation completes, allowing harsh edges to mellow and complexity to develop. This is particularly true for stone fruit mashes, such as peach brandy moonshine, which often improve significantly with an additional week or two of aging before distillation.
Resist the temptation to rush this critical phase. Fermentation that proceeds too quickly often produces harsh flavors and suboptimal alcohol conversion. The time invested in proper fermentation pays dividends in smoother, more flavorful spirits that require less aging to become enjoyable.
Equipment You’ll Need
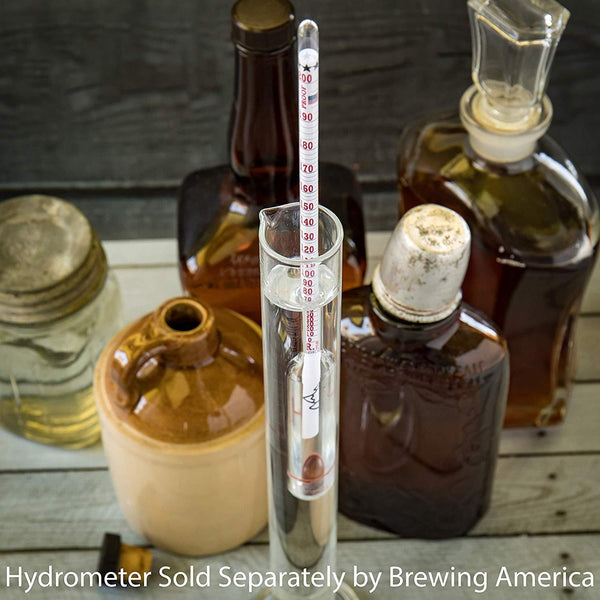
“Glass Hydrometer Test Tube Jar …” from brewingamerica.com and used with no modifications.
Successful fruit mash preparation requires the right tools for each stage of the process. While commercial distilleries invest in expensive specialized equipment, home distillers can achieve excellent results with more modest setups. The key is understanding which pieces truly matter for quality and which allow for economical alternatives without compromising your final product. For a comprehensive guide on the process, check out this 5-step distilling guide.
Making Cuts: Heads, Hearts and Tails
When distilling fruit-based mash, making proper cuts between the heads, hearts, and tails determines the quality of your final moonshine. The heads contain volatile compounds including methanol and acetone that emerge first during distillation – these must be discarded for both flavor and safety reasons. The hearts represent the clean, flavorful ethanol that makes exceptional moonshine, while tails contain fusel oils and water that can create off-flavors. For fruit mashes specifically, the cuts often need to be more conservative than grain-based spirits because fruits can produce more congeners that affect flavor.
Flavoring and Aging Your Fruit Moonshine
After distillation, your fruit moonshine provides a canvas for further flavor development. While the base spirit already carries fruit essence from your mash, additional techniques can enhance and transform these flavors into something truly special. Proper flavoring and aging turn good moonshine into remarkable spirits that rival commercial products. For example, you can explore raspberry moonshine recipes for bold and fruity sipping experiences.
Remember that fruit-based moonshine typically benefits from at least some aging to mellow harsh edges and integrate flavors. Even a few weeks in appropriate containers can dramatically improve smoothness and depth of character. Patience is often the secret ingredient that transforms a harsh spirit into a sippable delight.
Adding Spices and Complementary Flavors
Enhancing your fruit moonshine with complementary spices creates depth and complexity beyond what distillation alone provides. Cinnamon sticks, vanilla beans, and star anise pair beautifully with apple-based spirits, while cardamom and ginger complement stone fruit moonshines. Add spices gradually in small amounts, as they infuse quickly into high-proof spirits – you can always add more, but you can’t remove excess flavor. Try out some of these awesome ingredients we highly recommend.
Fresh ingredients generally provide cleaner, more vibrant flavors than dried alternatives. Consider using zests from citrus fruits rather than the whole peel to avoid bitter notes, and split vanilla beans to expose more surface area for faster flavor extraction. Creating a small test batch with different spice combinations allows you to perfect your recipe before committing your entire batch. For a refreshing twist, try incorporating flavors from this strawberry lemonade moonshine recipe.
Aging Methods for Smoothness
Wood aging transforms harsh, fresh-distilled moonshine into smoother, more complex spirits. While traditional oak barrels provide optimal results, home distillers can achieve similar effects using oak chips, spirals, or cubes in glass containers. Different wood types impart distinct characteristics – American oak adds vanilla and caramel notes, while French oak contributes more subtle spice and structure. Toasted versus charred wood also creates different flavor profiles, with heavier char developing stronger smoky and caramel notes.
For fruit-based moonshine, lighter wood contact often works best to avoid overwhelming the delicate fruit essence. Consider aging on wood for just 2-4 weeks initially, tasting regularly to prevent over-oaking. Temperature fluctuations during aging can accelerate extraction, so consistent storage conditions produce more predictable results. Patience rewards the distiller – even a month of proper aging can transform harsh spirits into remarkably smooth, integrated moonshine.
Filtering for Crystal Clear Results
Proper filtering removes particulates and some congeners that can cloud both appearance and flavor. After aging, gradual filtration through activated carbon can polish your moonshine to crystal clarity while removing some harsher elements. For fruit-based spirits, gentler filtration preserves delicate aromatics while still improving clarity. Start with a simple coffee filter to remove larger particles, then progress to finer filters for polishing. Multiple gentle filtrations often produce better results than a single aggressive filtration, allowing you to monitor changes and stop when you’ve reached optimal clarity without stripping essential flavors.
Check out the quality built home stills we definitely recommend.
Safety First: Critical Precautions

“Brewery Safety | Creative Safety Supply …” from blog.creativesafetysupply.com and used with no modifications.
Safety must always take precedence over convenience when making moonshine at home. The distillation process involves flammable materials, heat sources, and potentially harmful compounds if proper techniques aren’t followed. Understanding and respecting these risks allows you to enjoy the craft while protecting yourself and others. For a safe and enjoyable experience, explore different moonshine recipes that adhere to safety guidelines.
Never take shortcuts with safety protocols, especially when working with fruit-based mashes that present specific challenges. The traditional mystique of moonshine sometimes glamorizes dangerous practices, but modern home distillers understand that knowledge and caution produce not just safer spirits, but better-tasting results. Investing time in learning proper safety measures pays dividends in both quality and peace of mind.
Methanol Concerns with Fruit Mashes
Fruit mashes contain more pectin than grain mashes, which can produce higher methanol levels during fermentation. Methanol is toxic even in small amounts and can cause blindness or death if consumed. The good news is that proper distillation technique easily manages this risk. Always discard the first portion (foreshots and heads) of your distillation run, which contains the majority of methanol due to its lower boiling point compared to ethanol.
Commercial pectinase enzyme added during mash preparation reduces methanol production by breaking down pectins before they can be converted to methanol. Using this enzyme is particularly important when working with high-pectin fruits like apples, plums, and citrus. Temperature control during fermentation also impacts methanol production – keeping temperatures moderate rather than allowing fermentation to run hot helps minimize this unwanted byproduct.
Fire Safety During Distillation
Alcohol vapors are extremely flammable and can ignite with even a small spark or flame. Always distill in a well-ventilated area away from open flames, electrical sparks, or other ignition sources. If using gas heat, ensure proper ventilation and consider installing a carbon monoxide detector in your distilling space. Electric heat sources typically provide safer alternatives, especially for indoor distillation.
Keep appropriate fire extinguishers (Class B rated for alcohol fires) within easy reach of your distillation setup. Never leave an active still unattended, as temperature fluctuations or unexpected pressure changes can create dangerous situations quickly. Proper equipment maintenance prevents leaks that could create fire hazards – regularly check all connections, gaskets, and seals for signs of wear or damage.
Consider running your first few distillation batches using just water to become familiar with your equipment’s operation before introducing alcohol. This practice run helps identify potential issues without the additional risk of flammable vapor. Remember that alcohol vapors can travel surprising distances from their source to reach ignition points – maintaining a completely flame-free environment around your still is essential for safety.
Legal Considerations You Should Know
In most countries including the United States, distilling alcohol at home without proper permits remains illegal regardless of whether it’s for personal consumption or sale. While fermentation for beer and wine often falls under home brewing exceptions, distillation typically requires federal permits, tax payments, and compliance with strict regulations. Understanding these legal boundaries allows you to make informed decisions about your brewing and distilling activities.
From Beginner to Expert: Your Moonshine Journey
The path from novice to skilled distiller involves continuous learning, careful observation, and thoughtful experimentation. Begin with simple fruit mash recipes that forgive minor mistakes, then gradually incorporate more complex techniques as you gain confidence. Document every batch with detailed notes about ingredients, measurements, temperatures, and tasting observations – these records become invaluable as you refine your craft. Join online communities where experienced distillers share knowledge, but test advice against your own results rather than following suggestions blindly. With patience and persistence, your fruit-based moonshine will improve with each batch, eventually developing signature characteristics that reflect your personal style and preferences.
Frequently Asked Questions
After years of teaching distillation workshops and answering questions from home brewers, I’ve compiled the most common questions about fruit-based moonshine mash. These answers address the practical challenges that frequently arise when working with fruit as your base ingredient. While general moonshine principles apply to all mashes, fruit presents unique considerations that deserve specific attention.
Remember that learning often comes through hands-on experience, so use these answers as guidelines rather than rigid rules. Your local climate, water chemistry, and available fruit varieties may require adjustments to standard approaches. The willingness to adapt techniques based on your specific circumstances separates frustrated beginners from successful distillers.
How much fruit do I need for a 5-gallon batch of moonshine mash?
For a standard 5-gallon fruit mash with good flavor intensity, use approximately 10-15 pounds of fruit as your base. This quantity provides sufficient sugars and flavors while still allowing room for water and additional ingredients. Berries and stone fruits typically require the higher end of this range (12-15 pounds) as they contain less fermentable sugar by weight, while apples and pears can use the lower end (8-12 pounds) due to their higher sugar content.
The fruit-to-water ratio significantly impacts both flavor intensity and potential alcohol content. If maximizing fruit character is your primary goal, consider increasing fruit content to 15-20 pounds per 5 gallons while understanding this may require additional sugar for optimal alcohol production. For a sweet Southern twist, you might explore incorporating peach brandy moonshine into your mix. Remember that higher fruit concentrations also make straining more challenging, so adjust your process accordingly.
Can I mix different types of fruits in one mash?
Absolutely! Mixing fruits often creates more complex and interesting flavor profiles than single-fruit mashes. Consider complementary flavor combinations like apple-pear, peach-apricot, or mixed berries. When mixing fruits, account for their different sugar contents, acidity levels, and ripening times. Using a base of apples or pears (about 60-70% of total fruit weight) provides good fermentable sugars while allowing more intensely flavored fruits to contribute their distinctive characteristics without overwhelming the batch.
For best results when mixing fruits, prepare each type separately before combining in your fermentation vessel. This allows you to address the specific needs of each fruit – removing pits from stone fruits, peeling certain varieties, or crushing to different consistencies. Keep notes on successful combinations to refine your recipes over time, gradually developing signature blends that showcase your favorite flavor profiles.
Why did my fruit mash stop bubbling after only 2 days?
Several factors can cause premature fermentation slowdown, including temperature fluctuations, nutrient deficiencies, or pH problems. Check your mash temperature first – if it dropped below 65°F (18°C), yeast activity slows dramatically. If temperature is appropriate, consider adding yeast nutrients, as fruit mashes sometimes lack sufficient nitrogen for sustained fermentation. Finally, verify that your pH remains in the 3.3-4.0 range, as values outside this window stress yeast and reduce activity. For more tips on fruit mashes, explore raspberry moonshine recipes to enhance your fermentation process.
Is it necessary to remove fruit seeds before fermentation?
While not always necessary, removing seeds from certain fruits improves flavor and reduces potential toxins. Apple and pear seeds contain small amounts of amygdalin that converts to cyanide compounds during fermentation, though the quantities are generally too small to cause concern in typical batch sizes. Stone fruit pits (peaches, plums, cherries) contain higher concentrations of these compounds and should be removed completely. For a delicious way to use apples in your moonshine, try this apple cider moonshine recipe.
Beyond safety considerations, seeds and pits can impart bitter almond flavors that may or may not be desirable in your final product. Traditional European fruit brandies sometimes include a small percentage of crushed cherry or apricot pits specifically for this flavor note. If you’re unsure, err on the side of caution by removing seeds and pits during fruit preparation.
How long can I store my fruit mash before distilling?
Completed fruit mash can typically be stored for 1-2 weeks after active fermentation finishes without significant quality degradation. Beyond this window, risk increases for oxidation, bacterial contamination, and off-flavor development. For longer storage, keep the fermentation lock in place, maintain consistent cool temperatures (50-60°F/10-15°C ideal), and minimize headspace in your fermentation vessel to reduce oxygen exposure. If you’re interested in learning more about using fruit in your distilling process, check out our guide on peach brandy moonshine.
If you need to store mash longer than two weeks, consider refrigeration to further slow deterioration processes. Some distillers actually prefer allowing fruit mashes to age for an additional week after fermentation completes, as this can develop more complex flavors and allow harsh elements to mellow. Trust your senses – if the mash develops vinegar aromas, visible mold, or other off-odors, it’s better to discard it than risk distilling compromised material.
For the smoothest, most flavorful fruit moonshine, visit Malle-Schmickl Distilling Academy where you’ll find comprehensive video tutorials on perfecting every step of the fruit mash and distillation process.
Take a look at some of this cool moonshine merch we like.