Moonshine Yeast Review: Everything You Need to Know To Start
Key Takeaways
- The right moonshine yeast can dramatically impact flavor profiles, with bread yeast producing more mash-forward flavors while champagne yeast creates cleaner, more neutral spirits.
- Temperature tolerance is crucial when selecting yeast – strains that can ferment above 90°F will complete fermentation faster and with less energy cost.
- Alcohol tolerance determines your final potential ABV, with specialized distiller’s yeasts capable of reaching up to 20% ABV before distillation.
- Proper yeast rehydration and pitching techniques can significantly improve your fermentation efficiency and final spirit quality.
- Clawhammer Supply offers comprehensive resources on moonshine yeast selection to help ensure successful home distilling results.
The Ultimate Moonshine Yeast Guide: Why Your Choice Matters

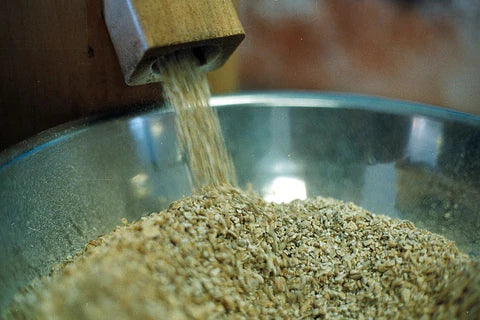
“Mashing and Fermentation for Brewers …” from www.linkedin.com and used with no modifications.
Choosing the right yeast for moonshine isn’t just a minor detail—it’s the foundation of your entire spirit. While other ingredients like corn, barley, and sugar contribute to flavor, yeast is the workhorse that transforms those ingredients into alcohol. Without the right yeast, your carefully crafted mash recipe can fall flat, producing off-flavors or incomplete fermentation that wastes both time and ingredients.
When I first started distilling, I made the mistake of thinking “yeast is just yeast” and grabbed whatever was convenient. That first batch was a harsh lesson in how wrong that assumption could be. The resulting spirit had strange flavors, lower alcohol content than expected, and simply didn’t represent the quality I was hoping to achieve. After consulting with more experienced distillers and extensive research, I learned that selecting the proper yeast strain is perhaps the most critical decision you’ll make in the moonshine production process.
Today, we’ll explore exactly why your yeast choice matters so much and which options deliver the best results for different styles of moonshine. Whether you’re making traditional corn whiskey, sugar shine, or fruit-based spirits, understanding these yeast differences will elevate your distilling game immediately. The team at Clawhammer Supply has tested numerous yeasts over the years to provide this comprehensive guide for home distillers looking to produce the finest quality spirits possible.
Different Yeasts Create Different Flavors
Each strain of yeast imparts distinctive flavor characteristics to your moonshine that go far beyond simply converting sugar to alcohol. Some strains are notorious for creating fruity esters that add complexity, while others work more neutrally, allowing the base ingredients to shine through. This flavor profile becomes particularly important when producing traditional whiskey-style moonshines where character is everything.
In comprehensive testing, bread yeast consistently produces spirits with more of the natural mash flavors intact. While not specifically designed for distilling, its tendency to preserve grain character makes it surprisingly effective for traditional corn whiskey recipes where you want that authentic moonshine taste. Champagne yeast, by contrast, tends to ferment very cleanly with minimal flavor contribution—perfect if you’re aiming for a more neutral base spirit that will later be infused or flavored.
Specialized distiller’s yeasts often strike a balance, preserving some grain character while efficiently converting sugars to alcohol. Many distillers don’t realize that yeast-derived flavors survive the distillation process and can make or break your final product. In blind tastings, spirits made with different yeasts but identical mash bills can taste dramatically different, highlighting just how crucial this decision becomes.
- Bread yeast: Preserves grain character, slower fermentation, good for traditional flavors
- Champagne yeast: Clean, neutral profile with minimal flavor contribution
- Turbo yeast: High alcohol but can produce harsh flavors needing aging
- Super Start Distiller’s yeast: Balanced flavor preservation with good efficiency
- Rum yeasts: Create fruity esters ideal for fruit-based moonshines

Temperature Tolerance Affects Fermentation Success
Temperature tolerance is arguably one of the most overlooked aspects when selecting moonshine yeast. Different strains have vastly different temperature ranges where they perform optimally, and exceeding these ranges can lead to stressed yeast, stuck fermentations, or off-flavors that no amount of careful distilling can remove. Commercial distillers prefer strains capable of fermenting above 90°F, which allows fermentation to progress faster and with less energy cost for temperature control.
When yeast operates outside its comfort zone, it produces stress compounds like fusel alcohols that create harsh flavors and terrible hangovers. I’ve seen countless home distillers blame their equipment or recipes when the real culprit was fermenting bread yeast at 90°F when its ideal range tops out around 80°F. Specialized distiller’s yeasts often tolerate higher temperatures, with some strains working happily at 95°F, meaning you can ferment year-round in warmer climates without expensive cooling equipment. For those wondering how much yeast for 5-gallon moonshine mash is needed, specialized strains can offer a more forgiving fermentation process.
This temperature flexibility translates directly to consistency in your final product. By choosing a yeast with appropriate temperature tolerance for your environment, you gain predictability from batch to batch. Remember that fermentation generates its own heat, often raising temperatures 5-10°F above ambient conditions, so always factor this into your yeast selection process.
Alcohol Tolerance Determines Final Proof
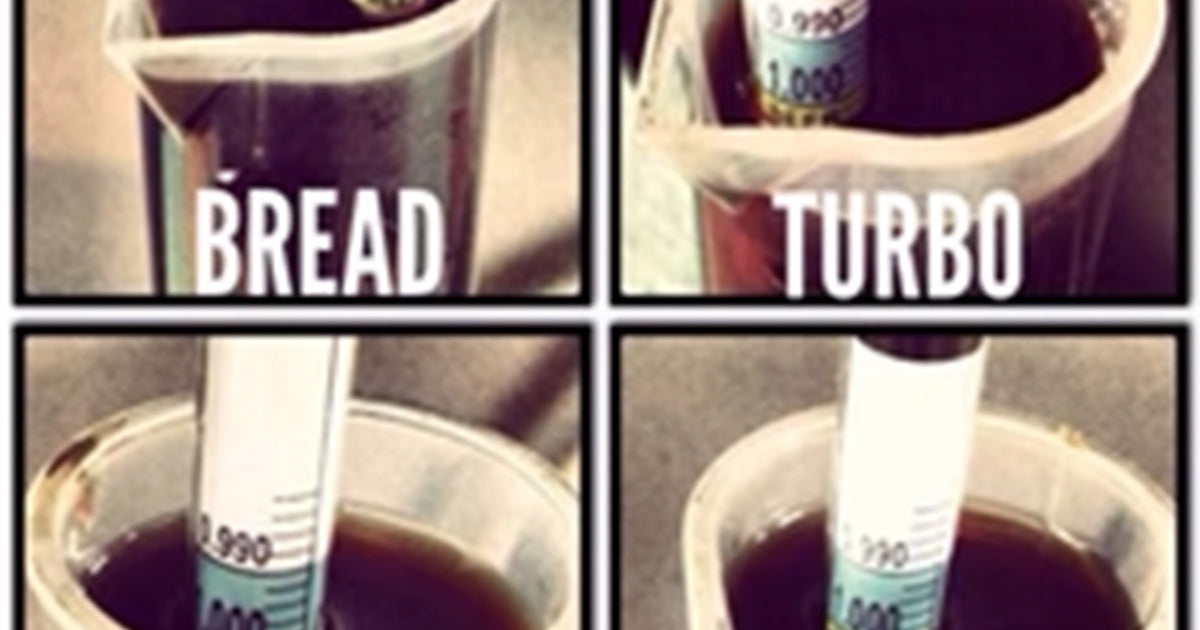
The alcohol tolerance of your chosen yeast directly impacts how strong your wash can become before distillation. This matters enormously because higher alcohol content in your wash means more efficient distillation runs and higher yields of finished product. Standard baker’s yeast typically tops out around 10-12% ABV, leaving unused sugars and potential alcohol on the table.
Specialized distiller’s yeasts, particularly turbo varieties, can push fermentation to impressive levels—some reaching 20% ABV or higher. This dramatic difference means that from identical sugar content, you could nearly double your alcohol yield simply by selecting a high-tolerance yeast strain. For commercial distillers, this efficiency directly affects the bottom line, but even home distillers benefit from the improved yield and reduced waste.
It’s worth noting that extremely high alcohol environments can strip flavor from your wash, potentially creating a more neutral base spirit. This may be desirable for vodka-style moonshines but less appropriate for traditional whiskey styles where flavor complexity is prized. The sweet spot for many traditional moonshine recipes is using a yeast with 14-18% alcohol tolerance, balancing efficiency with flavor preservation. Always match your yeast’s alcohol tolerance to your intended spirit style for optimal results.
Top 5 Best Moonshine Yeasts Compared

“Best Distillers Yeast For Making Moonshine” from brewinreview.com and used with no modifications.
After years of experimentation and countless batches, I’ve narrowed down the field to five standout yeast options that consistently deliver excellent results for moonshine production. Each has distinct characteristics that make it suitable for different styles and preferences in your distilling journey. While personal preference will always play a role, these recommendations are based on measurable factors like fermentation speed, alcohol yield, flavor profile, and overall reliability.
The ideal yeast for your moonshine largely depends on your specific goals. Are you looking to maximize alcohol content? Preserve grain character? Create a neutral base for flavoring? Or perhaps you need something that works in warmer environments without temperature control? Understanding these tradeoffs will help you select the perfect yeast for your particular situation.
Distillers Yeast: The All-Purpose Powerhouse
Standard distiller’s yeast stands as the most versatile option for moonshine production, striking an excellent balance between efficiency and flavor development. This workhorse typically ferments to 14-18% ABV while preserving enough grain character to create a spirit with authentic moonshine flavor. Most distiller’s yeasts complete fermentation within 3-5 days at moderate temperatures (75-85°F), making them suitable for most home distilling environments without specialized equipment. If you’re curious about the right amount of yeast to use, check out this guide on how much yeast for 5-gallon moonshine mash.
What makes standard distiller’s yeast particularly valuable is its forgiving nature regarding temperature fluctuations and nutrient requirements. Even when conditions aren’t perfect, it tends to complete fermentation reliably without developing off-flavors. The resulting spirits showcase a balanced profile that works well for traditional corn whiskey, rye, or barley-based moonshines where you want some character without overwhelming funkiness.
Turbo Yeast: For Maximum Alcohol Production
When maximum alcohol yield is your primary concern, turbo yeast delivers impressive results by fermenting up to 20% ABV or higher in ideal conditions. These specialized yeast blends contain nutrients, buffers, and sometimes multiple yeast strains designed to push fermentation to its limits. Most turbo yeasts complete fermentation remarkably quickly, often finishing in just 24-48 hours while tolerating temperatures up to 95°F.
The tradeoff with turbo yeast comes in flavor development. The aggressive, rapid fermentation creates a higher proportion of fusel alcohols and other compounds that can produce harsh flavors and intense hangovers if not properly managed. For this reason, spirits made with turbo yeast generally benefit from additional aging or carbon filtering. I find turbo yeast works best for creating high-proof neutral spirits or as a base for heavily flavored liqueurs where the initial character will be masked.
If using turbo yeast, consider running your still with a slower distillation rate and being extremely careful about making proper heads and tails cuts to minimize unwanted compounds in your final product. The extra alcohol yield often compensates for the additional care needed during distillation.
Bread Yeast: The Convenient Backup Option
Don’t dismiss common bread yeast as merely a backup option – in testing, it consistently produces spirits with excellent flavor preservation, often retaining more of the natural grain character than specialized options. While bread yeast typically tops out around 10-12% ABV and ferments more slowly (7-10 days), the resulting spirit can have remarkable complexity that works beautifully for traditional corn whiskey moonshine recipes.
The accessibility of bread yeast makes it particularly valuable for beginners or those in locations where distilling supplies are hard to find. Available in any grocery store, it provides a reliable way to start fermenting without specialized ingredients. The lower alcohol tolerance means you’ll get less yield from the same amount of grain or sugar, but the tradeoff in flavor can be worth it for certain styles.
In my experience, bread yeast produces less harsh fusel alcohols when fermented at moderate temperatures (65-75°F), resulting in smoother spirits that require less aging to be enjoyable. For small-batch craft moonshine where flavor matters more than maximum yield, bread yeast remains a surprisingly excellent choice.
Wine/Champagne Yeast: For Cleaner, Fruitier Spirits
Wine and champagne yeasts offer distinct advantages when creating fruit-based moonshines or spirits where a cleaner, more neutral profile is desired. These strains typically ferment to 14-16% ABV while producing fewer congeners and fusel alcohols, resulting in spirits that require less aging to be smooth and palatable. The natural tendency of wine yeasts to enhance fruit character makes them ideal for apple, peach, or berry-based moonshine recipes.
Champagne yeast, specifically, creates an exceptionally clean fermentation profile that works beautifully for neutral spirits or as a base for botanical infusions like gin-style moonshines. It tolerates cooler temperatures (60-75°F ideal range) and tends to drop clear naturally at the end of fermentation, making separation from the lees easier before distillation. The tradeoff is that champagne yeast may strip away some of the desirable grain character in traditional corn or rye recipes.
For fruit-forward recipes or when a cleaner profile is the goal, wine yeasts provide benefits that dedicated distiller’s yeasts can’t match. Many experienced distillers keep both distiller’s yeast and wine yeast on hand, selecting the appropriate strain based on the specific recipe and desired outcome.
Super Start Distillers Yeast: Balanced Performance
Super Start distiller’s yeast represents a newer generation of specialized strains that offer excellent balance between alcohol production, temperature tolerance, and flavor development. These enhanced strains typically reach 16-18% ABV while fermenting relatively quickly (3-4 days) and producing balanced flavor compounds. The enhanced stress tolerance means more consistent results even when conditions aren’t perfect.
What separates Super Start from standard distiller’s yeast is its enhanced ability to work with a wider variety of base ingredients. Whether fermenting grain mash, fruit, molasses, or pure sugar, it maintains efficiency without creating excessive off-flavors. This versatility makes it an excellent “one-yeast-fits-all” solution for distillers who produce various spirit styles throughout the year.
In side-by-side comparisons, Super Start typically produces spirits with a clean but characterful profile that requires minimal aging to be enjoyable. While slightly more expensive than basic distiller’s yeast, the improved performance and consistency justify the additional cost for serious moonshiners looking to produce consistently excellent spirits.
How Yeast Actually Works in Your Moonshine Mash
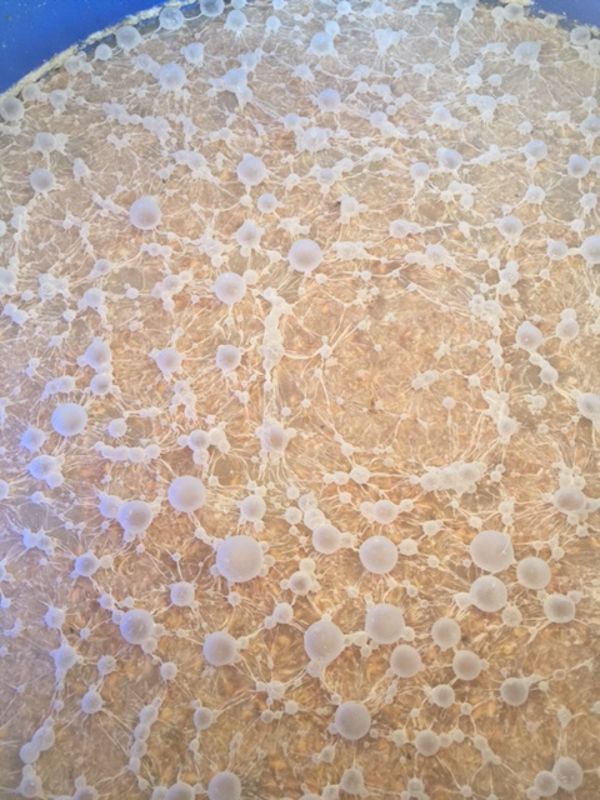
“Basic Moonshine Mash Recipe” from www.whiskeystillpro.com and used with no modifications.
Understanding the basic science behind yeast fermentation helps demystify the process and improves your ability to troubleshoot problems. At its core, yeast performs a simple but magical transformation: converting sugars into alcohol and carbon dioxide. But the details of how this happens directly impact the quality and character of your final moonshine.
Yeast cells are living microorganisms that consume simple sugars for energy. When oxygen is present, they reproduce rapidly, building cell mass. Once oxygen is depleted, they shift to anaerobic fermentation, producing ethanol and CO₂ as byproducts. This biological process hasn’t changed since humans first discovered fermentation thousands of years ago, though our understanding and control of it have dramatically improved.
The Science of Fermentation Explained Simply
Fermentation begins when yeast cells encounter fermentable sugars in your mash. The first 24-48 hours involve rapid yeast reproduction as the cells multiply to colonize the available sugars. This initial phase often produces a thick foam (called kraeusen) and vigorous bubbling as carbon dioxide is released. During this period, oxygen is beneficial as it helps the yeast reproduce and build strong cell walls that can withstand higher alcohol environments later. For more details on yeast usage, check out this guide on how much yeast to use for a 5-gallon moonshine mash.
As oxygen depletes, the yeast transitions to anaerobic fermentation, where the magic of alcohol production truly begins. The yeast enzymes break down complex sugar molecules and reassemble the components into ethanol and CO₂. This process generates heat—often raising the mash temperature by 5-10°F—and continues until either all fermentable sugars are consumed or the alcohol concentration reaches the yeast’s tolerance limit.
Throughout fermentation, yeast also produces secondary metabolites including esters, phenols, and other flavor compounds that significantly impact your moonshine’s character. Temperature, pH, nutrient availability, and yeast strain all influence which compounds develop and in what quantities. This is why identical mash recipes fermented with different yeasts or at different temperatures can produce dramatically different flavor profiles after distillation.
Sugar Conversion and Alcohol Production
The efficiency of your yeast directly determines how much alcohol you’ll produce from a given amount of sugar. Different yeast strains have varying abilities to convert sugars into ethanol, with specialized distiller’s yeast typically achieving 90-95% efficiency compared to bread yeast’s 80-85%. This difference becomes significant when scaling up production, as even a 5% efficiency improvement translates to substantially more moonshine from the same ingredients. For those interested in the traditional approach, a corn-based moonshine recipe offers a time-tested method to maximize yield.
Not all sugars ferment equally well. Simple sugars like glucose and fructose are immediately consumable by yeast, while more complex carbohydrates like maltose (from grain) or maltotriose require enzymatic breakdown before fermentation. This explains why all-grain mashes ferment more slowly than pure sugar washes – the yeast must wait for enzymes to convert the complex sugars into fermentable form. Adding amylase enzymes to grain mashes can dramatically improve conversion efficiency and final alcohol yield.
The maximum theoretical yield from sugar fermentation is 51.1% ethanol and 48.9% carbon dioxide by weight. This means that for every pound of sugar fully fermented, you can produce approximately 0.5 pounds of pure alcohol. Understanding this conversion helps you calculate expected yields and troubleshoot when actual production falls short of theoretical maximums.

Flavor Development During Fermentation
The complexity of moonshine flavors develops primarily during fermentation, not distillation. While distillation concentrates alcohol and certain compounds, the fundamental flavor components are created by yeast during the fermentation process. Temperature plays a crucial role here – fermentations conducted at higher temperatures (above 85°F) typically produce more fruity esters and sometimes harsh fusel alcohols, while cooler fermentations (below 75°F) tend to create cleaner, more neutral flavor profiles.
Fermentation speed also dramatically affects flavor development. Slow, steady fermentations generally produce smoother, more complex spirits than rapid fermentations. This explains why turbo yeast, while efficient at producing alcohol quickly, often creates harsher spirits that require additional aging. Traditional moonshine recipes often benefit from extended fermentation times of 7-14 days, allowing for more complete sugar conversion and balanced flavor development.
Nutrient availability during fermentation significantly impacts both flavor and efficiency. Yeast requires not only sugar but also nitrogen, minerals, and vitamins to function optimally. Grain mashes naturally provide these nutrients, but sugar washes often need supplementation. Without proper nutrition, yeast produces stress compounds that carry through to your final spirit, creating undesirable flavors that can’t be removed through distillation.
Matching Yeast Types to Your Moonshine Recipe
“Appalachian Moonshine – Potential …” from www.stilldragon.org and used with no modifications.
Pairing the right yeast with your specific moonshine recipe dramatically improves your chances of creating exceptional spirits. Just as you wouldn’t use the same yeast for baking bread as brewing beer, different moonshine styles benefit from specialized yeast selections. The base ingredients, desired flavor profile, and production conditions should all influence your yeast choice.
When selecting yeast, consider not just alcohol tolerance but also flavor contribution, temperature requirements, and nutrient needs. A yeast that works perfectly for corn whiskey might perform poorly in a fruit brandy application. I’ve learned through many batches that taking time to match your yeast to your recipe pays dividends in the quality of your final product.
Corn Mash: Best Yeast Choices
Traditional corn mash moonshine benefits from yeasts that preserve grain character while providing moderate alcohol production. For authentic flavor, standard distiller’s yeast or even bread yeast produces excellent results in corn-heavy recipes, highlighting the natural sweetness and distinctive character of the grain. Avoid high-attenuation wine yeasts for traditional corn whiskey, as they tend to strip away the grain character that defines classic moonshine.
Temperature control becomes particularly important with corn mashes, as they tend to generate more heat during fermentation due to their higher nutrient content. Select a yeast with appropriate temperature tolerance for your environment – in summer months, strains that perform well at 85-90°F prevent stuck fermentations and off-flavors. During winter, standard bread yeast or distiller’s yeast operating in the 70-75°F range often produces the smoothest, most complex corn whiskey flavors.
For maximum corn character, consider a slower fermentation schedule with moderate alcohol tolerance yeast (14-16% ABV). This approach preserves more grain flavor compounds compared to high-octane turbo fermentations. If using corn with other grains like rye or malted barley, standard distiller’s yeast offers the best balance of flavor preservation and reliable fermentation. For a traditional approach, you might want to try this corn-based moonshine recipe.
Sugar Shine: Ideal Yeast Options
Sugar-based moonshines (often called sugar shine) benefit from different yeast characteristics than grain mashes. Since sugar washes lack the natural complexity and nutrients of grain, selecting yeasts that produce pleasant esters and flavor compounds becomes crucial to avoid a thin, harsh final product. Turbo yeast works efficiently for sugar washes but often creates harsher spirits, while rum yeasts develop fruity esters that add complexity to otherwise neutral sugar bases.
For traditional sugar shine, champagne yeast offers an excellent balance of clean fermentation and moderate ester production, creating a smooth neutral spirit that takes well to flavoring or aging on wood chips. The higher alcohol tolerance (up to 18% ABV) of champagne yeast maximizes efficiency from pure sugar washes, important when working with more expensive cane sugar or honey bases.
Always remember that sugar washes require nutrient supplementation for optimal yeast performance. Without added nutrients, even the best yeast will struggle, producing stressed fermentation by-products that carry through to your final spirit. For every 5 pounds of sugar, add at least one teaspoon of yeast nutrient to ensure healthy fermentation and clean flavor development.
Fruit Mashes: Complementary Yeast Selection
Fruit-based moonshines present unique challenges and opportunities in yeast selection. The natural acidity and varying sugar content of fruits require yeasts that can handle lower pH environments while enhancing (rather than competing with) the delicate fruit aromatics. Wine and champagne yeasts excel with fruit mashes, as they’re specifically developed to preserve and enhance fruit character during fermentation.
For stone fruits like peaches or cherries, wine yeasts designed for white wines typically produce the most aromatic, flavorful spirits. These strains enhance the natural fruit esters while fermenting cleanly to 14-16% ABV. Apple or pear based moonshines benefit from cider yeasts, which preserve the crisp, clean character of pomaceous fruits while developing complementary honey and floral notes during fermentation.
Berries and high-acid fruits require acid-tolerant yeast strains that won’t stall in lower pH environments. Specialized fruit brandy yeasts or certain wine yeasts (particularly those designed for high-acid white wines) perform exceptionally well with these challenging base ingredients. Remember that most fruits benefit from sugar supplementation to reach optimal alcohol levels before distillation – calculate additions based on the natural sugar content of your specific fruit.
Step-by-Step Guide to Using Moonshine Yeast

“How to Make Moonshine: A Step-by-Step Guide” from www.wikihow.com and used with no modifications.
Proper yeast handling dramatically impacts fermentation success and final spirit quality. Even the best yeast strain will underperform if mistreated during preparation and pitching. The following techniques represent best practices developed through years of professional distilling experience, adapted for home moonshine production.
The goal of proper yeast handling isn’t just successful fermentation – it’s creating the optimal conditions for clean, efficient alcohol production with minimal stress compounds. Small improvements in your process can yield significant enhancements in the smoothness and character of your final spirit. For more insights, explore how to pick a distiller’s yeast.
1. Proper Rehydration Techniques
Dry yeast requires careful rehydration to maximize cell viability and fermentation performance. Start by sanitizing all equipment to prevent bacterial contamination that could compete with your yeast. Heat dechlorinated or spring water to the temperature specified on your yeast package (typically 100-105°F for distiller’s yeast) – using a thermometer is crucial, as water that’s too hot will kill yeast cells while water that’s too cold causes cell wall damage. For more information on yeast usage, check out how much yeast is needed for a 5-gallon moonshine mash.
Sprinkle the yeast onto the water surface (don’t stir immediately) and allow it to hydrate for 15 minutes until it forms a creamy suspension. Gently stir to dissolve any clumps, then let it sit for another 5-10 minutes. During this time, the yeast cells reactivate and repair their cell walls in preparation for fermentation. For optimal results, gradually add small amounts of your mash liquid to the rehydrated yeast, allowing it to acclimate to the sugar concentration and pH before pitching the entire starter into your main fermentation vessel.
Never rehydrate yeast directly in your mash or with sugar water, as the osmotic pressure can rupture cell walls and reduce viability by 50% or more. This proper rehydration process typically improves fermentation performance by 25-30% compared to simply sprinkling dry yeast directly into your mash. For more details on yeast usage, check out how much yeast is needed for a 5-gallon moonshine mash.
2. Correct Pitching Temperatures
Pitching yeast at the right temperature prevents thermal shock and ensures rapid startup without excessive stress compounds. For most distiller’s yeast, the ideal pitching temperature is between 70-80°F, though specific strains may have different recommendations. Never pitch yeast into mash above 90°F, as this causes immediate stress and can kill a significant percentage of cells before fermentation even begins.
Temperature differential between your rehydrated yeast and main mash should never exceed 10°F. If your mash is significantly warmer or cooler than your yeast starter, gradually add small amounts of mash to the starter over 15-20 minutes to acclimate the yeast. This step prevents temperature shock that can cause yeast to produce excessive fusel alcohols and other stress compounds that will carry through to your final spirit.
After pitching, monitor temperature carefully during the first 48 hours when fermentation is most vigorous and generating significant heat. Active temperature management during this critical period prevents runaway fermentations that can reach damaging temperatures above 95°F, especially in larger batches where heat dissipation is limited. For more information on how to manage your distillation process, check out the three main parts of a still.
3. Ideal Yeast Quantities Per Gallon
Using the proper amount of yeast ensures rapid startup while minimizing stress on individual cells. For standard distiller’s yeast, use 5-10 grams (approximately 1-2 teaspoons) per 5 gallons of mash. Contrary to common misconception, using more yeast doesn’t necessarily produce more alcohol – it simply accelerates the initial fermentation phase while potentially creating more yeast biomass that can strip flavor from your final product. For more details on yeast quantities, you can check how much yeast to use for a 5-gallon moonshine mash.
For high-gravity mashes (with starting potential above 1.080 or high sugar content), increase yeast quantities by 25-50% to ensure adequate cell counts for complete fermentation. Sugar washes particularly benefit from higher pitching rates, as they lack the natural nutrients found in grain mashes that support yeast reproduction. Turbo yeast packages typically contain significantly more yeast cells and nutrients, which explains their rapid fermentation properties.
When working with fruit mashes or difficult fermentation conditions (very high or low temperatures), increase pitching rates by 50% to provide extra insurance against stuck fermentations. The minimal cost of additional yeast is far outweighed by the benefits of complete, healthy fermentation.

4. Monitoring Your Fermentation
Successful fermentation requires regular monitoring to catch potential problems before they impact your final spirit quality. Use an airlock filled with sanitizing solution to maintain an oxygen-free environment while allowing carbon dioxide to escape. Bubbling through the airlock provides a visual indicator of fermentation activity – vigorous during the first few days, gradually slowing as sugars are depleted.
Temperature monitoring is equally crucial throughout fermentation. Use stick-on thermometer strips or digital probes to track mash temperature, intervening with cooling measures if temperatures exceed your yeast’s tolerance range. Gravity readings with a hydrometer provide the most accurate measure of fermentation progress, showing how much sugar has been converted to alcohol. Take readings every 2-3 days, sanitizing your hydrometer and sampling equipment each time to prevent contamination.
Changes in appearance and aroma also indicate fermentation stages. Early fermentation produces a thick foam cap and fruity aroma, which transitions to a clearer liquid with a more alcoholic scent as fermentation nears completion. Unusual smells (rotten eggs, vinegar, solvent-like) indicate potential problems requiring immediate attention to salvage your batch.
5. Knowing When Fermentation is Complete
Determining when fermentation is truly complete prevents premature distillation of unfinished wash with excessive remaining sugars. The most reliable method is taking consecutive hydrometer readings 24 hours apart – when readings remain stable for two consecutive days, fermentation is complete. For most moonshine mashes, final gravity should reach 1.000 or slightly below, indicating nearly complete sugar conversion.
Visual and aromatic cues also help identify completion – fermentation is likely finished when bubbling through the airlock stops completely, the mash develops a clearer appearance as yeast drops out of suspension, and the aroma shifts from fruity to distinctly alcoholic. However, these indicators alone can be misleading, as very slow fermentation might appear complete while still progressing gradually. Always confirm with hydrometer readings before proceeding to distillation.
Allow completed fermentation to settle for 24-48 hours before distilling, permitting yeast and solids to drop to the bottom of your fermenter. This clarification step improves spirit quality by preventing scorching during distillation and reducing the transfer of unwanted compounds. Carefully rack (siphon) the clear liquid from above the sediment layer when transferring to your still for optimal results.
Common Yeast Problems and How to Fix Them

“Thousand Problem Dissatisfied Royalty …” from www.shutterstock.com and used with no modifications.
Even experienced distillers occasionally encounter fermentation challenges. Recognizing problems early and understanding proper remediation techniques can save batches that might otherwise be lost. Most issues stem from poor temperature control, inadequate nutrition, or contamination – all preventable with proper technique.
Remember that prevention is always easier than correction. Investing time in proper sanitization, yeast preparation, and fermentation monitoring eliminates most common problems before they begin. However, when issues do arise, prompt intervention often salvages affected batches with minimal impact on final spirit quality.
Stuck Fermentations and Restarts
Stuck fermentations occur when yeast activity slows or stops before consuming all available sugars. This frustrating problem typically results from temperature extremes, inadequate nutrition, excessive starting gravity, or alcohol levels exceeding yeast tolerance. Identify stuck fermentation by taking hydrometer readings – if gravity remains well above 1.000 with no visible activity for 48+ hours, you likely have a stuck batch.
To restart stuck fermentation, first ensure temperature is within your yeast’s optimal range (usually 70-80°F). Then prepare a starter with fresh, highly active yeast in a small amount of diluted mash (50% mash, 50% water) with added yeast nutrient. Allow this starter to become vigorously active before gradually adding more stuck mash over several hours, eventually returning the entire active mixture to your main fermentation vessel. This gradual acclimatization helps the fresh yeast adapt to the challenging conditions without shocking them.
For persistently stuck fermentations, consider adding yeast hulls (dead yeast cells) which absorb toxins that might be inhibiting fermentation, followed by fresh yeast nutrient and a new pitch of alcohol-tolerant yeast. As a last resort, diluting the stuck mash with water reduces alcohol concentration and sugar density, creating more favorable conditions for the yeast to resume activity.
Off-Flavors: Causes and Prevention
Off-flavors in fermentation often carry through to your final spirit despite distillation. Sulfur compounds (rotten egg smell) typically result from nutrient deficiency, particularly lack of nitrogen or vitamins. Adding yeast nutrient at the beginning of fermentation prevents most sulfur issues, but for active fermentations already producing sulfur, copper in your still will help remove these compounds during distillation.
Solvent-like or nail polish remover aromas indicate excessive production of ethyl acetate and other esters, usually caused by oxygen exposure or bacterial contamination during fermentation. Prevent this by maintaining proper airlock seals and sanitizing all equipment thoroughly. Once these compounds form, careful fractional distillation with attentive cuts helps minimize their presence in your final spirit. For more insights, learn about the three main parts of a still to ensure a smoother distillation process.
- Medicinal or plastic phenolic notes: Usually from wild yeast contamination, use proper sanitization
- Butter or butterscotch flavors: Indicates diacetyl from interrupted fermentation, allow complete fermentation
- Green apple flavors: Acetaldehyde from premature distillation, allow fermentation to complete fully
- Burning/hot alcohol sensation: Excessive fusel alcohols from high temperature fermentation, control fermentation temperature
- Vinegar aromas: Acetic acid bacteria contamination, improve sanitization and airlock seals
Many off-flavors diminish with proper aging, but preventing their formation yields cleaner spirits requiring less aging time. Temperature control during fermentation is particularly effective at preventing fusel alcohol production, one of the primary causes of harsh flavors and severe hangovers.
Temperature Control Issues
Temperature management represents the single most important variable within the distiller’s control during fermentation. Excessively high temperatures (above 90°F) stress yeast, creating fusel alcohols and harsh flavors, while temperatures too low (below 65°F) can stall fermentation or extend it unnecessarily. For most distiller’s yeast, maintaining 75-85°F throughout fermentation produces optimal results in both efficiency and flavor development.
For cooling overheated fermentations, wrap wet towels around fermentation vessels and position fans to create evaporative cooling, or place vessels in water baths with frozen bottles rotated regularly. For warming cool fermentations, use brew belts, heating pads on temperature controllers, or simply move fermentation vessels to warmer locations. Insulating fermenters with blankets or sleeping bags helps maintain stable temperatures by preventing rapid fluctuations that stress yeast.
Advanced Yeast Techniques for Better Moonshine
“The Best Yeast for Distilling and Brewing” from www.clawhammersupply.com and used with no modifications.
Beyond the basics lie advanced techniques that elevate your moonshine from good to exceptional. These methods, often borrowed from commercial distilleries and craft breweries, provide greater control over fermentation characteristics and final spirit quality. While not necessary for beginning distillers, these approaches reward those seeking to perfect their craft.
As with any advanced technique, start with small experimental batches before implementing changes to your full production process. Document results carefully to build your personal knowledge base about what works best for your specific recipes and equipment. For additional guidance, check out this resource on how to pick a distiller’s yeast.
Staggered Nutrient Additions
Rather than adding all yeast nutrients at the beginning of fermentation, staggered nutrient addition provides resources precisely when yeast needs them most. This technique prevents both nutrient deficiency stress and excessive initial growth that can strip flavors from your wash. Divide your total nutrient addition into three portions: add the first third at pitching, the second third when fermentation reaches high activity (typically 24-36 hours later), and the final third when fermentation reaches about 50% completion (determined by hydrometer readings).
This approach creates cleaner, more predictable fermentations by maintaining steady yeast activity throughout the process. Commercial distilleries have found staggered nutrient addition particularly beneficial for high-gravity fermentations and pure sugar washes, where nutrient deficiencies often cause stuck fermentations or excessive sulfur production. The slight additional effort pays dividends in improved spirit quality and more consistent batch-to-batch results.
pH Management
Maintaining optimal pH throughout fermentation significantly improves yeast performance and final spirit quality. Most yeast strains perform best when pH remains between 4.0-5.5, with performance declining sharply outside this range. Start by checking your mash pH before pitching yeast, adjusting with food-grade lactic acid to lower excessively high pH or calcium carbonate to raise overly low pH.
pH naturally drops during fermentation as yeast produces acidic compounds, sometimes falling below optimal ranges in long fermentations. For extended fermentations, periodically check pH and make small adjustments as needed to maintain the optimal range. This attention to pH balance prevents stress-induced off-flavors and improves both fermentation efficiency and final spirit character.

Using Multiple Yeast Strains
Advanced distillers sometimes employ multiple yeast strains in a single batch to develop complexity and specific flavor characteristics impossible to achieve with single-strain fermentation. This technique, borrowed from Belgian brewing traditions, creates flavor complexity through the complementary metabolic pathways of different yeasts. Typically, one strain provides efficient alcohol production while others contribute specific flavors or aroma compounds. For more insights, check out this guide on the best yeasts for distilling.
To implement this approach, either pitch mixed strains simultaneously or use sequential inoculation – starting with one strain and adding others at specific stages. For whiskey-style moonshines, combining bread yeast for grain character with distiller’s yeast for efficiency often produces spirits with both excellent flavor preservation and good alcohol yield. For fruit-based moonshines, pairing wine yeast with a touch of rum yeast creates complex, fruity esters that survive distillation and enhance the final spirit.
Final Tips for Moonshine Yeast Success

“Success PNGs for Free Download” from www.vecteezy.com and used with no modifications.
After years of distilling and countless experimental batches, certain principles consistently lead to better moonshine regardless of recipe or equipment. Always prioritize sanitation from start to finish – bacterial contamination ruins more batches than any other factor. Keep detailed records of each batch, noting yeast strain, temperature patterns, fermentation duration, and final spirit quality to build your personal knowledge base. Match your yeast to both your ingredients and your equipment capabilities rather than forcing a recipe to work with inappropriate yeast. Finally, respect the living nature of yeast – provide proper conditions and nutrients, and it will reward you with exceptional spirits that truly represent the ancient partnership between humans and these remarkable microorganisms. For further guidance and supplies that have been tested with these principles in mind, Clawhammer Supply offers comprehensive resources to support your moonshining journey.
Frequently Asked Questions
Through years of teaching distilling workshops and answering questions from the home distilling community, certain questions about moonshine yeast arise consistently. These frequently asked questions address common concerns and misconceptions about yeast selection, handling, and performance, including how much yeast is needed for a 5-gallon moonshine mash.
Can I reuse yeast from one batch to another?
Yes, yeast can be reused (or “repitched”) from batch to batch, but with important caveats. Collect the yeast slurry from the bottom of your fermenter after racking off the finished wash, discarding the very bottom layer which contains trub and dead cells. Store this yeast slurry in a sanitized container in the refrigerator, using it within 1-2 weeks for best results. When repitching, use approximately twice the volume of slurry compared to dry yeast, as the collected yeast contains significant liquid.
Yeast can typically be reused 3-5 times before performance deteriorates noticeably. Each generation tends to ferment slightly differently than the original strain, as natural selection favors cells with traits specific to your fermentation conditions. This can be beneficial for developing a “house yeast” with characteristics perfectly suited to your specific recipes, but may eventually lead to diminished performance or changed flavor profiles after multiple generations. If you’re curious about the amount of yeast needed for a 5-gallon moonshine mash, there are resources available to guide you.
How long does moonshine yeast last once opened?
Properly stored dry distiller’s yeast typically remains viable for 1-2 years after the package is opened. Store opened yeast in an airtight container in the refrigerator or freezer to maximize longevity. Vacuum-sealed packages may maintain viability even longer. As yeast ages, viability gradually decreases, requiring higher pitching rates to achieve the same fermentation performance – for yeast more than a year old, consider increasing the amount used by 25-50%. Learn more about the packaging ideas for aged moonshine to ensure your yeast stays fresh.
What’s the difference between distiller’s yeast and brewer’s yeast?
Distiller’s yeast is specifically selected for high alcohol tolerance, temperature resistance, and efficient sugar conversion – traits that maximize alcohol yield for distillation. Brewer’s yeast, conversely, is chosen primarily for flavor development and moderate alcohol tolerance appropriate for beer production (typically 8-12% ABV), with strains often selected to produce specific flavor compounds that complement particular beer styles. If you’re interested in learning more about yeast and its role in moonshine production, check out our guide on how much yeast for 5 gallon moonshine mash.
While brewer’s yeast can be used for moonshine production, it typically produces lower alcohol yields and may stall in high-gravity mashes designed for distillation. The flavor profiles can be interesting, however, and some distillers intentionally use certain beer yeasts for specific whiskey styles. If experimenting with brewer’s yeast for distilling, select high-attenuation strains with the highest alcohol tolerance available, and be prepared for potentially slower, less complete fermentation than specialized distiller’s strains would provide.
Will higher alcohol tolerance yeast make stronger moonshine?
Higher alcohol tolerance yeast doesn’t directly increase your final moonshine proof, which is determined primarily by your distillation equipment and technique. What higher tolerance yeast does provide is a more complete fermentation with higher alcohol concentration in your wash before distillation. This improved efficiency means more potential alcohol to collect during distillation from the same amount of ingredients.
For example, bread yeast fermenting to 10% ABV versus distiller’s yeast reaching 16% ABV means the latter produces roughly 60% more alcohol from identical ingredients before distillation begins. After distillation, both might reach the same final proof, but you’ll collect significantly more finished product from the higher-alcohol wash. Think of alcohol tolerance not as affecting strength, but rather efficiency and yield.
- Bread yeast (10-12% ABV) might yield 1.5-2 quarts of finished moonshine per 5-gallon wash
- Standard distiller’s yeast (14-16% ABV) might yield 2-2.5 quarts from the same wash
- Turbo yeast (18-20% ABV) might yield 2.5-3 quarts from identical ingredients
- These yields assume proper distillation technique and typical proof levels around 100-120 proof
- Higher alcohol content in the wash also improves distillation efficiency by requiring less energy per unit of alcohol produced
Remember that extremely high-alcohol washes can produce harsher spirits requiring additional aging. Sometimes a moderate-tolerance yeast with better flavor characteristics produces a superior final product despite slightly lower yield.
The key is matching your yeast choice to your specific goals – maximum yield isn’t always the primary consideration, especially for craft distillers focusing on flavor complexity and smoothness rather than pure efficiency.
Is more expensive yeast worth the extra cost?
The value proposition of premium yeast depends entirely on your priorities and batch size. For small-batch home distillers making 5-10 gallon fermentations, the price difference between budget and premium yeasts typically represents just $1-3 per batch – negligible compared to the value of your time and other ingredients. Premium yeasts generally offer more consistent performance, better documentation, higher purity (fewer wild yeast contaminants), and strain-specific characteristics that can significantly improve your final spirit.
For larger operations or frequent distillers, the consistency and reliability of premium yeasts often justifies the additional expense through improved yield and reduced failed batches. Many experienced distillers keep both economical and premium yeasts on hand, using budget options for experimental batches or standard recipes while reserving specialty strains for their signature spirits where specific characteristics are crucial to the desired outcome. For those interested in trying out new recipes, consider this traditional corn-based moonshine recipe for a classic touch.
Consider that yeast represents one of the least expensive ingredients in moonshine production yet has perhaps the greatest impact on both yield and flavor. When viewed in this context, premium yeast often provides excellent return on investment for serious distillers focused on quality and consistency.
For those just starting out or making occasional batches, basic distiller’s yeast provides excellent results without unnecessary expense. As you develop your skills and refine your recipes, experimenting with specialty yeasts becomes a natural progression in the pursuit of crafting truly exceptional moonshine. Whatever your distilling goals, Clawhammer Supply can help you find the perfect yeast for your specific needs.
Moonshine yeast is a crucial component in the distillation process, as it helps convert sugars into alcohol. Understanding the different types of yeast and how they affect the flavor and potency of your moonshine can significantly improve your final product. For those interested in traditional methods, you might want to explore this traditional corn-based moonshine recipe to see how yeast plays a role in the fermentation process.