Best Pear Moonshine Mash Recipe: Step-by-Step Guide for Perfect Flavor
Key Takeaways
- Bartlett, Bosc, and Anjou pears create the most flavorful moonshine mash due to their high sugar content and distinct aromatic profiles.
- A perfect pear moonshine mash requires a careful balance of ripe pears, sugar, water, and specialized distillers yeast for optimal fermentation.
- Proper temperature control during fermentation (65-75°F) is crucial for developing the complex flavor compounds that make pear moonshine exceptional.
- Using a 2:1 ratio of fruit to sugar yields the most balanced flavor profile while ensuring sufficient alcohol production.
- Aging your distilled pear moonshine with a vanilla bean or cinnamon stick can transform a good spirit into an exceptional homemade creation.
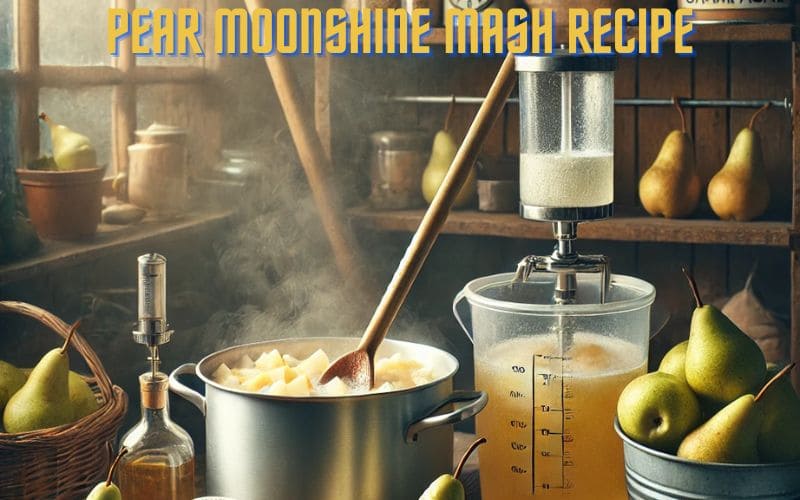
Creating pear moonshine at home begins with a perfect mash recipe that captures the essence of this delicate fruit. Unlike apple or peach variations, pear moonshine offers a distinctive floral sweetness that’s both sophisticated and approachable. The secret to exceptional pear spirit lies in understanding both the science and art of fermentation. Mountain Brew Supply has been guiding home distillers through this process for years, helping craft enthusiasts create spirits with character and depth.
Why Pear Moonshine Stands Out from Other Fruit Spirits

“Pears | SNAP-Ed” from snaped.fns.usda.gov and used with no modifications.
Pear moonshine carries subtle complexity that sets it apart from other fruit-based spirits. The natural sugars in pears ferment into a smoother, more nuanced flavor profile compared to the sharper notes of apple or the intense sweetness of peach. When properly crafted, pear moonshine displays delicate floral notes with hints of honey and vanilla even before aging or flavoring.
The relatively low acidity of pears creates a gentler mouthfeel that appeals to both seasoned moonshine enthusiasts and newcomers to homemade spirits. This approachability makes pear moonshine an excellent gateway spirit for those beginning their distilling journey. Additionally, the seasonal variations in pear harvests create unique opportunities for batch-specific character that reflects your local terroir.
What truly distinguishes great pear moonshine is how it captures the essence of the fruit while transforming it into something entirely new. Unlike commercial pear-flavored spirits that often rely on artificial additives, homemade pear moonshine derives its character directly from the fruit itself, resulting in authentic flavor that cannot be replicated by mass production methods. For those interested in exploring other fruit-based spirits, the peach brandy moonshine is another delightful option.
Try out some of these awesome ingredients we highly recommend.
Essential Ingredients for a Perfect Pear Moonshine Mash
The foundation of exceptional pear moonshine begins with selecting the right ingredients in proper proportions. Quality matters at every step – from the fruit to the water you use. A basic pear mash recipe requires ripe pears, granulated sugar, water, and yeast, but understanding the nuances of each component elevates your final product from ordinary to extraordinary.
For a standard 5-gallon batch of pear mash, you’ll need approximately 15-20 pounds of ripe pears, 8-10 pounds of sugar, 4 gallons of filtered water, and 1-2 packets of specialized distillers yeast. The ratio of fruit to sugar directly impacts both flavor development and potential alcohol content. Too much sugar masks the pear’s delicate character, while too little results in insufficient fermentation.
Best Pear Varieties for Moonshine Making
Not all pears are created equal when it comes to moonshine production. Bartlett (also known as Williams) pears stand as the gold standard due to their ideal balance of sugars, aromatic compounds, and juice yield. Their pronounced pear flavor carries through the fermentation and distillation process remarkably well. Bosc pears, with their firmer flesh and spicy undertones, add complexity when blended with Bartletts in a ratio of about 1:3.
Anjou pears contribute excellent juice content and a slightly tangy profile that adds dimension to your mash. For advanced distillers seeking unique character, Asian pear varieties like Hosui or Shinseiki introduce exotic floral notes, though they typically require supplemental sugar due to their lower natural sugar content. Avoid underripe pears at all costs – they contain high levels of starch that won’t convert properly during fermentation.
The ripeness level dramatically affects your mash quality. Ideally, select pears that are fully ripe but not overripe or mushy. They should yield slightly to gentle pressure and emit a sweet aroma at the stem end. For consistent results, aim for pears harvested from the same orchard or region, as growing conditions significantly impact sugar content and flavor compounds.
Sugar Options and How They Affect Flavor
While plain granulated sugar works perfectly well for pear mash, exploring alternative sweeteners can enhance complexity. Brown sugar introduces subtle molasses notes that complement pear’s natural character, while honey (particularly lighter varieties like clover) adds floral dimensions that amplify the fruit’s essence. For a truly distinctive batch, consider using raw turbinado sugar, which retains more natural molasses content than refined white sugar.
The timing of sugar addition also influences your final product. Adding all sugar at once creates a higher initial gravity that can stress yeast, while staggered additions allow for more controlled fermentation and potentially cleaner flavors. For beginners, a split approach works well – add 60% of your sugar initially, then the remaining 40% after primary fermentation has been active for 48-72 hours.
Yeast Selection for Optimal Fermentation
Choosing the right yeast strain is perhaps the most overlooked aspect of creating exceptional pear moonshine. While bread yeast will technically work, it produces inferior flavors and lower alcohol yields. Instead, invest in quality distillers yeast specifically formulated for fruit mashes. DADY (Distillers Active Dry Yeast) offers excellent performance with high alcohol tolerance up to 20% ABV and clean fermentation characteristics that preserve delicate pear aromatics.
For those seeking more pronounced fruit character, wine yeasts like Lalvin 71B or EC-1118 bring out different dimensions of the pear’s natural profile. 71B enhances fruit esters and produces a more aromatic final product, while EC-1118 ferments quickly and completely, leaving minimal residual sugar. Advanced distillers might consider creating a starter culture 24 hours before pitching to ensure rapid, vigorous fermentation that outcompetes potential contaminants.
Water Quality Considerations
Never underestimate the impact of water quality on your moonshine mash. Municipal tap water often contains chlorine and chloramines that can stress yeast and create off-flavors. Spring water or filtered water free from these chemicals provides the best foundation. If using tap water, allow it to sit uncovered for 24 hours to dissipate chlorine, or use a carbon filter to remove both chlorine and chloramines.
The mineral content of your water also affects fermentation. Moderately hard water containing calcium and magnesium supports yeast health, while excessively soft or hard water can cause problems. For advanced control, some distillers add small amounts of brewing salts like calcium chloride or gypsum to optimize their water profile specifically for pear fermentation.
Equipment You’ll Need for Success
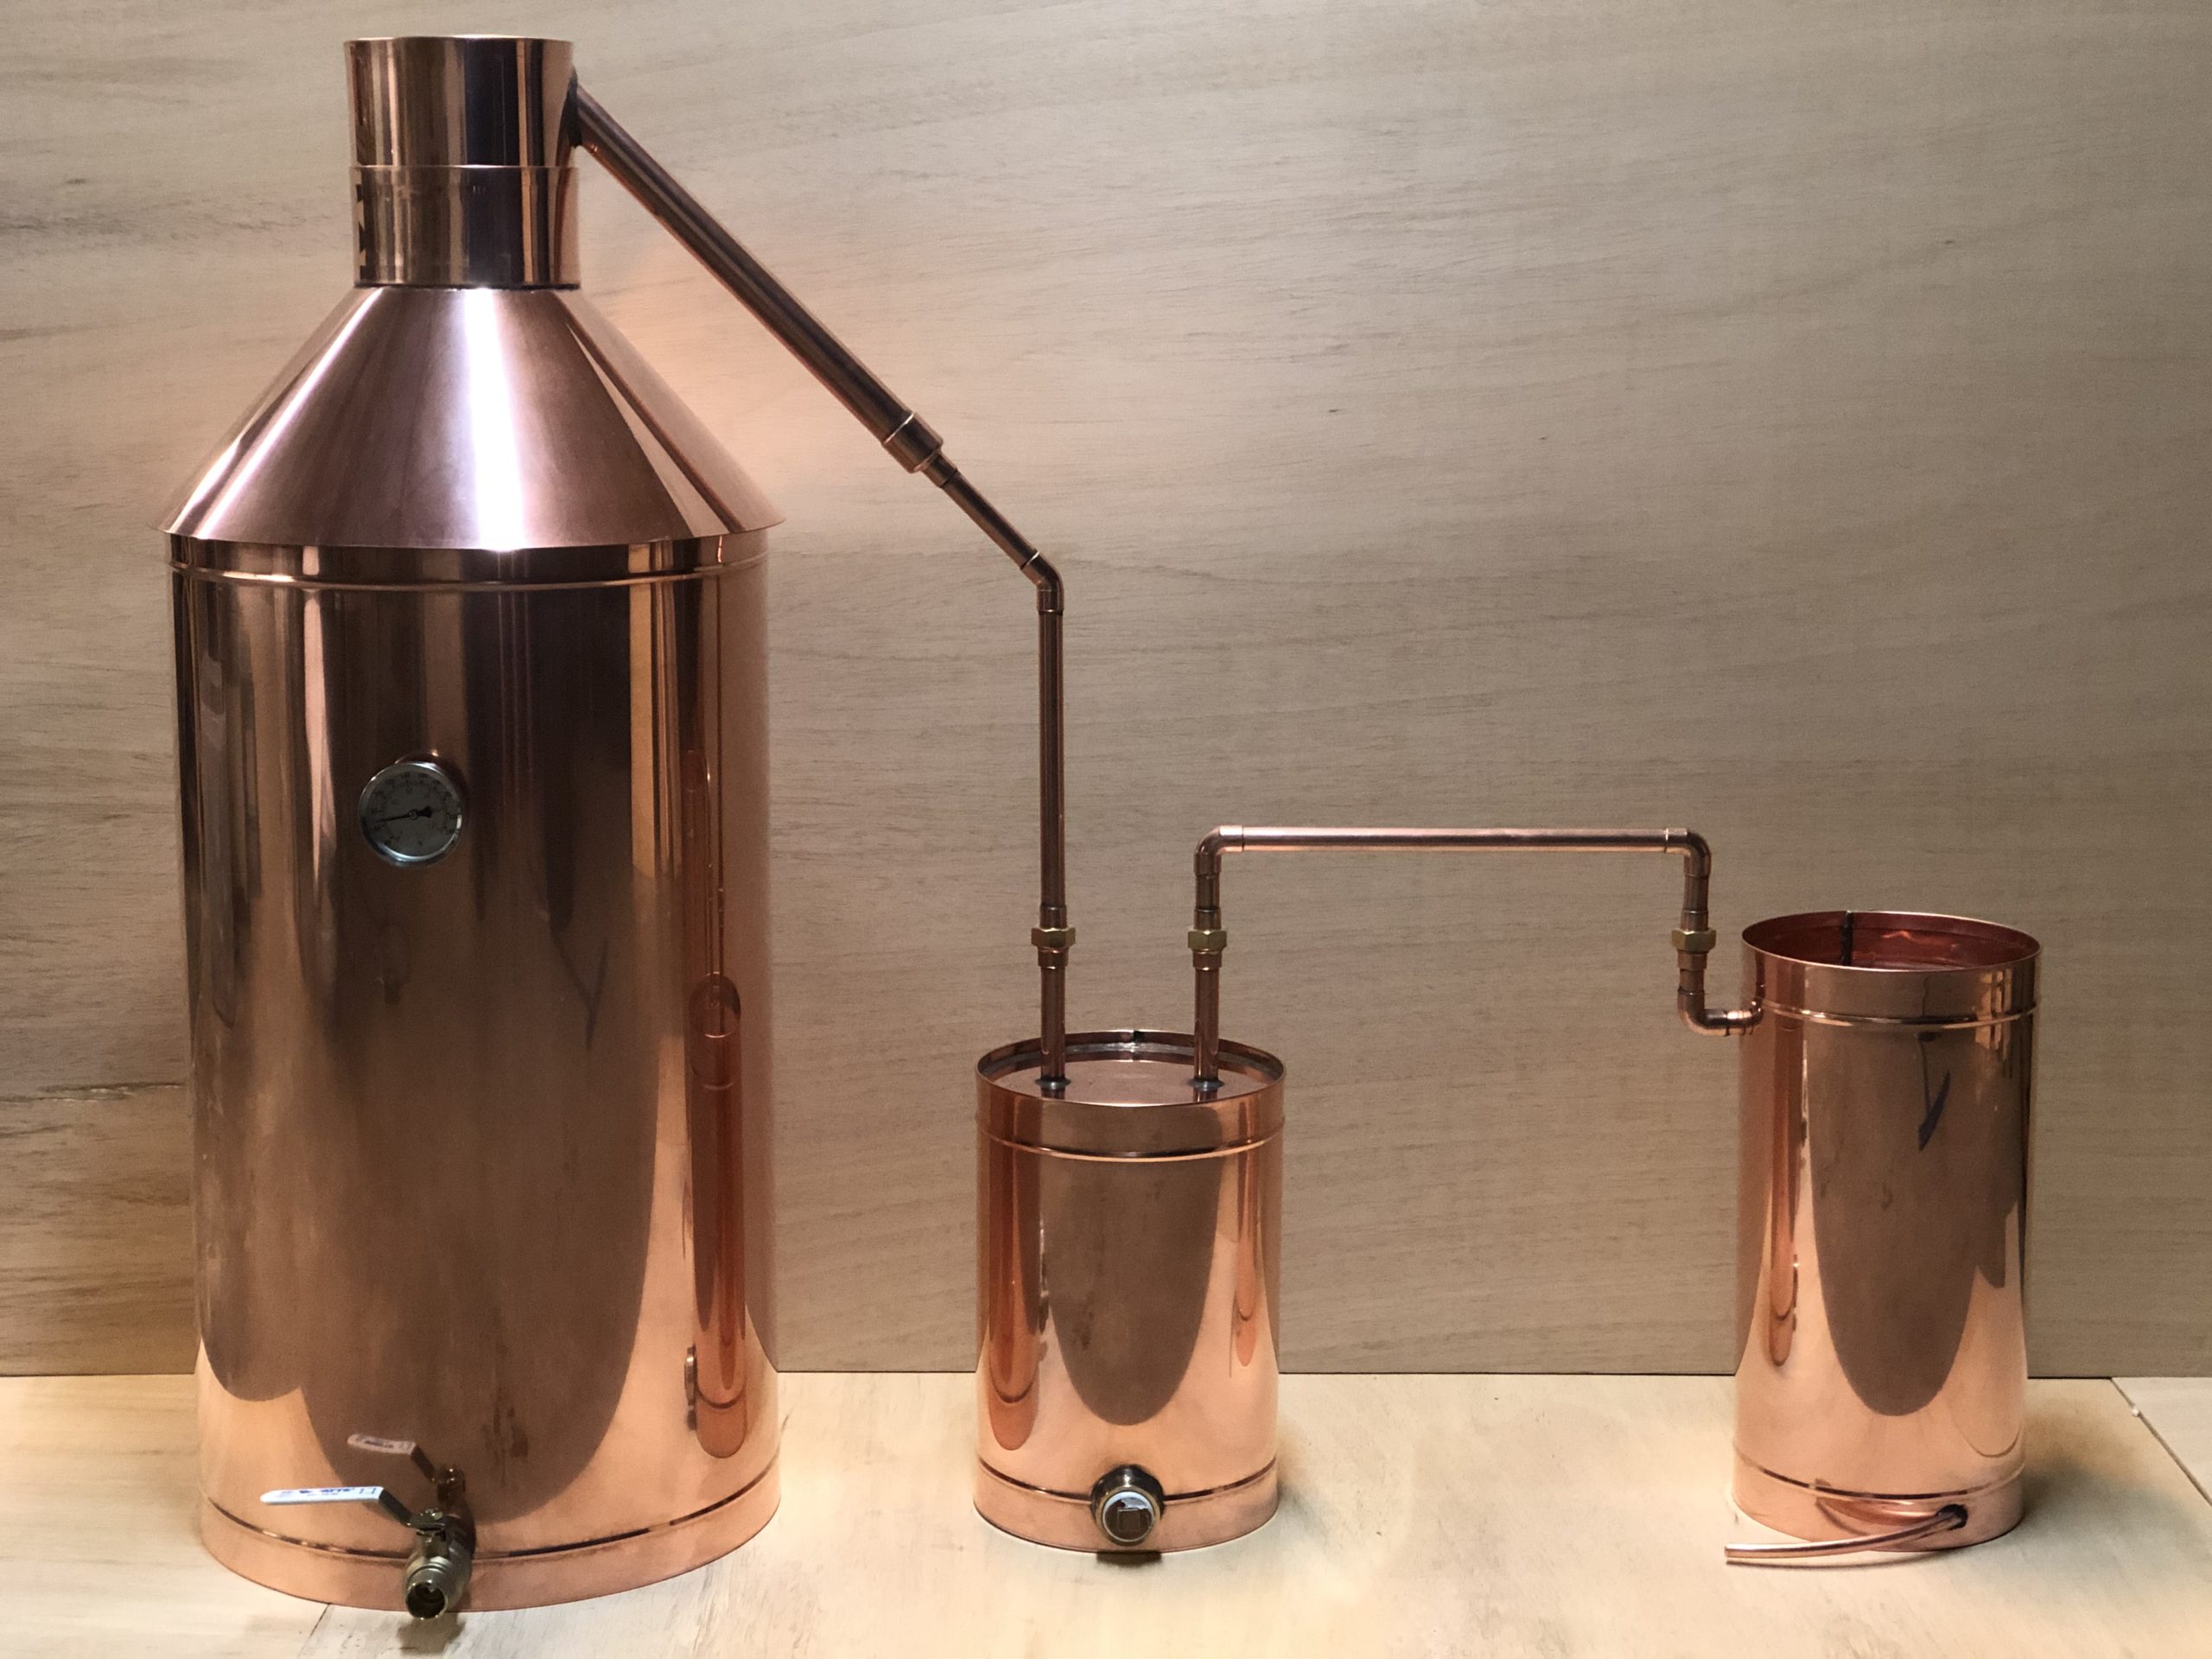
“Heavy Copper Moonshine Still” from diymoonshine.com and used with no modifications.
Creating the perfect pear moonshine mash requires proper equipment to ensure cleanliness, consistency, and quality. Everything that touches your mash must be thoroughly sanitized to prevent contamination from wild yeasts and bacteria. Food-grade sanitizers like Star San provide no-rinse convenience while effectively eliminating potential contaminants. For those interested in experimenting with other flavors, consider trying this apple cider moonshine recipe for a cozy and crisp fall sipper.
Fermentation Vessels
A food-grade plastic fermentation bucket with an airtight lid is ideal for primary fermentation of pear mash. The wider opening allows easier addition of fruit and stirring during the initial fermentation stages. For secondary fermentation, glass or plastic carboys provide better protection against oxygen exposure. Regardless of vessel choice, an airlock is essential to allow carbon dioxide to escape while preventing oxygen and contaminants from entering. If you’re interested in exploring different flavors, try this apple cider moonshine recipe for a cozy and crisp fall sipper.
Crushing and Pressing Tools
Efficient juice extraction maximizes the flavor potential of your pears. A fruit crusher or grinder breaks down the fruit structure to release juice and expose surface area for yeast activity. Hand-cranked fruit crushers work well for small batches, while electric models save significant labor for larger operations. Following crushing, a fruit press extracts maximum juice while separating pulp, seeds, and stems that could introduce bitter compounds.
Temperature Control Methods
Maintaining proper temperature throughout the mash preparation and fermentation process significantly impacts your final product. A reliable digital thermometer with a long probe allows precise temperature monitoring without excessive oxygen exposure. For heating, consider a large stainless steel pot with a thick bottom that distributes heat evenly to prevent scorching. During fermentation, insulated fermenters or temperature-controlled spaces help maintain the narrow ideal temperature range that promotes clean flavor development.
Check out the quality built home stills we definitely recommend.
Step-by-Step Pear Moonshine Mash Preparation
Creating perfect pear moonshine begins with meticulous mash preparation. Each step builds the foundation for the complex flavors that will eventually emerge in your finished spirit. Patience and attention to detail during this phase pays dividends in the quality of your final product.
1. Selecting and Preparing Your Pears
Begin by thoroughly washing your pears to remove any dirt, pesticides, or wild yeasts on the skin surface. Remove any stickers but leave the skins intact, as they contain aromatic compounds that contribute to flavor complexity. Inspect each fruit carefully, discarding any with mold or significant bruising that could introduce unwanted microbial contaminants. Cut away any damaged sections from otherwise good fruit to maximize your yield.
Quarter or roughly chop the pears to prepare them for crushing. There’s no need to remove stems, seeds, or cores at this stage – the pressing process will separate these elements. For varieties with particularly tough skins, like Bosc, consider slightly smaller pieces to aid juice extraction. Leave the cut fruit exposed to air for 20-30 minutes before crushing – this brief oxidation actually enhances certain flavor compounds that survive distillation.
2. Crushing and Juicing Techniques
Feed your prepared pears into your crusher in small batches, allowing the mechanism to grab and process the fruit thoroughly. If using a mechanical crusher, maintain a steady pace rather than overwhelming the machine. For those without specialized equipment, a sanitized potato masher in a large food-grade container works for small batches, though this method requires significant physical effort and yields less juice. The goal is to break down cell walls and create a pulpy consistency that maximizes extraction without turning the fruit into complete mush.
3. Adding Sugar and Other Ingredients
Transfer your crushed pear pulp to your fermenter and add about 3 gallons of water per 15-20 pounds of fruit. The ideal ratio maintains enough liquid to allow proper fermentation while preserving concentrated pear flavor. Stir thoroughly to create a homogeneous mixture before adding your selected sugar. For those interested in exploring more fruity flavors, check out this raspberry moonshine recipe.
For a standard 5-gallon batch, gradually incorporate 8-10 pounds of sugar while stirring continuously to ensure complete dissolution. This approach prevents sugar from settling at the bottom where it could remain unfermented. Take a gravity reading with your hydrometer at this stage – aim for a starting gravity between 1.060-1.080, which will produce a mash with sufficient alcohol content for distilling. For a fruity twist, consider trying a raspberry moonshine recipe to enhance your distilling experience.
Consider adding 1-2 teaspoons of yeast nutrient to support healthy fermentation, especially important with pear mash which may lack some nutrients yeast requires for optimal performance. Some distillers also add 1 teaspoon of acid blend or the juice of two lemons to adjust pH to the ideal range of 3.5-4.0, creating a more hospitable environment for yeast while inhibiting bacterial growth.
- Optional: 1 teaspoon pectic enzyme to break down fruit pectin and prevent haze
- Optional: 1/4 teaspoon tannin for structure and mouthfeel
- Optional: 1 crushed Campden tablet (if using wild fruit) to inhibit wild yeasts
- Optional: 1 teaspoon yeast energizer for vigorous initial fermentation
4. Heating the Mash to the Right Temperature
Unlike grain-based mashes that require complex temperature rests for starch conversion, fruit mashes benefit from a simpler heating approach. Gently warm your pear mash to 160°F (71°C) and hold at this temperature for 15-20 minutes. This pasteurization step eliminates competing wild yeasts and bacteria without extracting harsh tannins or cooking the fruit flavors. Stir continuously during heating to prevent scorching and ensure even temperature distribution throughout the mash.
Some traditional distillers skip the heating step entirely, relying on high sugar concentration and healthy pitched yeast to outcompete wild microorganisms. While this natural approach can work, it introduces more variables and potential for off-flavors. For consistent results, especially for beginners, the controlled pasteurization approach provides greater reliability without sacrificing flavor quality.
5. Cooling and Pitching Yeast
After heating, rapidly cool your mash to yeast pitching temperature (65-75°F or 18-24°C) as quickly as possible. This temperature range strikes the perfect balance between fermentation activity and flavor development. Use an immersion chiller if available, or place your fermentation vessel in an ice bath with frequent stirring to accelerate cooling. Once at pitching temperature, sprinkle your selected yeast evenly across the surface of the mash, then gently stir to incorporate. Seal your fermenter with an airlock filled with sanitizer solution and place in a location with stable temperature in the ideal fermentation range. For more fruity moonshine recipes, check out our raspberry moonshine recipes.
Don`t forget the must have accessories and supplies we always recommend.
The Fermentation Process: Your Path to Flavor

“Fermentation | Bakepedia – Baking …” from www.bakepedia.com and used with no modifications.
Fermentation transforms your carefully prepared pear mash into the foundation for exceptional moonshine. During this phase, yeast consumes sugars and produces alcohol, carbon dioxide, and a complex array of flavor compounds. The conditions you maintain during fermentation dramatically impact the character of your final spirit. With pear mash in particular, gentle handling preserves the delicate aromatics that make this fruit spirit so appealing.
Ideal Fermentation Temperature Range
Maintain your fermenting pear mash between 65-75°F (18-24°C) throughout the entire process for optimal results. This moderate temperature range encourages steady yeast activity while preventing stress reactions that produce unwanted fusel alcohols and sulfur compounds. Temperature stability matters as much as the actual temperature – fluctuations force yeast to constantly adapt, leading to inconsistent fermentation and potential off-flavors. Consider using a temperature controller or placing your fermenter in a water bath to buffer against environmental temperature swings, especially in locations with significant day/night temperature differences.
Signs of Healthy Fermentation
Within 12-24 hours of pitching yeast, you should observe visible activity in your airlock and foam forming on the mash surface. This indicates active fermentation is underway. The most vigorous phase typically occurs during the first 3-5 days, with steady bubbling through the airlock and a distinctive sweet-sour aroma developing as the yeast processes the sugars.
A healthy fermentation produces a clean, slightly fruity aroma without sulfurous or vinegar-like smells that would indicate contamination. The foam cap will gradually subside as fermentation slows, and the airlock activity will decrease from several bubbles per second to one bubble every few minutes. This progression signals the transition from primary to secondary fermentation, where slower yeast activity continues to refine flavors and increase alcohol content. For a fruity twist, you might explore raspberry moonshine recipes to enhance your fermentation experience.
Common Fermentation Issues and Fixes
Even with careful preparation, fermentation challenges can arise. Recognizing and addressing these issues promptly helps ensure your pear mash reaches its full potential. The most common problem is stuck fermentation, where yeast activity slows or stops before consuming all available sugars. This typically results from temperature fluctuations, insufficient nutrients, or excessive starting gravity stressing the yeast.
Troubleshooting Fermentation Problems
Stuck Fermentation: Gently warm to 70-75°F, add yeast nutrient, and rouse yeast by gently stirring. If no improvement, pitch fresh, rehydrated yeast.
Sulfur Smell: Indicates stressed yeast. Ensure proper temperature, add yeast nutrient, and increase oxygen with gentle stirring.
Vinegar Aroma: Sign of acetobacter contamination. Minimize air exposure and consider adding potassium metabisulfite to inhibit bacterial growth.
Mold Growth: Discard batch if white, green, or black mold appears on surface. Improve sanitation procedures for future batches.
Patience becomes crucial during the later stages of fermentation. Many beginners rush this process, but allowing a full 10-14 days for pear mash fermentation develops complexity and ensures complete sugar conversion. Resist the urge to constantly open the fermenter to check progress, as this introduces oxygen and potential contaminants. Instead, rely on airlock activity and gravity readings to monitor fermentation progress.
For particularly stubborn fermentations, creating a yeast starter from a high-activity strain like EC-1118 can rescue a struggling batch. Rehydrate the new yeast in a small amount of warm water with a pinch of sugar, allow it to become active, then gradually introduce small amounts of the stuck mash to acclimate the yeast before pitching into the main batch.
Remember that temperature control becomes even more critical when fermentation issues arise. Wild temperature swings stress yeast and compound existing problems, so stabilize your fermentation environment before attempting other remedies. With proper attention and quick intervention when needed, most fermentation challenges can be successfully overcome. For a cozy drink option, consider trying apple cider moonshine during cooler months.
Knowing When Your Pear Mash is Ready for Distilling
Determining the perfect moment to transition from fermentation to distillation requires both scientific measurement and sensory evaluation. The primary indicator of completion is stable gravity readings over 2-3 consecutive days. Take hydrometer readings without introducing excessive oxygen – using a wine thief or turkey baster allows you to extract small samples without disturbing the entire batch. A fully fermented pear mash typically reaches a final gravity between 0.996-1.000, indicating that virtually all fermentable sugars have been converted to alcohol. For those interested in exploring other flavors, you might enjoy crafting peach brandy moonshine as a sweet southern spirit at home.
Beyond gravity readings, visual and aromatic cues provide valuable information about fermentation completion. The mash surface should appear relatively clear without significant bubbling or foam. Any fruit solids will have largely settled to the bottom, creating a more defined separation between liquid and sediment. The cloudy appearance of active fermentation gives way to a clearer liquid, though pear mash will retain some haziness from fruit pectin even when fermentation is complete.
Patience during this assessment phase directly impacts your final product quality. Rushing to distill prematurely can result in lower alcohol yields and undesirable flavor compounds that would otherwise be processed during complete fermentation. Most pear mashes require 10-14 days for primary fermentation, with some benefit from an additional week of conditioning before distillation, particularly when using wine yeasts that continue to refine flavors during extended contact.
Visual and Aromatic Indicators
The aroma profile of your pear mash evolves dramatically throughout fermentation. In the initial stages, the sweet, fresh pear scent dominates. As fermentation progresses, this transforms into a more complex bouquet with noticeable alcohol notes and yeasty undertones. When fermentation nears completion, the sharp, yeasty characteristics diminish, replaced by a cleaner, more refined aroma with subtle fruit notes remaining. This aromatic transition signals that the yeast has completed its primary work and the mash is approaching distillation readiness.
Visually, watch for the cessation of carbon dioxide production. During active fermentation, tiny bubbles continuously rise to the surface, creating slight movement throughout the mash. As fermentation completes, this activity gradually diminishes until the mash appears still, with only occasional bubbles rising. The color of pear mash typically lightens slightly as fermentation completes, shifting from a cloudy yellow-brown to a clearer amber tone with more translucency, though still not completely clear.
Using a Hydrometer to Measure Completion
While sensory evaluation provides valuable insights, hydrometer readings offer objective confirmation of fermentation completion. A brewing hydrometer measures the density of your mash relative to water, indicating how much sugar remains. Take readings by filling your test jar approximately ¾ full with mash sample, then gently insert the hydrometer and allow it to stabilize before reading at eye level where the surface of the liquid intersects the scale.
Most pear mashes begin with a specific gravity between 1.060-1.080 and finish around 0.996-1.000. This gravity drop corresponds to a potential alcohol content of approximately 8-10% ABV before distillation. Three consecutive daily readings showing no change (within 0.001) confirm fermentation completion. Some distillers also use a refractometer for quick gravity checks, though these require mathematical correction for alcohol-containing samples to provide accurate readings. For more insights on creating fruit-based spirits, check out this guide on how to make a fruit mash for moonshine.
Flavor Enhancements and Variations

“Bourbon Cocktail Recipe …” from www.nospoonnecessary.com and used with no modifications.
While traditional pear moonshine showcases the pure essence of the fruit, creative variations can elevate your spirit to new heights. These modifications can be incorporated either during mash preparation, post-fermentation, or after distillation, each approach yielding different flavor profiles. Remember that subtlety is key when enhancing pear moonshine – the delicate fruit character should remain the star, with additions serving to complement rather than overpower.
Spice Additions for Complexity
Warming spices create exceptional harmony with pear’s natural flavor profile. Consider adding 1-2 cinnamon sticks, 3-4 whole cloves, a few cracked cardamom pods, or a small piece of star anise during the final 5 minutes of your mash heating process. This brief hot extraction captures aromatic compounds without extracting harsh tannins or excessive bitterness. For more pronounced spice character, these same ingredients can be added to your distilled spirit during aging, allowing you to monitor flavor development and remove the spices when the desired intensity is reached.
Ginger brings a particularly complementary dimension to pear moonshine. Add 1-2 ounces of freshly sliced ginger root during mash preparation for subtle integration, or infuse your finished spirit with ginger for a more pronounced effect. Other aromatics worth exploring include vanilla bean, nutmeg, allspice, and even small amounts of rosemary or lavender for adventurous palates seeking unique expressions. Always start conservatively with botanical additions – you can always add more, but you cannot remove excess flavor once incorporated.
Honey-Pear Moonshine Variation
Substituting part of your sugar with quality honey creates a mash with remarkable complexity and aromatics that survive the distillation process. Replace 2-3 pounds of your sugar with an equal weight of local wildflower or clover honey, adding it after your mash has cooled below 160°F to preserve delicate aromatic compounds. This modification not only enhances flavor but also provides additional nutrients that support healthy fermentation.
For an even more distinctive approach, consider a secondary honey addition to your distilled spirit. Dilute your moonshine to approximately 100 proof, then add 2-4 tablespoons of honey per quart, gently warming the mixture just enough to facilitate integration without cooking off aromatics. This creates a smoother, more approachable spirit with sophisticated flavor layers that continue to develop during aging. The combination of honey’s floral notes with pear’s natural character produces a uniquely appealing profile that distinguishes your creation from commercial products.
Vanilla Bean and Cinnamon Infusion
Perhaps the most universally appealing enhancement combines vanilla bean and cinnamon with pear moonshine. After distillation, split one vanilla bean lengthwise and add it to your spirit along with half a cinnamon stick per quart. Allow this infusion to develop for 1-2 weeks, tasting periodically until desired flavor intensity is achieved, then strain out the solids. The vanilla contributes roundness and perceived sweetness without adding sugar, while cinnamon provides warmth that amplifies the fruit’s natural spice notes.
For maximum extraction and flavor integration, store your infusing spirit in a cool, dark location and gently agitate the container daily. The flavor compounds will continue to meld and mature even after removing the solid ingredients. Consider preparing several small test batches with different infusion times to determine your preferred intensity before committing your entire batch.
Advanced distillers might explore vapor infusion during the actual distillation process. By placing botanical ingredients in a gin basket or suspended above the distillation column, aromatic compounds are extracted by the rising alcohol vapors, creating exceptionally integrated flavor profiles impossible to achieve through post-distillation infusion alone. This technique requires precise temperature control and equipment modification but yields remarkably complex results for those willing to experiment.
- Classic blend: 1 vanilla bean + ½ cinnamon stick per quart
- Spiced pear: 2 star anise pods + 3 cloves + ¼ cinnamon stick per quart
- Citrus brightness: 2 strips orange peel + 1 strip lemon peel per quart
- Floral enhancement: 1 tablespoon dried elderflower + ½ vanilla bean per quart
When experimenting with infusions, maintain a small portion of your uninfused spirit as a control sample for comparison. This reference point helps evaluate how various additions transform your base spirit and informs future batching decisions. Remember that less is often more when enhancing pear moonshine – the goal is to complement the fruit’s natural character rather than mask or overwhelm it.
Storing and Aging Your Pear Moonshine
Proper storage conditions dramatically influence how your pear moonshine develops over time. Unlike grain-based whiskeys that benefit from years in oak, fruit spirits often reach their peak within months rather than years. Store your finished moonshine in a cool, dark environment with consistent temperature between 55-65°F (13-18°C) to preserve aromatic compounds while allowing controlled flavor development. Excessive heat accelerates unwanted chemical reactions that can diminish fruit character, while UV exposure from direct sunlight breaks down both flavor and color compounds.
For short-term storage (3-6 months), clear glass or food-grade plastic containers work well when kept away from light. For longer aging periods, consider amber glass which provides natural UV protection. Always fill containers as completely as possible to minimize oxygen exposure, which can oxidize and flatten delicate flavors. Some distillers use argon or nitrogen gas to displace oxygen in partially filled containers, creating an inert blanket that protects the spirit from oxidation.
Many home distillers discover that pear moonshine undergoes a remarkable transformation around the 3-month mark. The initial harshness softens considerably as chemical compounds interact and integrate, revealing more of the subtle pear character that may be initially masked by alcohol heat. Patience during this maturation period rewards you with a more cohesive, rounded spirit that showcases the fruit’s true potential.
Container Options for Maximum Flavor Development
While clear, unaged pear spirit preserves the purest expression of the fruit, experimental aging in wood offers intriguing possibilities. Small oak barrels (1-5 liters) impart vanilla, caramel, and spice notes that complement pear’s natural character, but require careful monitoring to prevent over-oaking. The higher surface-to-volume ratio of small barrels accelerates extraction – what might take years in full-sized barrels occurs in weeks or months. Check flavor development weekly, as pear’s delicate profile can be overwhelmed by oak much faster than grain spirits. Consider neutralizing new barrels by first rinsing with hot water or pre-soaking with a sacrificial spirit to temper the aggressive extraction of fresh wood.
The Effect of Time on Flavor Profile
Pear moonshine undergoes several distinct phases during aging. In the first month, the raw alcohol notes soften significantly while fruit character becomes more integrated. Between months 2-4, complexity develops as various flavor compounds interact, often revealing subtle notes imperceptible in the young spirit. Beyond 6 months, most pear moonshine reaches flavor stability, with diminishing returns from additional aging unless wood is involved.
Consider bottling your batch in stages to capture different developmental phases. This creates a vertical tasting collection that demonstrates how time transforms your creation. Label each bottle with detailed production notes including pear varieties, fermentation specifics, and aging conditions – this documentation proves invaluable for replicating successful batches and avoiding less successful approaches in future production.
Serve and Enjoy: Getting the Most From Your Creation
Pear moonshine shines brightest when served properly. For tasting and evaluation, use small tulip-shaped glasses that concentrate aromatics while allowing warming in the hand. Serve at slightly cool room temperature (60-65°F/15-18°C) rather than refrigerated to fully experience the complex flavor profile. For casual enjoyment, try serving over a single large ice cube, which provides gentle dilution that often opens up additional aromatic dimensions. Pear moonshine also makes an exceptional base for craft cocktails – try substituting it for vodka or light rum in classics like the Moscow Mule or Daiquiri for sophisticated variations that showcase your homemade spirit. Whether savored neat, on ice, or in creative mixology, the care you’ve invested in creating perfect pear moonshine deserves thoughtful presentation that highlights its unique character.
Take a look at some of this cool moonshine merch we like.
Frequently Asked Questions

“Troubleshooting Vs. Debugging: The …” from revdebug.com and used with no modifications.
The journey from fruit to bottle generates many questions, especially for those new to fruit-based spirit production. These frequently asked questions address common concerns while providing additional insights to enhance your pear moonshine crafting experience. Remember that successful distilling combines science, tradition, and personal creativity – the guidelines provided are starting points for your own experimentation and refinement.
How long does pear moonshine mash take to ferment?
Pear moonshine mash typically requires 10-14 days for complete primary fermentation under ideal conditions. Temperature significantly impacts this timeline – fermentation proceeds faster at the upper end of the recommended range (70-75°F/21-24°C) but may develop more complex flavors at slightly cooler temperatures (65-70°F/18-21°C). The specific yeast strain also affects duration, with distillers yeast generally completing fermentation more rapidly than wine yeasts.
Complete fermentation is confirmed by stable gravity readings, not by calendar alone. Factors including sugar content, yeast health, nutrient availability, and temperature fluctuations can extend fermentation time. Some distillers allow an additional week of conditioning after active fermentation completes to allow yeast to process intermediate compounds that could contribute harsh flavors, particularly important when using wine yeasts that continue to refine flavors during extended contact.
Can I use canned pears instead of fresh ones?
Yes, canned pears can produce acceptable moonshine, though with notable differences from fresh fruit. Choose pears canned in juice rather than heavy syrup to avoid artificial sweetness and preservatives that might inhibit fermentation. Drain and rinse lightly to remove excess syrup before use. The heat processing canned pears undergo has already broken down cell structures, eliminating the need for crushing but also removing some of the fresh fruit aromatics that contribute to complexity.
For best results with canned pears, consider supplementing with fresh pear juice or adding pear essence to your final distilled product. Some distillers blend 75% canned with 25% fresh pears when fresh fruit availability is limited, capturing some fresh character while gaining the convenience of pre-processed fruit. Remember to adjust your sugar additions when using canned fruit, as commercial canning syrup contributes fermentable sugars that will affect your overall gravity and potential alcohol content.
What’s the best way to filter my pear mash before distilling?
Proper filtration prevents scorching in your still while maximizing yield and purity. The ideal approach uses multiple stages of increasingly fine filtration. Begin with a coarse straining through a sanitized mesh bag or large-holed colander to remove larger fruit pieces. Follow with filtration through several layers of fine cheesecloth or a specialized brewing bag to capture smaller particulates. For the cleanest possible wash, some distillers perform a final clarification step using bentonite clay or pectinase enzyme treatment followed by cold crashing (refrigeration for 24-48 hours) to settle remaining solids before carefully siphoning the clarified liquid from above the sediment.
Does pear moonshine need to be aged?
Unlike grain-based spirits that typically require extended aging to develop character, pear moonshine can be enjoyed relatively young. The delicate fruit essence is present immediately after distillation, though the spirit benefits significantly from at least 2-4 weeks of “resting” to allow harsh volatile compounds to dissipate and flavors to integrate. This short aging period dramatically improves smoothness without requiring oak or extensive time investment.
For those seeking additional complexity, light aging for 3-6 months in glass develops remarkable integration and refinement. Oak aging should be approached cautiously with pear moonshine – brief contact (2-4 weeks) with oak chips or small barrels can add complementary vanilla and spice notes, but extended wood aging often obscures the fruit character that makes pear moonshine special. Many experienced distillers prefer to maintain pear moonshine in its clear, unoaked form to showcase the pure fruit essence, using oak only for specific variation batches.
What proof can I expect from pear moonshine?
Fresh off the still, pear moonshine typically comes at 100-130 proof (50-65% ABV) depending on your still design and collection methods. Most distillers dilute this to 80-100 proof (40-50% ABV) for consumption, which provides the ideal balance between alcohol presence and flavor expression. Higher proofs can overwhelm the delicate pear aromatics, while lower proofs may taste watery and fail to preserve the spirit adequately.
When diluting, always use filtered or distilled water added gradually with thorough mixing and resting between additions. Some compounds can temporarily “cloud” when water is added too quickly, affecting both appearance and flavor integration. For the most accurate proof adjustment, use an alcoholometer or precision hydrometer designed specifically for spirit measurement, as small variations can significantly impact both flavor profile and legal compliance for those adhering to regulations for personal consumption.
For traditional Appalachian-style moonshine presentation, some distillers maintain higher proofs around 100-110 (50-55% ABV), which provides substantial warmth while still allowing fruit character to emerge, particularly after the initial alcohol heat dissipates on the palate. Experiment with different proofs using small test batches to determine your preferred balance point before diluting your entire production. Don`t forget the must have accessories and supplies we always recommend.
Creating the perfect pear moonshine mash requires a careful balance of ingredients and technique. Start by selecting ripe pears, as their natural sweetness will enhance the flavor profile of your moonshine. Once you’ve prepared your fruit, it’s time to consider other flavor elements. For those who enjoy a fruity twist, you might want to explore fruit punch moonshine for a tropical sunshine experience. Combine your pears with sugar, yeast, and water, allowing the mixture to ferment until it reaches the desired alcohol content. Patience is key, as the fermentation process can take several days to complete. Once finished, distill your mash to produce a smooth and flavorful pear moonshine.