How Long Can Mash Sit After Fermentation? Moonshine Guide Explained
Article-At-A-Glance
- Most fermented mash can be safely stored for 1-4 weeks under proper conditions before distillation without significant quality loss
- Temperature control between 50-65°F (10-18°C) is crucial for extending the shelf life of your fermented mash
- Clearing time improves your final distillate by allowing yeast and particulates to settle out of the mash
- Different mash types have different storage limitations – grain mashes are generally more vulnerable than sugar washes
- Techniques like cold crashing and racking to secondary fermenters can significantly extend your mash storage window
Wondering if your fermented mash is still good to run through your still? I’ve been there – life gets busy, equipment breaks down, or maybe you’re just waiting for the perfect weekend to fire up the still. The good news is that properly fermented mash doesn’t need to be distilled immediately.
A common concern among home distillers is exactly how long that bucket of fermented goodness can sit before quality issues arise. The answer isn’t quite as straightforward as we’d like, but I’ll break down everything you need to know about safely storing your mash after fermentation, backed by years of practical experience from moonshine distilling experts who understand the science behind what happens in your fermentation vessel.
Mash Storage Facts at a Glance
Before diving deeper, let’s establish some baseline facts about fermented mash storage. Fermentation typically takes 3-14 days depending on your recipe, temperature, and yeast strain. Once complete, your mash enters a vulnerable state where time becomes a factor affecting quality. The window for optimal distillation varies dramatically based on storage conditions, mash composition, and your quality standards.
Understanding these storage timeframes isn’t just about convenience—it directly impacts flavor development, alcohol content preservation, and the quality of your final product. Every distiller should know these fundamental guidelines to make informed decisions about when to run their still.
Why Timing Matters After Your Mash Stops Fermenting
“Basic Moonshine Mash Recipe” from www.whiskeystillpro.com and used with no modifications.
When fermentation completes, your mash reaches peak alcohol content as the yeast has consumed available sugars and converted them to ethanol. This moment represents your maximum potential yield. From this point forward, several biological and chemical processes begin that can affect your final product. Wild yeasts and bacteria naturally present in the environment can start competing with your cultivated yeast. Acetobacter bacteria, if introduced, will convert alcohol to acetic acid (vinegar). Meanwhile, dead yeast cells start to break down through autolysis, potentially releasing off-flavors into your mash. For more on how these processes can affect moonshine potency over time, explore our detailed guide.
The Safe Storage Window: How Long Mash Can Sit After Fermentation
![]()
“Tradition in Contemporary Craft Spirits …” from compassohio.com and used with no modifications.
The timeframe for safely storing fermented mash varies widely based on several factors. Temperature, pH level, mash composition, and sanitation practices all play significant roles in determining how long your mash remains viable. While there’s no one-size-fits-all answer, we can break down storage periods into three general timeframes, each with its own considerations and effects on your final product.
Immediate Distillation (1-7 Days)
Optimal Storage Window
For maximum alcohol yield: 1-7 days after fermentation completion
For improved flavor profile: 3-7 days after fermentation completion
For best clarity: 5-7 days after fermentation completion
The first week after fermentation completes is widely considered the ideal distillation window. During this period, your mash maintains its peak alcohol content while gaining some beneficial clearing as yeast and particulates begin to settle. Many distillers actually prefer waiting 3-5 days after fermentation completion before distilling, as this short rest period allows the mash to clear slightly without risking contamination.
Those first few days of settling can make a significant difference in your final product. Clearer mash means less risk of scorching solids during distillation and fewer yeast flavors carrying over into your distillate. If you’re working with a fruit mash, this short rest period also allows fruit particles to settle, reducing the chance of a messy boilover in your still.
Short-Term Storage (1-4 Weeks)
For most home distillers, storing mash for 1-4 weeks is generally safe with proper precautions. This timeframe is where having a proper airlock becomes essential. An airlock allows CO2 to escape while preventing oxygen and contaminants from entering your fermentation vessel. During this period, you’ll notice your mash becoming increasingly clear as more particulates settle to the bottom. For more insights, check out this discussion on fermentation timelines.
The mash will develop more complex flavors during this timeframe as yeast breaks down and subtle chemical changes occur. Some distillers intentionally age their mash in this range to develop specific flavor profiles, particularly when making whiskey or rum. Keep in mind that temperature control becomes increasingly important the longer you store your mash.

Long-Term Storage (1-6 Months)
Extending storage beyond a month enters territory where additional precautions become necessary. At this stage, you’re not just storing mash – you’re essentially aging it. For long-term storage, consider transferring to secondary containers, adjusting pH levels, and maintaining strict temperature control. While some distillers report successfully storing mash for 6+ months, this timeframe increases risks of contamination, oxidation, and significant alcohol loss.
The tradeoff for extended storage can be rewarding flavor development, particularly in all-grain mashes for whiskey production. However, this approach requires dedicated equipment, careful monitoring, and acceptance that alcohol yields will likely decrease over time. Sugar washes generally don’t benefit from extended aging and are more prone to turning sour or developing off-flavors during long-term storage.
When Mash Has Gone Bad: Clear Warning Signs
Knowing when your mash has passed the point of no return is crucial. Unlike commercial brewing with precise testing equipment, home distillers often rely on sensory evaluation. Strong vinegar smells indicate acetobacter contamination has converted alcohol to acetic acid. Slime or mold growth on the surface means bacterial contamination. Extremely foul, putrid odors suggest protein breakdown and contamination by unwanted bacteria.
These warning signs should never be ignored – distilling spoiled mash won’t “clean” the contamination and can result in unsafe distillate. When in doubt, it’s always better to dump a questionable batch than risk producing a potentially harmful product or damaging your equipment.
Proper Storage Conditions for Fermented Mash

“Moonshine Mash, 17p – COOKING ON A …” from oursouthend.wordpress.com and used with no modifications.
Creating ideal storage conditions dramatically extends how long your mash remains viable. The primary factors to control are temperature, oxygen exposure, and pH levels. While professional distilleries have sophisticated climate-controlled environments, home distillers can achieve excellent results with basic equipment and careful attention to detail. For instance, understanding at what temperature to add yeast can significantly impact the fermentation process and storage conditions.
Temperature Control Requirements
Temperature is perhaps the most critical factor in mash preservation. Cooler temperatures (50-65°F/10-18°C) slow microbial activity that could spoil your mash. Avoid fluctuations, as temperature swings can stress dormant yeast and promote unwanted bacterial growth. Consistent cool storage is why many distillers keep fermented mash in basements, cool garages, or temperature-controlled fermentation chambers.
Airlock Maintenance
Your airlock is the primary defense against oxygen and contaminants. Ensure it remains properly filled with sanitizing solution or vodka throughout the storage period. Check regularly for evaporation, especially in dry environments or during extended storage. A dry airlock creates a direct pathway for oxygen and airborne contaminants to enter your fermentation vessel.
Container Selection and Preparation
The container that housed your fermentation isn’t necessarily ideal for long-term storage. Glass carboys and food-grade plastic vessels with minimal headspace reduce oxidation risk. Always sanitize storage containers thoroughly before transferring mash. Consider the benefits of vessels with spigots for easy sampling without introducing contaminants from the top.
How Storage Time Affects Your Final Moonshine

The storage period between fermentation completion and distillation doesn’t just affect whether your mash remains viable – it fundamentally changes characteristics of your final product. Understanding these changes helps you make intentional decisions about timing rather than simply distilling whenever it’s convenient. For more insights on this, consider how moonshine ages well over time.
Flavor Development During Storage
Extended storage creates noticeable flavor changes in your mash that carry through to the final distillate. Initially, short rest periods (5-14 days) allow harsh fermentation compounds to mellow slightly while maintaining the core flavor profile. Medium-term storage (2-4 weeks) often results in more rounded, complex flavors as yeast autolysis contributes subtle bread-like or nutty notes. Long-term aging (1-6 months) can develop significant complexity in grain-based mashes, though this isn’t universally beneficial – some recipes benefit from youth and vibrancy.
Alcohol Content Changes
Even with a perfect airlock seal, extended storage typically results in some alcohol loss. This occurs through microscopic evaporation, continued metabolic activity of remaining yeast, and potential bacterial action. The rate varies dramatically based on storage conditions, but you can generally expect 0.5-2% ABV loss per month under typical storage conditions. This loss accelerates at higher temperatures and with poor airlock maintenance.

Clarity and Filtration Benefits
One undeniable benefit of extended storage is improved clarity as particulates settle out of suspension. This natural clearing process results in less scorching during distillation, cleaner flavor transfer, and fewer technical issues during your run. The longer your mash sits (within reason), the more particulates will settle out, creating a clearer liquid for distillation.
- Improved heat transfer during distillation with less risk of scorching
- Reduced chance of boilovers from excess particulates
- Cleaner flavor profile with fewer yeast-derived notes
- Less cleaning required for your still after running
Many distillers intentionally allow mash to clear for 5-7 days before distilling specifically for these benefits. The improvement in product quality often outweighs the minimal alcohol loss during this short clearing period. For fruit mashes in particular, this settling time makes a dramatic difference in preventing messy boilovers and stuck fermentations.
Some distillers take clarity a step further by using fining agents like gelatin, Irish moss, or bentonite clay to accelerate the clearing process. While these additives aren’t strictly necessary, they can reduce clearing time from weeks to days in some cases. The effectiveness varies by mash composition, with fruit and grain mashes typically benefiting more than simple sugar washes.
Keep in mind that extremely clear mash isn’t always desirable for every style. Traditional bourbon and whiskey production often maintains some grain solids in the mash during distillation to contribute characteristic flavors. This is a stylistic choice rather than a quality issue. If you’re curious about the amount of whiskey a still can produce, learn more about how much whiskey a 5-gallon still can make.
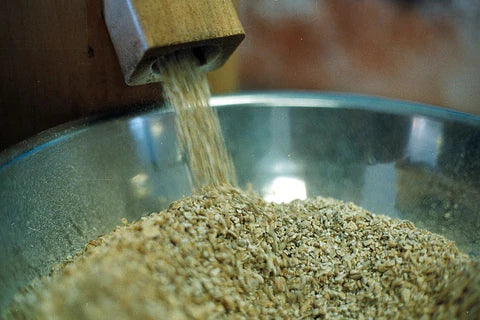
Grain vs. Sugar Mash: Different Storage Rules
“Cooking with Spent Grains – Brew Your Own” from byo.com and used with no modifications.
Not all mashes are created equal when it comes to storage potential. The composition of your fermentation directly impacts how long it can sit before quality degrades. Understanding these differences helps you make better decisions about timing your distillation runs and planning your production schedule.
All-Grain Mash Storage Considerations
Grain-based mashes typically contain more nutrients, proteins, and complex compounds than simple sugar washes. These additional components provide both benefits and challenges for storage. On one hand, grain mashes develop more interesting flavors during extended storage as these compounds break down and interact. On the other hand, they provide more food sources for potential contaminating bacteria and wild yeasts.
Whiskey mashes containing malted barley, corn, rye, or wheat generally benefit from a short rest period (5-14 days) after fermentation completes. This allows harsh fermentation byproducts to mellow while yeast and grain particles settle. Some whiskey distillers intentionally age their mash for several weeks to develop specific flavor characteristics, though this requires careful temperature control and excellent sanitation.
The higher protein content in grain mashes makes them particularly susceptible to certain spoilage bacteria. These proteins break down during extended storage, potentially creating sulfur compounds and other off-flavors. To mitigate this risk when storing grain mashes longer than two weeks, consider dropping the pH slightly (to around 4.0-4.2) and maintaining strict temperature control below 65°F (18°C).

Sugar Wash Storage Limitations
Sugar washes (sometimes called “sugar shine” bases) contain fewer nutrients and complex compounds than grain mashes. While this makes them less prone to developing certain off-flavors during storage, it also means they benefit less from extended aging. Most sugar washes reach their peak quality within 1-2 weeks after fermentation completes, with diminishing returns beyond this timeframe.
The primary advantage of sugar washes is their relative stability during short-term storage. With fewer proteins and complex nutrients, they’re less attractive to certain contaminating bacteria. However, they remain vulnerable to acetobacter (vinegar-producing bacteria) and oxidation just like any fermented product. For best results with sugar washes, aim to distill within 2-3 weeks of fermentation completion.
Expert Tips for Extending Mash Storage Time
![]()
“Tips – Free marketing icons” from www.flaticon.com and used with no modifications.
When circumstances require extending your mash storage beyond the ideal window, several techniques can help preserve quality and prevent spoilage. These methods come from decades of distiller experience and can significantly extend your safe storage timeframe. If you’re facing issues like mash not bubbling, these tips can also help address underlying problems.
Racking to Secondary Containers
Transferring your mash to a secondary container after primary fermentation completes is one of the most effective ways to extend storage life. This process, called “racking,” separates the liquid from the layer of settled yeast (lees) at the bottom of your fermentation vessel. Since dead yeast cells eventually break down through autolysis and can contribute off-flavors, removing this sediment layer extends your viable storage window considerably.
When racking, minimize oxygen exposure by using a siphon rather than pouring. Ensure the receiving vessel is thoroughly sanitized and sized appropriately to minimize headspace above the liquid. Some distillers rack multiple times for extended storage, with each transfer resulting in clearer mash and less sediment.
pH Adjustment Techniques
Manipulating the acidity of your mash creates an environment less hospitable to contaminating bacteria. Most spoilage organisms struggle to thrive in more acidic environments, while yeast remains relatively comfortable. For extended storage, consider adjusting your mash to pH 4.0-4.2 using food-grade acid (citric, lactic, or phosphoric).
This slight pH drop has minimal impact on flavor while significantly extending storage life. Test pH with inexpensive paper strips or a digital pH meter before making adjustments. Small additions go a long way, so add acid incrementally and test frequently to avoid overshooting your target.
Cold Crashing Benefits
Dramatically reducing the temperature of your mash to near-freezing (but not below freezing) forces yeast and particulates to drop out of suspension quickly. This technique, called “cold crashing,” not only clarifies your mash but also significantly slows microbial activity that could lead to spoilage. The process works by making yeast dormant and causing proteins to coagulate and settle.
To cold crash effectively, gradually reduce temperature to 32-38°F (0-3°C) and maintain for 2-3 days. This requires refrigeration space but yields dramatically clearer mash that stores longer. After cold crashing, carefully rack the clarified liquid off the compacted sediment for best results.
Stabilizing Agents: When to Use Them
Commercial stabilizing agents can extend mash storage life by inhibiting microbial activity. Potassium metabisulfite (often used in winemaking) prevents oxidation and inhibits bacteria, while potassium sorbate prevents yeast reproduction. These additives are most useful when you need to store mash for more than a month and can’t maintain ideal temperature conditions.
Use stabilizers sparingly and according to manufacturer instructions, as they can affect flavor in high concentrations. Most distillers prefer natural preservation methods when possible, but these chemical stabilizers provide an effective backup plan when circumstances require extended storage.
Ready to Run: Getting Stored Mash Ready for Distillation

“2 Gallon Copper Moonshine Still …” from moonshinestills.com and used with no modifications.
When the time finally comes to distill your stored mash, proper preparation ensures the best possible results. A few simple steps before firing up your still can significantly improve your yield and final product quality, especially with mash that’s been sitting for extended periods.
Stirring and Agitation Methods
After extended storage, your mash will have developed a compact sediment layer at the bottom of the container. Depending on your distillation style and equipment, you’ll need to decide whether to include or exclude this sediment. For most home distillers, leaving the majority of this sediment behind results in cleaner flavor and less risk of scorching.
If you plan to distill clear liquid only, carefully rack off the clear portion without disturbing the sediment layer. Use a siphon rather than pouring to maintain separation. For traditional whiskey production where some grain solids are desirable, gently stir the upper portion of the mash while leaving the densest bottom layer undisturbed. If you’re curious about how much liquor 10 gallons of mash can make, check out this guide for more information.
Complete agitation that reincorporates all sediment is generally only recommended for pot stills with mixer/agitator attachments that prevent scorching. If your still lacks these features, the risk of burning solids against the heating element usually outweighs any potential benefit from including all sediment.

Temperature Preparation
Allow refrigerated or cold-crashed mash to gradually warm to room temperature before distilling. Sudden temperature changes can shock dormant yeast, causing them to release compounds that negatively impact flavor. Aim for a starting temperature of 60-70°F (15-21°C) for most efficient distillation.
Filtering Options Before Distilling
For the cleanest possible distillate, consider filtering your mash before it enters the still. Simple straining through a fine mesh removes larger particles, while more advanced filtering through coffee filters or brewing-specific filter pads removes even fine particulates. This extra step reduces the risk of scorching and results in cleaner flavor, especially important when using direct-heat stills.
Keep in mind that filtering removes some beneficial compounds along with unwanted particles. For characteristic whiskey flavors, many distillers intentionally include some fine grain particles. This is a stylistic choice—there’s no right or wrong approach as long as your equipment can handle the solids content without scorching.
Make Better Moonshine By Planning Your Storage Strategy
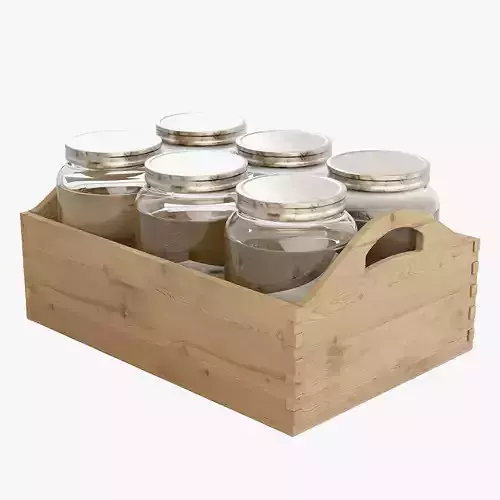
“Moonshine Jars And Wooden Crate 3D …” from www.cgtrader.com and used with no modifications.
Understanding how storage affects your mash empowers you to make intentional choices rather than just distilling whenever it’s convenient. Whether you’re aiming for maximum alcohol yield, specific flavor development, or practical storage solutions between busy weekends, incorporating storage considerations into your distillation planning leads to better results. Remember that proper temperature control, minimal oxygen exposure, and appropriate pH levels are your best allies in extending safe storage time for any fermented mash. Expert distillers understand that patience and proper storage can transform a good batch into a great one.
Frequently Asked Questions
After years of helping fellow distillers navigate mash storage challenges, I’ve compiled answers to the most common questions about storing fermented mash before distillation. If you’re curious about how much liquor your mash will yield, check out this detailed guide.
Can I refrigerate my mash to make it last longer?
Yes, refrigeration significantly extends safe storage time by slowing microbial activity that leads to spoilage. Temperatures between 33-40°F (1-4°C) can extend viable storage to 2-3 months for most mashes. Just be sure to allow the mash to gradually warm before distilling to prevent thermal shock to dormant yeast.
Remember that refrigeration space is often limited in home settings, making this option most practical for small batches or valuable special recipes. Standard refrigerators can also introduce food odors into your mash if it’s not in a tightly sealed container with an airlock.
What happens if I distill mash that’s been sitting too long?
Mash that’s slightly past its prime typically produces lower alcohol yields and may develop off-flavors that carry through to the final product. The severity depends on storage conditions and how far beyond optimal the mash has gone. Slight souring often results in a distillate with subtle vinegar notes that multiple distillations can minimize but not completely eliminate.
If your mash shows signs of mold growth or extreme spoilage (putrid odors, slime formation), it should never be distilled. Contrary to popular myth, distillation cannot make spoiled mash safe, as some microbial toxins can carry over into the final product. When in doubt about safety, it’s always better to discard questionable mash.
Is it normal for mash to develop a film on top during storage?
Some film development during extended storage is normal, but the type of film matters significantly. A thin white film that breaks apart when disturbed is typically harmless yeast rafts—clusters of dormant yeast cells that have risen to the surface. These don’t indicate spoilage and can be safely distilled.
However, a thick, wrinkled film that resembles leather or forms distinct patches indicates “mother of vinegar” (acetobacter) contamination, which converts alcohol to acetic acid. This significantly reduces alcohol yield and introduces vinegar flavors that will carry through to your distillate.
Blue, green, or black spotted growth is definitely mold and indicates serious contamination. Never distill mash with visible mold growth, as some mold toxins can survive distillation.
- White, broken film = typically harmless yeast rafts
- Thick, leathery film = acetobacter (vinegar) contamination
- Colorful, spotty growth = mold (discard immediately)
- Rainbow sheen on surface = potential bacterial contamination
How do I know if my stored mash has turned into vinegar?
The most reliable indicator is smell—vinegar contamination produces a distinct sharp, acidic aroma similar to household vinegar. This odor becomes increasingly pronounced as more alcohol converts to acetic acid. You may also notice a thick, leathery film on the surface (mother of vinegar) and significant reduction in alcohol odor. While small amounts of vinegar character can sometimes be removed through careful distillation techniques, substantial vinegar conversion significantly reduces alcohol yield and quality.
Can I freeze fermented mash for later distillation?
Freezing is an effective preservation method for fermented mash, especially for long-term storage beyond several months. The freezing process halts microbial activity completely rather than just slowing it down. When properly frozen at 0°F (-18°C) or below, mash can theoretically be stored for years without significant quality degradation.
The freezing process does create some practical challenges. You’ll need significant freezer space, and the thawing process must be gradual to prevent thermal shock to yeast cells. Some distillers report that previously frozen mash produces slightly different flavor profiles, though whether this is positive or negative varies by recipe.