Homemade Corn Mash Moonshine: Step-by-Step Beginner’s Guide
Key Takeaways
- Creating corn mash moonshine requires just a few simple ingredients: corn, malted barley, water, and yeast, with the proper ratio being crucial for quality results.
- The fermentation process typically takes 7-14 days and is the foundation for creating smooth, flavorful moonshine.
- While making mash is legal in most states, distilling alcohol without proper permits is federally illegal in the United States.
- Proper temperature control during both mashing (around 152°F) and fermentation (70-80°F) dramatically affects your final product quality.
- StillNTheClear offers comprehensive guides for beginners looking to perfect their moonshine-making skills from mash to final product.
Making corn mash moonshine connects you to one of America’s oldest traditions, dating back to the early settlers who brought their distilling knowledge from Europe. The process might seem intimidating at first, but with the right guidance, even beginners can create a smooth, flavorful spirit. I’ve spent years perfecting my technique, and I’m excited to share what I’ve learned with you today. With StillNTheClear’s proven methods, you’ll be creating your own signature corn mash in no time.
Before we dive into the nitty-gritty details, let’s address the elephant in the room: legality. Making mash is perfectly legal in 48 states, similar to brewing beer at home. However, distilling alcohol without proper permits is federally illegal in the United States. This guide focuses on the mash-making process, which is educational and legal. Always check your local laws before proceeding further with any distillation.
Article-at-a-Glance
This comprehensive guide walks you through creating your first batch of corn mash for moonshine. We’ll cover everything from selecting ingredients to fermentation, with special attention to the techniques that yield the smoothest results. You’ll learn about equipment needs, temperature control, and troubleshooting common issues. By the end, you’ll have the confidence to create a mash that could potentially become exceptional moonshine.
Corn Mash Moonshine Basics: What You Need to Know
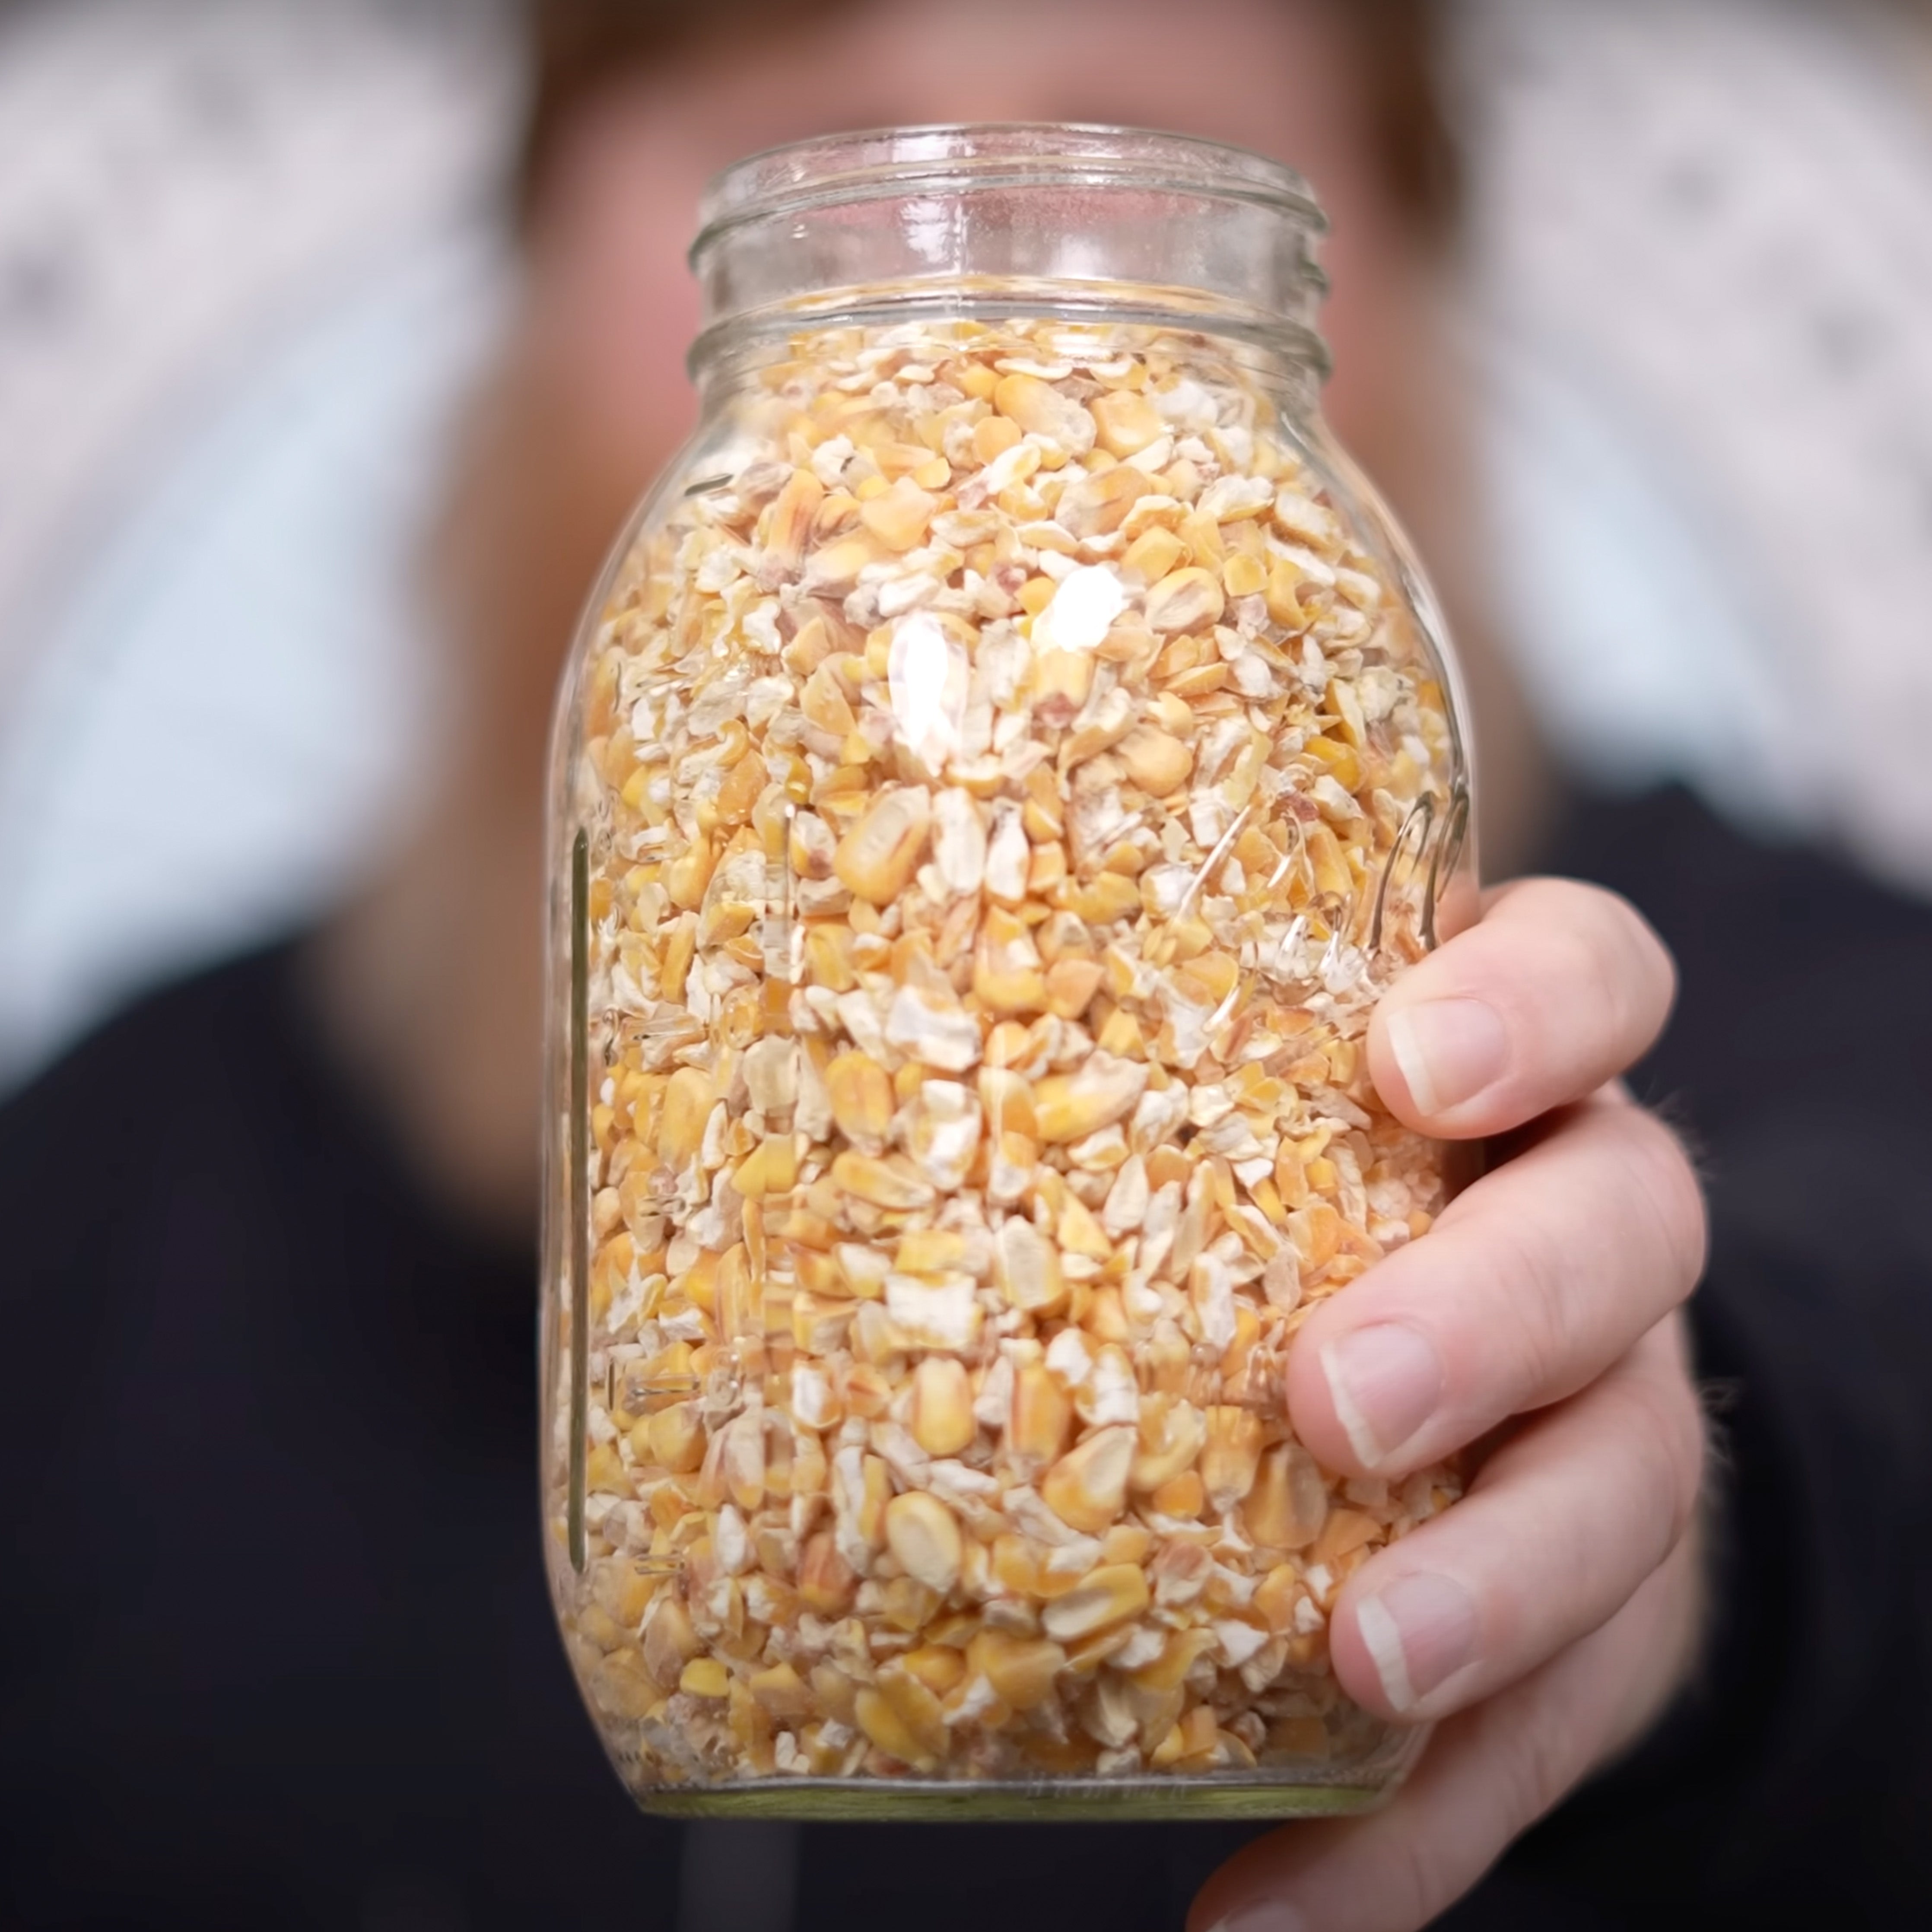
“Moonshine Mash – The Cracked Corn Method” from www.clawhammersupply.com and used with no modifications.
At its core, moonshine is simply an unaged whiskey made primarily from corn. The term “moonshine” refers to its historical production under the light of the moon to avoid detection during Prohibition. What sets great moonshine apart isn’t fancy equipment or secret ingredients—it’s attention to detail during the mash-making process. A properly prepared mash creates the foundation for a smooth final product, while cutting corners here will be evident in every sip of your spirit.
The Rich History of Corn Whiskey
Corn whiskey has deep roots in American culture, particularly in the Appalachian region. Early Scottish and Irish immigrants brought their distilling traditions to America in the 1700s, adapting their recipes to use corn, which grew abundantly in the new land. During Prohibition (1920-1933), moonshine production soared as people sought ways to create alcohol illegally. Many family recipes were perfected during this time, passed down through generations, and some commercial distilleries today still use methods derived from these moonshining traditions. The corn mash recipe we’ll explore today has been refined over centuries of trial and error by dedicated distillers.
Legal Considerations Before You Start
While I’m passionate about the craft of making moonshine, it’s important to understand the legal landscape. Creating mash is legal in most states, similar to home brewing beer. The fermented mash is essentially a strong beer. However, distilling alcohol without the proper federal permits is illegal in the United States. That said, learning about the process is completely legal, and many enthusiasts make mash for educational purposes or to understand the historical significance of the craft. Some hobbyists obtain legal permits for distillation, while others focus solely on perfecting their mash recipes.
If you’re interested in legal distilling, consider these options:
- Apply for a federal DSP (Distilled Spirits Plant) permit
- Check state and local laws, which vary widely
- Join distilling clubs that operate legally with proper permits
- Explore fuel alcohol permits, which are more accessible
- Consider commercial distilling courses that provide hands-on experience
Key Ingredients That Make Great Moonshine
The beauty of traditional corn mash lies in its simplicity. You only need four main ingredients to create a foundation for excellent moonshine: corn, malted barley, water, and yeast. The corn provides the bulk of fermentable sugars and the distinctive flavor profile that characterizes American moonshine. Malted barley contains enzymes that convert starches into fermentable sugars during the mashing process. Quality water—free from chlorine and heavy minerals—serves as the medium for the entire reaction. And finally, a good distiller’s yeast transforms those sugars into alcohol during fermentation.
Essential Equipment for Making Corn Mash Moonshine
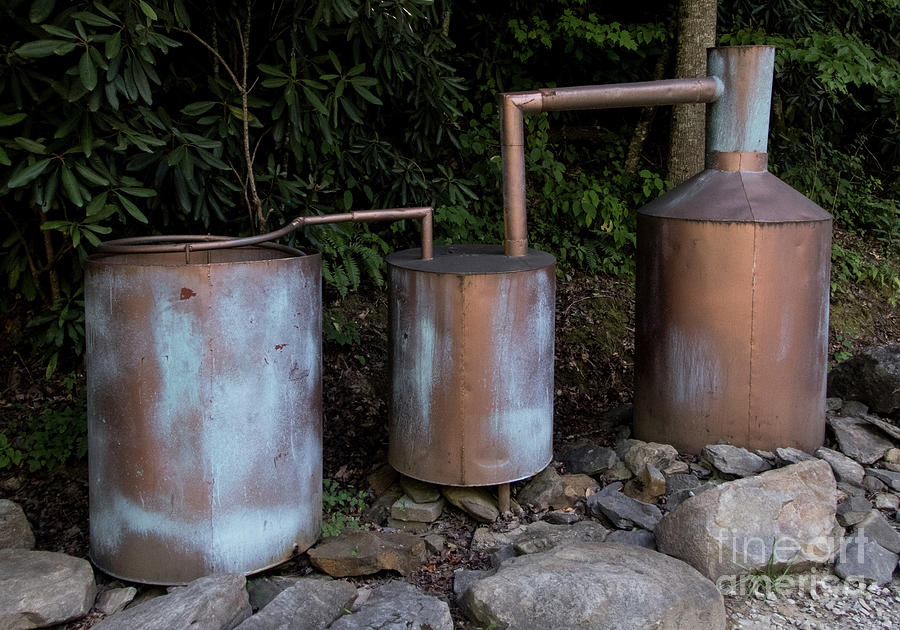
“Old Moonshine Still at the Tail of the …” from 1-performance-impressions.pixels.com and used with no modifications.
You don’t need fancy equipment to make quality corn mash. In fact, many successful moonshiners have created their best batches with simple, everyday items. The key is cleanliness and precision rather than expensive gear. That said, having the right tools makes the process more enjoyable and consistent. I’ll guide you through both the essential items and some nice-to-have upgrades that can improve your results. For those new to this craft, you might find this beginner mash recipe helpful as you get started.
Mashing and Fermentation Tools
To begin your moonshine journey, you’ll need some basic equipment for creating and fermenting your mash. A large stainless steel pot (at least 10 gallons for a 5-gallon batch) serves as your main mashing vessel. A reliable thermometer is absolutely critical—temperature control makes or breaks your mash quality. You’ll need a sturdy stirring paddle, preferably wooden or stainless steel, to prevent scorching during cooking. For fermentation, food-grade plastic buckets or glass carboys with airlocks keep your mash safe from contamination while allowing carbon dioxide to escape. A hydrometer helps measure sugar content and potential alcohol, giving you valuable data about your fermentation progress.

3. Cooking Your Grains
Now comes the crucial cooking phase where you’ll convert those starches into fermentable sugars. Bring your water to 165°F and slowly add your ground corn, stirring constantly to prevent clumping. Once all corn is added, maintain this temperature for about 60 minutes, stirring occasionally to prevent scorching on the bottom.
After the corn has cooked, you’ll need to cool the mixture to 152°F before adding the malted barley. This temperature is critical—too hot and you’ll destroy the enzymes in the barley; too cool and they won’t efficiently convert starches to sugar. Hold this temperature for 60-90 minutes while the magic happens. During this process, you’ll notice the mixture becoming sweeter and less starchy as the conversion takes place.
- Keep a spray bottle of water handy to control foaming
- Stir every 15 minutes to ensure even temperature distribution
- Test for starch conversion using an iodine test (drops turn clear when conversion is complete)
- Maintain consistent temperature using a reliable thermometer
A common beginner mistake is rushing this process. The mashing phase creates the foundation for your entire batch, so patience here pays dividends in your final product. If you’re using a brewing bag for your grains, gently squeeze it after removal to extract those precious sugars.
4. Adding Sugar at the Right Time
The addition of sugar is somewhat controversial among traditional moonshiners, but for beginners, it can help boost alcohol content while you master the mashing process. After your starch conversion is complete and your mash has cooled to about 140°F, you can add sugar if desired. For a 5-gallon batch, consider adding between 2-5 pounds of sugar, depending on your desired strength. Stir thoroughly until completely dissolved to ensure even distribution throughout your mash.
Some purists skip added sugar entirely, relying solely on the converted grain starches for fermentation. This produces a more authentic flavor but typically results in lower alcohol content. If you do use sugar, consider alternatives like brown sugar, honey, or even maple syrup in small amounts—each imparts subtle flavor variations that can make your moonshine unique. Remember that more sugar means higher potential alcohol, but may also impact the smoothness of your final product.
5. Cooling Your Mash
Cooling your mash quickly and efficiently serves two critical purposes: it prevents bacterial contamination and prepares the environment for healthy yeast activity. The goal is to bring your mash temperature down to 70-80°F as rapidly as possible. At higher temperatures, unwanted bacteria thrive while below this range, yeast becomes sluggish.
If you have a wort chiller, this is the time to use it—simply run cold water through the coils while they sit in your hot mash. Without a dedicated chiller, you can place your mash pot in an ice bath, stirring occasionally to speed cooling. For small batches, transferring to multiple smaller containers increases surface area and accelerates cooling. Regardless of method, cover your cooling mash with a clean cloth to prevent airborne contaminants from settling in. If you’re curious about the yield, learn more about how much liquor 10 gallons of mash can make.
Once your mash reaches the target temperature, transfer it to your fermentation vessel promptly. Any prolonged time in the “danger zone” (80-120°F) increases the risk of lactobacillus and other bacteria gaining a foothold before your yeast can establish dominance. Always sanitize your fermentation vessel and tools before they contact the cooled mash. To understand more about the fermentation process, you might want to learn about how long mash can sit after moonshine fermenting.
- Aim for cooling your mash within 30-45 minutes for best results
- Keep a digital thermometer handy to monitor temperature accurately
- Sanitize all equipment that will contact the cooled mash
- Leave about 20% headspace in your fermentation vessel to accommodate foaming
Mastering the Fermentation Process

“Mastering Fermentation: 100+ Homemade …” from www.amazon.com and used with no modifications.
Fermentation is where patience truly becomes a virtue in moonshine making. This 7-14 day process transforms your sweet mash into a wash (sometimes called “beer”) with alcohol content typically between 8-12%. The quality of your fermentation directly impacts the character of your final product, so understanding this stage is essential for producing smooth, clean-tasting moonshine.
Choosing the Best Yeast for Moonshine
Selecting the right yeast strain can dramatically influence both the efficiency of your fermentation and the flavor profile of your finished moonshine. While bread yeast will work in a pinch, it often produces harsh flavors and lower alcohol content. Instead, invest in a quality distiller’s yeast or whiskey yeast specifically designed for grain mashes. These specialized yeasts typically ferment more completely, tolerate higher alcohol levels, and produce fewer off-flavors than general-purpose brewing yeasts.
For corn mash moonshine, I’ve found that strains like DADY (Distiller’s Active Dry Yeast) or Whiskey Turbo Yeast deliver consistent results. Turbo yeasts often include nutrients and can complete fermentation more quickly, but some traditional distillers believe they sacrifice flavor complexity for speed. If you’re aiming for authentic flavor, consider slower-fermenting whiskey yeasts that may take longer but often produce a smoother final product with more character. For more details on the fermentation process, check out how long mash can sit after fermenting.
Ideal Fermentation Conditions
Maintaining optimal conditions during fermentation is crucial for complete conversion and clean flavors. Keep your fermenting mash between 70-80°F throughout the process—cooler temperatures slow yeast activity while higher temperatures can create off-flavors or even kill your yeast. Store your fermentation vessel away from direct sunlight in a location with relatively stable temperature. If necessary, wrap your fermentation vessel with blankets or use a heating pad with temperature controller during cold weather to maintain consistency.

Signs Your Fermentation Is Working
A healthy fermentation follows a predictable pattern that’s important to recognize. Within 12-24 hours of pitching your yeast, you should observe active bubbling, a foam cap forming on the surface, and a distinctly “working” sound of carbon dioxide releasing through your airlock. This vigorous stage typically lasts 2-4 days before gradually slowing. Don’t worry if your mash seems to “stall” after this initial burst—the yeast continues working more slowly. Fermentation is complete when bubbling stops entirely, the mash clears somewhat as yeast falls to the bottom, and hydrometer readings remain stable for three consecutive days.
Common Fermentation Problems and Solutions
- Slow or Stuck Fermentation: Add yeast nutrient, gently raise temperature, or pitch fresh yeast
- Sulfur Smell: Ensure proper aeration at the beginning and be patient—this often resolves itself
- Mold Growth: Discard batch if surface mold appears—prevention through proper sanitation is key
- Vinegar Smell: Indicates acetobacter contamination; improve sanitation next time
- Overly Sweet Final Product: Yeast may have reached alcohol tolerance before consuming all sugars; use higher tolerance yeast strains
During fermentation, resist the urge to constantly open your fermentation vessel to check progress. Each exposure increases contamination risk. Instead, rely on airlock activity and scheduled hydrometer readings to monitor progress. If you must access the mash, always sanitize any equipment that will contact it.
The aroma of your fermenting mash provides valuable feedback. Initially, it should smell sweet and grainy, transitioning to a more yeasty, beer-like aroma. Towards the end, a slight alcohol note emerges. Any sharp vinegar smell, rotten egg odor that doesn’t dissipate, or moldy scent indicates potential problems that need addressing. If you’re wondering how long can mash sit after moonshine fermenting, it’s crucial to monitor these aromas closely to ensure quality.
Once fermentation is complete, it’s best to move promptly to distillation or transfer the wash to a secondary container away from the settled yeast bed. Extended contact with dead yeast cells can impart bitter flavors to your wash. If you can’t distill immediately, store your fermented wash in a cool location with an airlock still attached. For more details on the process, check out this smoothest moonshine mash recipe.
Distillation Techniques for Beginners

“Steam Distillation – an overview …” from www.sciencedirect.com and used with no modifications.
Distillation is where your fermented mash transforms into proper moonshine. This process separates alcohol from water and other compounds based on their different boiling points. While the legal restrictions around distillation have been mentioned, understanding the process remains valuable from an educational perspective. The principles behind distillation involve carefully controlled heating to vaporize alcohol, which is then condensed back into liquid form at a higher concentration.
For corn mash moonshine, most traditional distillers use a pot still design, which preserves more of the grain’s flavor compounds compared to reflux stills. The pot still’s simpler design makes it more forgiving for beginners while still capable of producing excellent spirit. Modern home distillers often use small copper stills that combine traditional materials with safety features like temperature control.
The art of distillation involves more than simply boiling and collecting liquid—it requires careful attention to temperature, timing, and the changing character of the spirit as it emerges from the still. Mastering these variables is what separates great moonshine from merely acceptable product. The following sections break down this complex process into manageable steps for beginners.
Distillation Techniques for Beginners
Distillation is where your fermented mash transforms into proper moonshine. This process separates alcohol from water and other compounds based on their different boiling points. While the legal restrictions around distillation have been mentioned, understanding the process remains valuable from an educational perspective. The principles behind distillation involve carefully controlled heating to vaporize alcohol, which is then condensed back into liquid form at a higher concentration.
Setting Up Your Still Safely
Safety should be your primary concern when setting up a distillation system. Ensure your workspace is well-ventilated, free from flammable materials, and equipped with a fire extinguisher. All connections in your system should be secure to prevent alcohol vapor leaks, which can create fire hazards. Never leave a running still unattended, and always maintain a clear head during the distillation process—sampling should wait until you’re completely finished. For those curious about how long mash can sit, here’s more information on how long mash can sit after fermenting.
The First Run: Making Your “Stripping Run”
For beginners, a two-run distillation process often produces the best results. The first run, called a “stripping run,” focuses on efficiently extracting alcohol from your fermented mash without concern for precise separation of compounds. During this run, you’ll heat your wash to just below boiling and collect everything that comes off the still until the output reaches about 20% ABV (40 proof). This low-wines collection will contain all the alcohol from your wash, along with various congeners, fusel oils, and flavor compounds that will be sorted out in the second run.
A stripping run typically proceeds quickly, with less attention to precise temperature control. The goal is simply to concentrate the alcohol and reduce the volume of liquid you’ll need to process in the more careful spirit run. You can combine multiple stripping runs from several batches of mash if you wish to create a larger volume for your spirit run.

The Second Run: Spirit Run Basics
The spirit run is where the magic happens. You’ll take your collected low-wines from the stripping run(s) and distill them again, this time with careful attention to temperature and the changing character of the distillate. Before beginning, dilute your low-wines to about 40% ABV (80 proof) by adding filtered water. This reduces the fire hazard and allows better separation of the various alcohols and flavor compounds during distillation.
Heat should be applied more gently during the spirit run, allowing for a slow, controlled distillation. The ideal drip rate from your condenser is about 2-3 drops per second. Too fast and you’ll fail to achieve proper separation; too slow and you’ll waste energy and time. Collect your distillate in small glass jars (about 8 ounces each) rather than one large container—this allows you to precisely identify the transitions between the different fractions of your run.
Making Proper Cuts: Heads, Hearts, and Tails
Learning to make proper “cuts” between the different fractions of your distillate is perhaps the most crucial skill in producing quality moonshine. The distillate comes off in three main sections: heads, hearts, and tails. The heads contain volatile compounds like methanol and acetone that emerge first due to their lower boiling points. These compounds give off a sharp, solvent-like smell and taste, and should be set aside (many distillers keep them for cleaning purposes or to add back in tiny amounts for flavor complexity).
The hearts fraction is your prize—the clean, smooth ethanol with the desirable flavor compounds. This middle section typically starts coming over when the distillate reaches around 175-180°F at the still head, though temperature alone isn’t a reliable indicator. Trust your nose and taste (using tiny amounts diluted with water): when the harsh solvent notes fade and a clean, sweet character emerges, you’ve reached the hearts. Collect this section carefully until you begin to detect a heavier, less pleasant character with subtle hints of wet cardboard or mustiness. For more insights on how long you can let your mash sit after moonshine fermenting, explore our detailed guide.
The tails fraction contains fusel oils and heavier compounds that can contribute to hangovers and off-flavors. Some traditional distillers capture the early tails to add depth of flavor in small amounts, but as a beginner, it’s safer to be conservative with your cuts. Set aside the tails for redistilling in future batches rather than including questionable sections in your finished product.
Finishing and Storing Your Moonshine

“How to Make Moonshine: A Step-by-Step Guide” from www.wikihow.com and used with no modifications.
After distillation, your moonshine requires a few final steps before it’s ready to enjoy. The hearts fraction typically comes off the still at 130-160 proof (65-80% ABV), which is too strong for comfortable consumption. Proper dilution, filtration, and storage will transform your raw distillate into a polished final product that showcases your craftsmanship. Learn more about moonshine potency and aging to enhance your understanding of the process.
Proper Dilution Techniques
Most distillers prefer to bring their moonshine down to 80-100 proof (40-50% ABV) for drinking. Use only filtered water for dilution, as tap water can contain chlorine and minerals that affect flavor. Add water gradually, as the interaction between alcohol and water creates an exothermic reaction that temporarily shrinks the overall volume. Let the diluted spirit rest for at least 24 hours before making final adjustments, as the true proof will only be apparent after the molecules have fully integrated.
A proofing hydrometer is essential for precise dilution. For example, to dilute 1 liter of 150 proof moonshine to 100 proof, you’d add approximately 500ml of water. The formula is: (Starting Volume × Starting Proof) ÷ Target Proof = Final Volume. Subtract your starting volume from the final volume to determine how much water to add. Take your time with this process—you can always add more water, but you can’t remove it once added.
Filtration Methods for Cleaner Spirits
Even well-made moonshine can benefit from filtration to remove trace impurities and achieve crystal clarity. The simplest method is to run your diluted spirit through a coffee filter, which removes any large particles. For superior results, activated carbon filtration can dramatically improve smoothness by adsorbing congeners and fusel oils that contribute to harsh flavors and hangovers.
Commercial filtering systems like the Brita filter can work in a pinch, but purpose-built spirit filters are more effective. Simply pour your diluted moonshine through the carbon-filled filter several times (3-5 passes typically produces noticeably smoother results). Between each pass, let the spirit rest for a few hours, as some chemical reactions continue after filtration. Some distillers even freeze-filter their moonshine by chilling it to just above freezing, which causes certain oils to solidify for easier removal.
Container Choices and Their Effects
The container you choose for storing your moonshine affects both its preservation and flavor development. Traditional moonshiners often used glass mason jars, which remain an excellent choice for neutral storage. Glass is non-reactive and allows you to monitor clarity and color over time. Avoid plastic containers, which can leach chemicals into high-proof alcohol and allow oxygen permeation that degrades quality.
For longer storage, ensure bottles are filled nearly to the top to minimize oxygen exposure, and use tight-sealing caps or corks. Clear glass allows light to degrade your spirits over time, so store bottles in a dark place or use amber/blue glass for better protection. Unlike aged whiskeys, traditional clear moonshine doesn’t continue to improve with extensive aging, so there’s no advantage to extremely long-term storage—though a few weeks of “resting” often helps flavors meld and harsh edges soften. If you’re curious about how moonshine ages, here’s a guide on does moonshine age well.
Flavor Your Moonshine Like a Pro
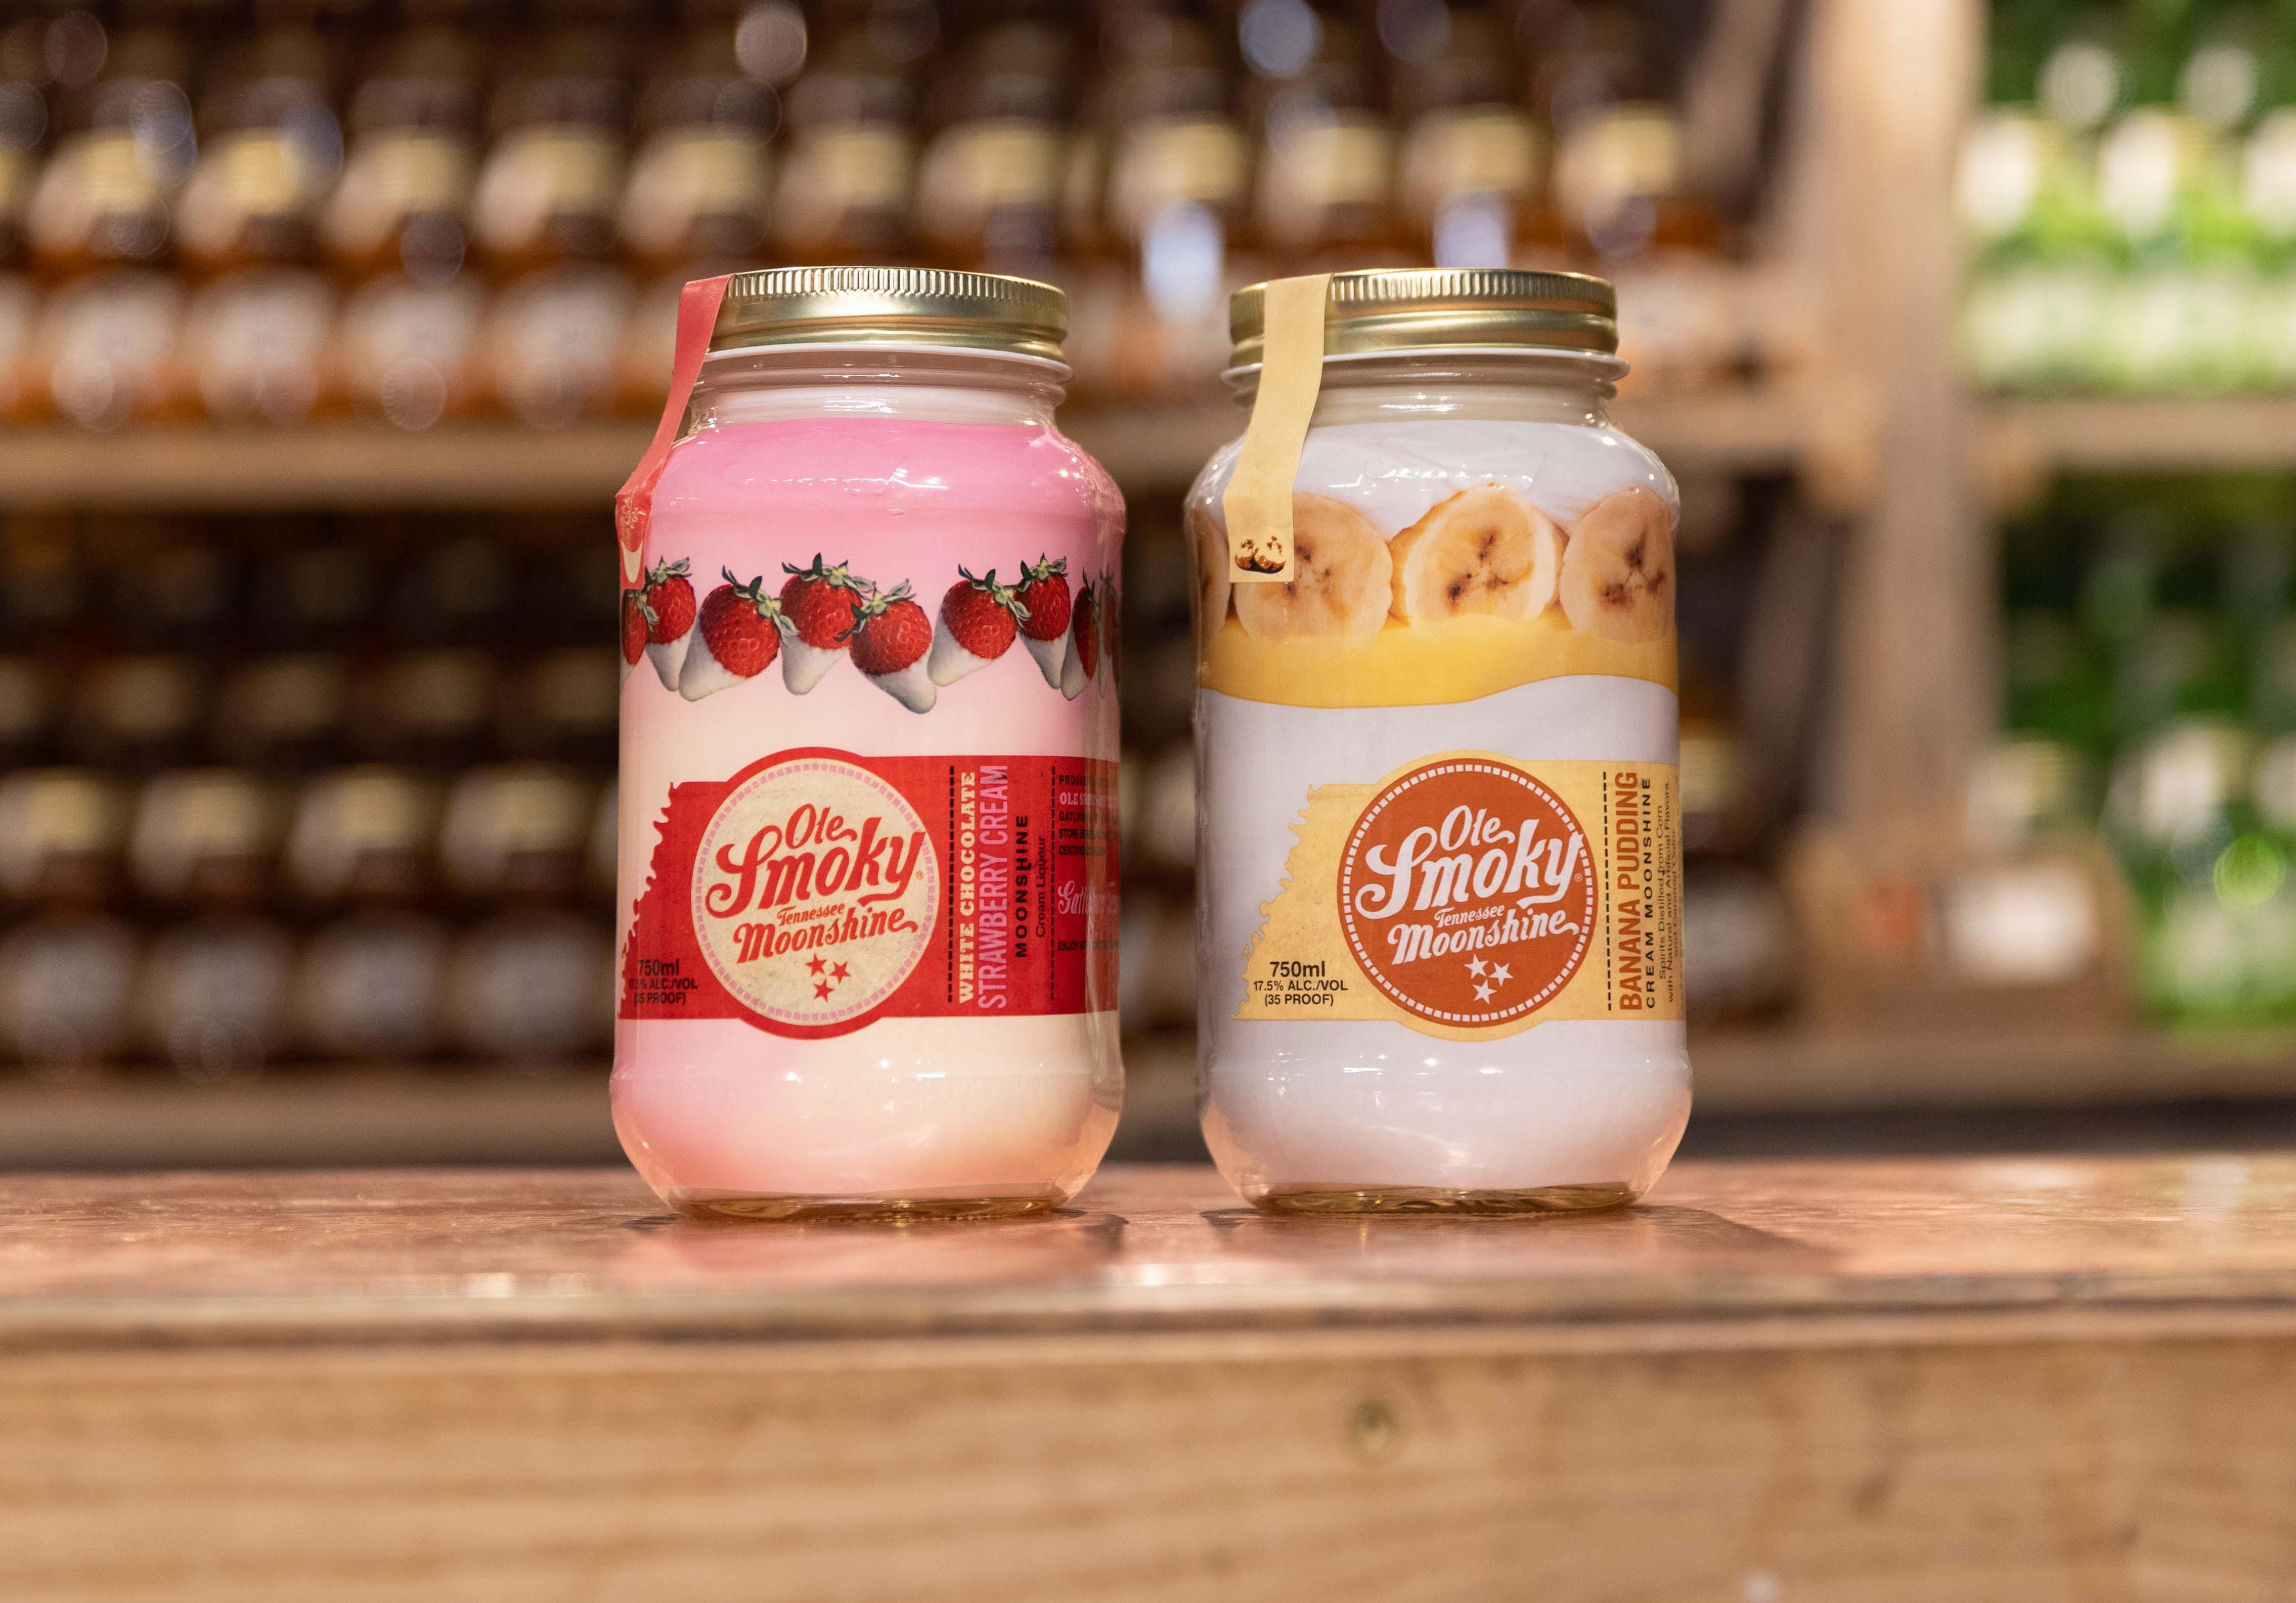
“Ole Smoky Banana Pudding Cream Moonshine” from topshelfwineandspirits.com and used with no modifications.
While traditional corn whiskey moonshine has its own distinctive character, many distillers enjoy customizing their spirits with additional flavoring techniques. These methods can transform your basic moonshine into specialty products with unique flavor profiles, often masking any rough edges in early batches as you perfect your distillation skills.
Traditional Corn Whiskey Flavoring Techniques
The most authentic way to enhance corn whiskey is through toasted oak. Traditionally, moonshiners would add toasted oak chips or sticks to their jars, imparting vanilla, caramel, and spice notes while softening harsh edges. For a quick infusion, add 1-2 tablespoons of toasted oak chips per quart of moonshine and taste regularly until you achieve the desired flavor profile—typically 1-2 weeks for light aging and 1-2 months for more pronounced character. Some craftsmen even char the interior of white oak barrels with a torch to simulate the effects of traditional barrel aging in a fraction of the time.
Fruit and Spice Infusion Ideas
Fruit-infused moonshine creates approachable spirits that even novice drinkers enjoy. Fresh fruits like peaches, apples, cherries, and berries work beautifully—simply wash thoroughly, slice or crush, and submerge in your moonshine. For optimal extraction, maintain a ratio of about 1 cup of fruit per 2 cups of spirit and store in a cool, dark place for 1-3 weeks, shaking daily. Strain thoroughly through fine mesh or coffee filters when the desired flavor intensity is reached.
Spice infusions offer another dimension of flavor complexity. Cinnamon sticks, vanilla beans, cloves, nutmeg, and allspice create warming, aromatic spirits perfect for sipping in cooler weather. Because spices contain potent oils, a light touch is recommended—start with just 1-2 cinnamon sticks or a single split vanilla bean per quart, and taste regularly during infusion. The benefit of spice infusions is their relatively quick extraction time, often reaching optimal flavor in just 3-7 days compared to fruits that may take weeks.
Mini Oak Barrel Aging
Small oak barrels (1-5 liters) provide an accessible way to simulate traditional aging in a fraction of the time. Due to the greater wood-to-spirit ratio, these mini barrels can impart significant oak character in just 2-3 months compared to years in full-sized barrels. Before first use, prepare your barrel by filling with hot water for 24-48 hours to swell the wood and check for leaks. After emptying, fill immediately with your proofed moonshine (typically 100-110 proof works best for aging) and store in a cool location away from direct sunlight.
Troubleshooting Your First Batch

“Angry Frustrated Office Worker Having …” from www.shutterstock.com and used with no modifications.
Every moonshiner, even the most experienced, occasionally produces a batch that doesn’t meet expectations. The key to improvement lies in identifying exactly what went wrong and understanding how to fix it. Most problems stem from a few common issues: contamination during fermentation, improper temperature control, or errors in making cuts during distillation. By systematically analyzing each step of your process, you can usually pinpoint the source of off-flavors or poor yields.
Keep detailed notes of each batch, including exact measurements, temperatures, timing, and observations. This documentation becomes invaluable when troubleshooting—patterns often emerge that might not be obvious when relying on memory alone. Don’t get discouraged by early failures; they’re an essential part of the learning process that every successful distiller has experienced.
Fixing Common Taste Problems
If your moonshine has a harsh, burning sensation beyond normal alcohol heat, you likely included too much of the heads in your final product. For future batches, make more conservative cuts and separate out more of the early distillate. When your spirit exhibits a bitter, unpleasant aftertaste, you’ve probably included too much of the tails fraction. Both issues can be somewhat remedied through activated carbon filtration, which will remove some (though not all) of the problematic compounds.
A yeasty or bread-like flavor indicates insufficient clearing of the wash before distillation or potentially fermenting at too high a temperature. Allow your wash to settle completely before siphoning it off the yeast sediment, and consider using fining agents like bentonite to help clarify future batches. For moonshine with minimal flavor that seems “thin” or lacking character, you may have made cuts that were too conservative, losing desirable congeners that contribute complexity. Experiment with slightly wider hearts cuts in future runs, or consider oak aging to build flavor depth.
When to Start Over vs. When to Salvage
Not every problematic batch needs to be discarded. Minor flaws like slight off-flavors or lower-than-expected alcohol content can often be salvaged through blending, filtration, or flavor infusion. However, if your moonshine exhibits signs of bacterial contamination (sliminess, vinegar smell, or mold), contains significant fusel oils that cause headaches, or simply tastes unpalatable despite remediation attempts, it’s best to count it as a learning experience and start fresh. Safety should always trump sentiment—when in doubt, throw it out.
Learning from Mistakes
Each “failed” batch contains valuable lessons that improve your future results. After identifying what went wrong, implement specific changes to your process one at a time rather than making multiple adjustments simultaneously. This methodical approach helps isolate which modifications actually create improvement. Many legendary moonshiners developed their exceptional skills precisely because they experienced—and overcame—numerous challenges in their early attempts. Your persistence through initial difficulties builds the foundation for consistently creating superior moonshine as your experience grows.
Your Moonshine Journey: Next Steps
“Moonshine Jug Illustration – A vector …” from stock.adobe.com and used with no modifications.
As you gain confidence with basic corn mash moonshine, an exciting world of variations awaits exploration. Consider this first recipe just the beginning of your distilling journey. Advanced moonshiners often develop signature recipes by adjusting grain bills, experimenting with different yeast strains, and fine-tuning distillation techniques to create truly distinctive spirits.
“The best moonshine makers never stop learning. Each batch teaches you something new about the craft, and after decades of distilling, I’m still discovering subtle improvements to my process. That’s what makes this tradition so enduring—it’s both science and art, with endless room for personal expression.” — Anonymous Appalachian Distiller
Consider joining online forums and social media groups focused on home brewing and traditional distillation history. These communities offer invaluable knowledge sharing, troubleshooting help, and inspiration for your next creations. Many experienced distillers take pride in mentoring newcomers, passing down traditions like Popcorn Sutton’s moonshine that might otherwise be lost to time.
As your skills advance, you might explore heritage grain varieties like heirloom corn that offer distinctive flavor profiles. Some enthusiasts even grow their own corn specifically for mash making, creating truly “field-to-glass” products that connect deeply with traditional agricultural practices.

Record-Keeping for Better Results
- Batch numbers and dates for each production run
- Exact measurements of all ingredients used
- Temperature readings at critical points in the process
- Fermentation observations (start time, activity levels, completion time)
- Detailed notes on distillation cuts (volume, proof, sensory qualities)
- Tasting notes at different stages of aging/finishing
- Photos documenting color, clarity, and equipment setup
Meticulous record-keeping transforms moonshine making from casual experimentation to refined craftsmanship. Create a dedicated notebook or digital spreadsheet to track every detail of your process. These records help you replicate successful batches precisely and identify exactly where adjustments should be made when results don’t meet expectations.
Consider developing a standardized tasting protocol to evaluate your moonshine consistently across batches. Professional distillers use structured tasting sheets that rate appearance, aroma, flavor, mouthfeel, and finish on numerical scales. This approach helps identify subtle improvements over time and provides objective comparisons between different recipes or techniques.
Many serious enthusiasts create small vertical collections of their own production, keeping samples from each batch to track their progress over time. Tasting earlier attempts alongside recent batches provides tangible evidence of your developing skills and can be immensely satisfying as you witness your improvement.
Advanced Recipes to Try Next
Once you’ve mastered basic corn mash, consider exploring historical variations like the “sugar shine” recipes that became popular during grain rationing periods, or authentic sour mash techniques that use backset (liquid from a previous distillation) to achieve consistency across batches. More advanced grain bills might incorporate wheat, rye, or even malted barley as the primary grain instead of corn, each creating distinctly different flavor profiles. The principles remain largely the same, but these variations open new worlds of flavor complexity that reward your growing expertise.
Building a Distiller’s Community
The revival of interest in traditional moonshine making has created vibrant communities of enthusiasts who share a passion for preserving this cultural heritage. Consider attending legal moonshine workshops, craft distillery tours, or heritage festivals that celebrate Appalachian traditions. These gatherings offer opportunities to compare notes with like-minded individuals, learn regional variations in techniques, and sometimes even meet multi-generational moonshiners willing to share family secrets. The social aspect of moonshine making—sharing your creations with appreciative friends and family—connects you to centuries of communal tradition that extends far beyond the technical aspects of production.
Frequently Asked Questions
As you embark on your moonshine journey, you’ll likely encounter many questions about the process. Below are answers to some of the most common inquiries from beginners, addressing everything from timing expectations to safety concerns. For instance, you might wonder how much liquor 10 gallons of mash make. Remember that learning is an ongoing process, and even experienced moonshiners continuously refine their understanding of the craft.
How long does the entire moonshine-making process take?
| Stage | Typical Duration | Variables Affecting Time |
|---|---|---|
| Mashing | 3-4 hours | Equipment efficiency, batch size |
| Fermentation | 7-14 days | Temperature, yeast strain, sugar content |
| Distillation | 6-8 hours | Still size, heat source, desired cuts |
| Finishing | 1-30 days | Filtration methods, flavor infusions |
From start to finish, expect your first batch to take approximately two to three weeks, with most of that time devoted to fermentation. Active work time is typically 10-15 hours spread across several days. As you gain experience, you’ll develop efficiencies that may reduce active work time, but the fermentation duration remains relatively constant unless you use specialized turbo yeasts (which some argue sacrifice quality for speed).
Many enthusiasts establish a production rotation, starting a new mash while the previous batch ferments, creating a continuous cycle of production. This approach allows you to refine your process through regular practice while maintaining a steady supply. With experience, you’ll develop intuition about when each stage is complete, relying less on strict timetables and more on observing the characteristics of your mash, wash, and distillate.
For those incorporating aging elements, add weeks or months to the finishing time. Even a few weeks with oak chips can dramatically transform your moonshine into a more refined, smooth-sipping spirit. The good news is that once you’ve established your production rhythm, you’ll rarely be without a batch in some stage of the process.
Is making moonshine at home legal?
In the United States, creating mash and fermenting it into wash (essentially a strong beer) is legal for personal consumption in most areas, similar to home brewing. However, distilling alcohol without the appropriate federal permits is illegal regardless of whether it’s for personal use or sale. The federal government considers unlicensed distillation a serious offense that can result in significant fines and even criminal charges. Many countries worldwide have similar restrictions, though specific laws vary considerably.
Some enthusiasts obtain fuel alcohol permits, which can legally allow distillation for non-consumption purposes. Others pursue legitimate commercial distilling licenses, though these come with substantial regulatory requirements and costs. Many home brewers simply enjoy creating and fermenting mash recipes while leaving the distillation process as a theoretical study. Understanding the historical techniques and science behind moonshine making has educational and cultural value regardless of whether you pursue the complete production process.
- Federal law prohibits distilling alcohol without proper permits
- State laws vary but generally align with federal restrictions
- Owning distillation equipment may be legal if used for purposes other than alcohol production
- Educational resources about distillation are legal to possess and study
- Commercial distilling requires extensive licensing, bonding, and regulatory compliance
If you’re passionate about legally producing distilled spirits, consider apprenticing at a craft distillery, taking certified courses in distillation, or exploring the growing number of “make your own whiskey” experiences offered by commercial distilleries that allow you to participate in the process within a legal framework. These alternatives provide hands-on experience while respecting legal boundaries.
What’s the difference between corn mash moonshine and other types?
Corn mash moonshine is distinguished by its grain bill, which contains a majority percentage of corn (typically 70-80%). This high corn content creates a naturally sweeter profile with distinctive cereal notes that other grain-based spirits lack. Traditional American moonshine evolved from this corn-heavy recipe precisely because corn was abundantly available to early settlers and farmers in the Appalachian region, where the moonshining tradition became deeply established.
Sugar shine, another common variety, uses refined sugar as its primary fermentable ingredient rather than grain. This creates a more neutral spirit with less distinct character but is considerably easier and quicker to produce since it skips the mashing process entirely. While purists might argue that sugar shine isn’t “real” moonshine, it became widespread during periods when grain was scarce or when discretion was particularly important, as sugar wash produces less aroma during fermentation.
Fruit-based moonshine begins with fruit juice or mashed fruit instead of grains, creating distinct categories like apple brandy or peach moonshine. These traditions developed in regions where particular fruits were plentiful, especially in orchard-rich areas. Modern craft distillers have expanded the definition further, creating innovative mash bills that incorporate multiple grains, adjuncts, and sometimes even alternative starch sources like potatoes or rice.
How can I make my moonshine smoother?
The smoothness of moonshine comes primarily from making precise cuts during distillation, removing harsh compounds found in the heads and tails fractions. Conservative cuts that focus on the pure hearts section will produce smoother spirit, though with somewhat lower yield. This quality-over-quantity approach is the foundation of premium moonshine production. Multiple distillations can further improve smoothness, with each run providing additional purification and refinement.
After distillation, several finishing techniques can enhance smoothness. Activated carbon filtration removes many congeners that contribute to harshness, while proper dilution to 80-100 proof makes the spirit more approachable. Many distillers report that simply allowing their moonshine to “rest” for several weeks after proofing down improves smoothness as the molecular interaction between alcohol and water reaches equilibrium. For significant transformation, light oak aging introduces tannins and compounds that both add flavor complexity and smooth out rough edges.
What are the signs that my moonshine is safe to drink?
Safety in moonshine comes from proper technique throughout the production process. Start with quality ingredients and maintain strict sanitation during fermentation to prevent harmful bacterial growth. During distillation, always discard the foreshots (first 150ml per 20L wash), which contain methanol and other volatile compounds that can be harmful even in small amounts. The resulting distillate should be clear (unless intentionally aged) with no unusual cloudiness, have a clean aroma without chemical or solvent notes, and produce a warming sensation rather than a burning pain when tasted.
Contrary to popular myths, properly made moonshine doesn’t cause blindness—this historical issue stemmed from unscrupulous producers who added methanol to increase potency during Prohibition. Modern concerns center more on bacterial contamination or poor distillation technique. Trust your senses: if your moonshine has an unusual color, produces a strong burning sensation beyond normal alcohol heat, or smells like chemicals rather than grain and alcohol, err on the side of caution and discard it.
For absolute certainty, inexpensive alcohol testing strips can detect methanol contamination, though these are rarely necessary if proper distillation procedures are followed. The most reliable safety measure remains proper technique: discard foreshots, make conservative cuts, and maintain impeccable cleanliness throughout the process. When these fundamentals are observed, the resulting moonshine is no more dangerous than commercially produced spirits.
Remember that making moonshine connects you to generations of distillers who passed down their knowledge through centuries of practice. While modern understanding of chemistry and fermentation has refined the process, the core techniques remain remarkably similar to those used by your ancestors. Each batch you create honors this tradition while adding your own chapter to the ongoing story of American spirits heritage.